
Wordless Wednesday #54
Reply
(See also Part 1 and Part 2 for a discussion of the standard ACR section house design and several photos of other examples, and also my scratchbuild of the Franz section house here, here and here.)
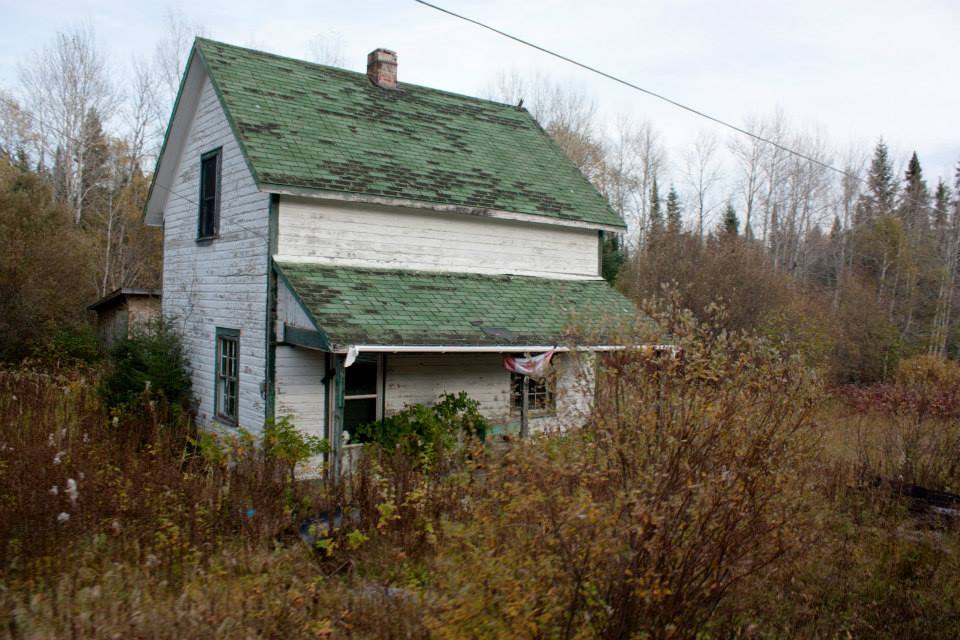
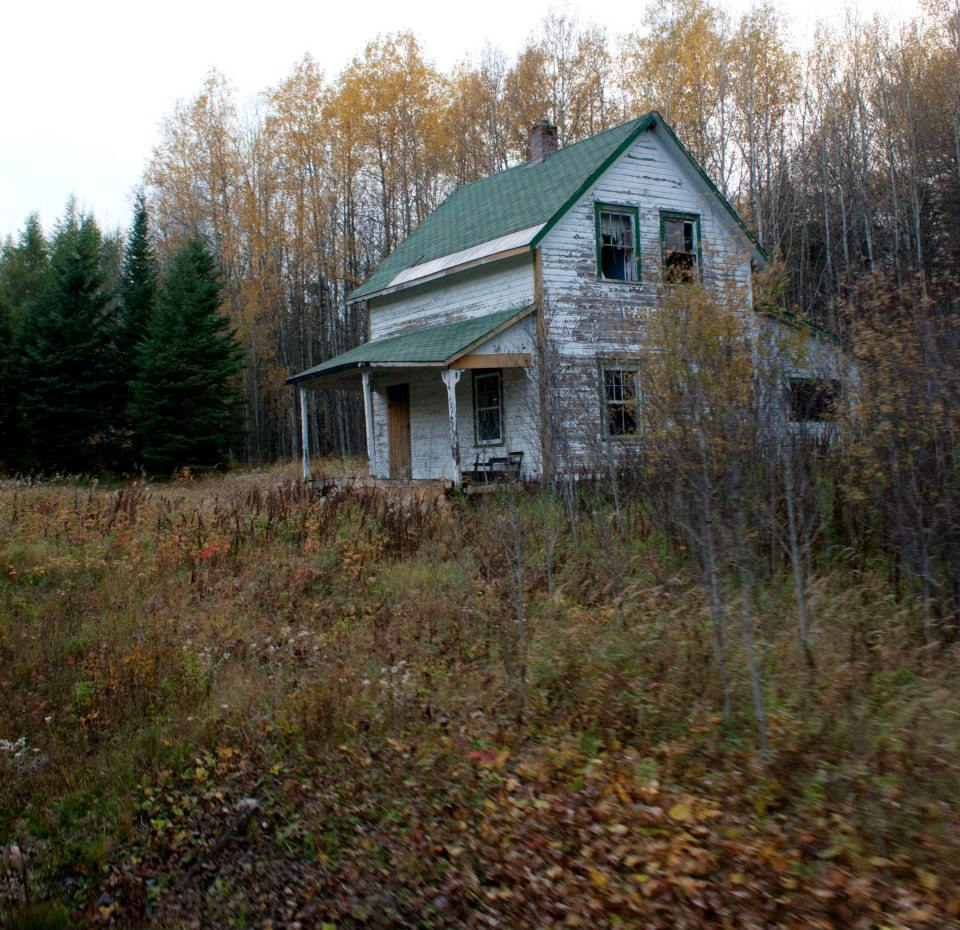
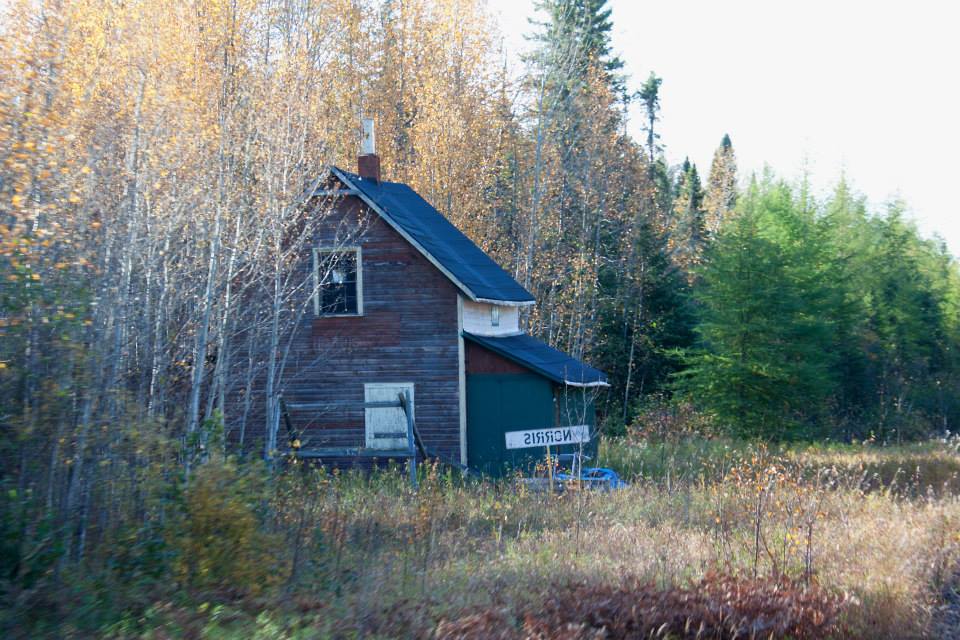
Here’s another small handful of mostly abandoned but still standing section houses along the north end of the ACR courtesy of my friend Melody who rode the Tour of the Line with me back in the fall of 2013. She got several that I missed as we were shooting out opposite sides of the vestibule.
All photos Sept. 30-Oct. 1, 2013 by Melody Halliday.
This one appears to be in reasonably good shape still with a metal roof and the grass has been trimmed at least somewhat recently, so someone was probably still maintaining this one as a private cabin.

This one however, is definitely abandoned.
This one also doesn’t appear to have been occupied in a while.

Also obviously abandoned, with broken windows and the porch roof is starting to sag.
Clearly privately occupied at least at some point, someone has enclosed the porch and left some stuff lying around, but it doesn’t seem to have received any significant upkeep in a while.

While I was mostly busy with other things over the Christmas and New Year’s period, I’ve been managing to poke away at a couple of projects and have managed to complete another milestone on my Franz section house project, and now I have my first actual project posting of 2015.
The house is now painted, and has shingles applied.

The house was airbrushed white and the trim carefully masked and painted Southern Sylvan Green. I had a setback at this point that rather threatened to ruin the entire project – on one side I sprayed a little too heavily with the green and it leaked and spread under the masking. After venting some frustration (“Model Railroading is Fun”?? – MR’s old tagline) including some choice words that would have disappointed my mother, I tried to recover the project by scraping away some of the green paint, and repainting the side again with white to touch it up and once again masking off the trim and windows and then touching up the green.
I think I managed to not botch it too much the second time around. Phew.

The shingles are a heavy paper product from Rusty Stumps. They are pre-cut for a standard 3-tab shingle pattern and can be ordered with or without an adhesive backing. (Rusty Stumps has several different variations of shingle types available, and different colours are also available. Their dark green will likely come in handy when I build Hawk Junction station…)
You can see above that I have also been working on finishing off the assorted tool and speeder sheds with shingle roofing material as well (I actually completed a few of these over the Christmas season, and applied the last shingles to the section house tonight). Some of these small structures are known to have tarpaper/roll roofing but I’ve managed to source some photos here and there and some of the specific locations I’m intending these for (Franz, Mosher) had shingle roofing on these sheds. Even some of the different section houses had varying roofing and siding treatments, with some of them also having tar paper roofing as well. Franz however, is well documented as having normal black asphalt shingles.
All of the model structures just need a ridge cap applied yet to complete the roofing treatment.
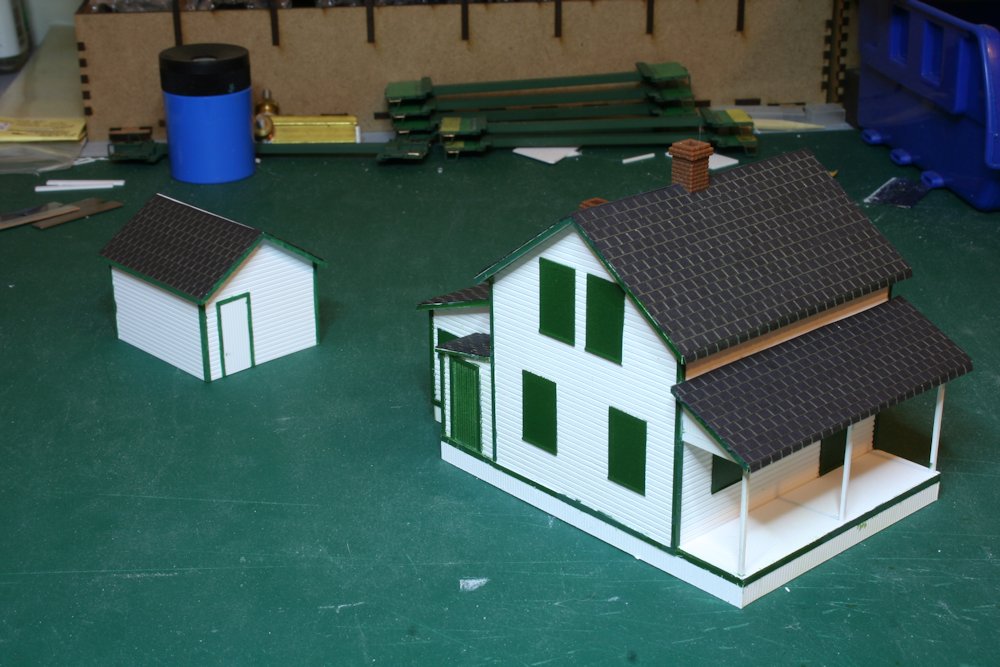
Here we see what the Franz section house would look like in context with its storage shed, although you kind of have to imagine a forest around and behind it, a nearby outhouse, and chances are when I actually build Franz, you’ll end up looking at the back of the house from the aisle.
It’s taken a while, and had it’s bumps along the way, but I’m happy that these structures are really starting to look a bit more like the real ones they represent.
Many railroads over the years eventually developed standards for colour schemes and designs of stations and other structures. Since the Algoma Central was a relatively small railway, and running through such sparsely populated wilderness, only a small handful of proper stations were ever built, and each at different times and to fit the requirements of the location, so a standard station plan was never developed (and the stations at the well-known crossing points of other railways at Franz, Oba and Hearst were all built by the other railways at those locations – Canadian Pacific, Canadian Northern and National Transcontinental Railways, respectively, and the current two-storey brick station at Hawk Junction only dates to the 1940s when the yard was extensively redeveloped). However more or less standard versions of many other common structures were developed, which I have been exploring here on this blog over the last few months.
It is natural too, that the railway would establish a standard painting scheme for these structures, and while a trip along the line today will display quite a variety of treatments to the old section houses, many of these existing section houses on the south end between Sault Ste. Marie and Hawk Junction have been renovated and upgraded by private owners as cottages. During the 1970s and 1980s the standard colour scheme for most [wood sided] ACR structures was white with dark green trim.

Mashkode section bunkhouse, July 2014. Now a private camp, but mostly unaltered. My photo.

Franz section bunkhouse, September 2013. My photo.
These two shots of Mashkode and Franz help illustrate how the bunkhouse and associated tool sheds would all receive the same treatment.
Abandoned speeder/tool shed at Frater in the mid 1990s. Blair Smith photo.
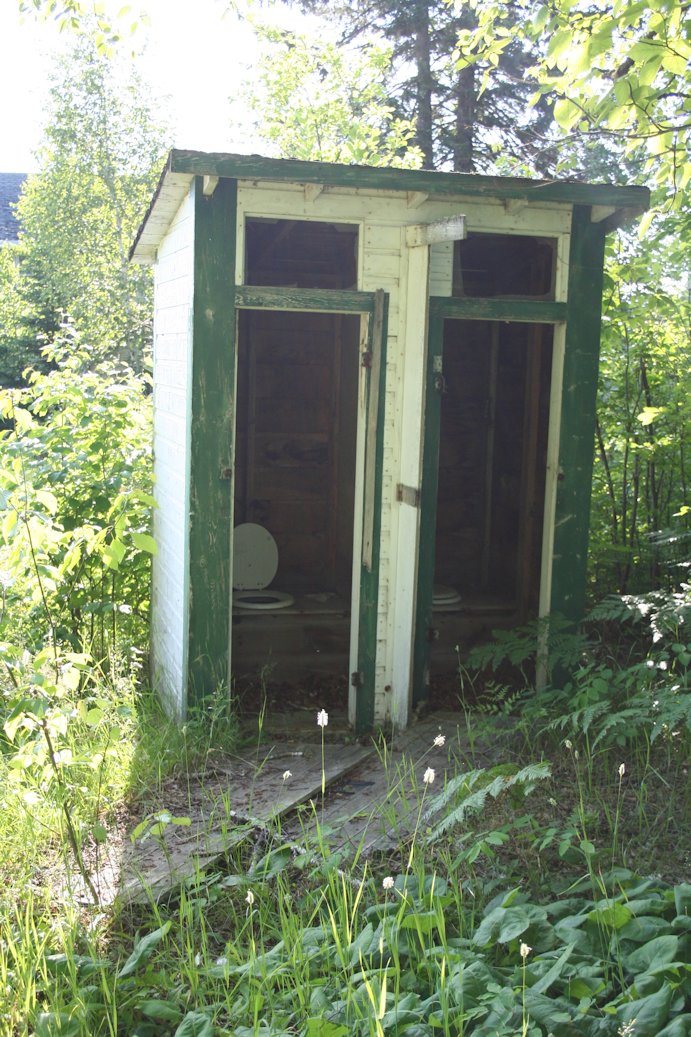
Outhouse behind Searchmont Station. July 2013, my photo.
Even this old double outhouse and a nearby storage shed in the weeds behind Searchmont station follows the standard colours with white paint overall and dark green trim.
This two-storey structure at Hawk Junction is identified as the railway bunkhouse. It was located across the street from the station and apparently later lost to a fire. It again follows the standard colours.
Prior to about 1970, the standard railway colours still involved a dark green trim, but on what can best be described as a sort of light pistachio green shade for the siding. As this started to be repainted to white and green in the early 1970s, there aren’t really any existing examples of this anymore, but Ted Ellis has some good 1960s shots on his Algoma Central photo website:
Canyon Section Bunkhouse and Tool Sheds – 1964
I’ve had the opportunity to put a little more work into my section house build, and it’s starting to get a lot closer to finished.
Across the front of the structure is a covered porch which extends the full width of the building. According to the standard drawings, the porch extends five and a half feet forward from the structure. To start the porch roof, I built an open framework using scale 4×4 strip for the porch roof. This was a very delicate piece to work with, but holds together fairly strongly once fully assembled with the sheet material for the roof’s surface cemented to the rafters.

After this was all set up, I proceeded to add the fascia trim to all of the roof edges of the structure.
I also built the porch with a sheet of .020″ thick scribed Evergreen styrene sheet material and some .060x.060″ strip framing. Then, to complete the model down to the ground and also hold everything together more rigidly, I added the vertical board cladding all around the bottom supports of the structure. (Some more recent photos at this location show some of this replaced with lattice, but I have a couple of older photos that I’ve saved and archived in my reference folder where this is vertical siding all the way around, so I went with this approach.)


You’ll also notice I’ve added the chimneys for the stoves that heat the structure. To mount the main chimney at the peak of the roof, I filed a notch into the roof itself so that the chimney could be cemented down on a flat surface rather than trying some sort of painful attempt to cut a peaked bevel into the base of the molded plastic chimney which I never would have pulled off cleanly.
The kitchen chimney however had the based filed off at an angle to bevel it to the slope of the roof.