Scale Test Car 10302 Model

In the previous post, I discussed background information on the Algoma Central’s old steel ore hoppers from the early 1900s, and the surviving example that was converted to a scale test car and operated into the mid 1980s.

Fortunately Westerfield makes a detailed craftsman kit for a couple of variations of the Pressed Steel Co. ore hopper, making it possible (although a bit of work) to model either the early 1900s ore fleet or the surviving scale test car.

The instructions provided with the kit are quite detailed, so I won’t go into a detailed blow-by-blow of the construction, except to point out the major deviations and additions I made based on the modernizations performed on the prototype car.

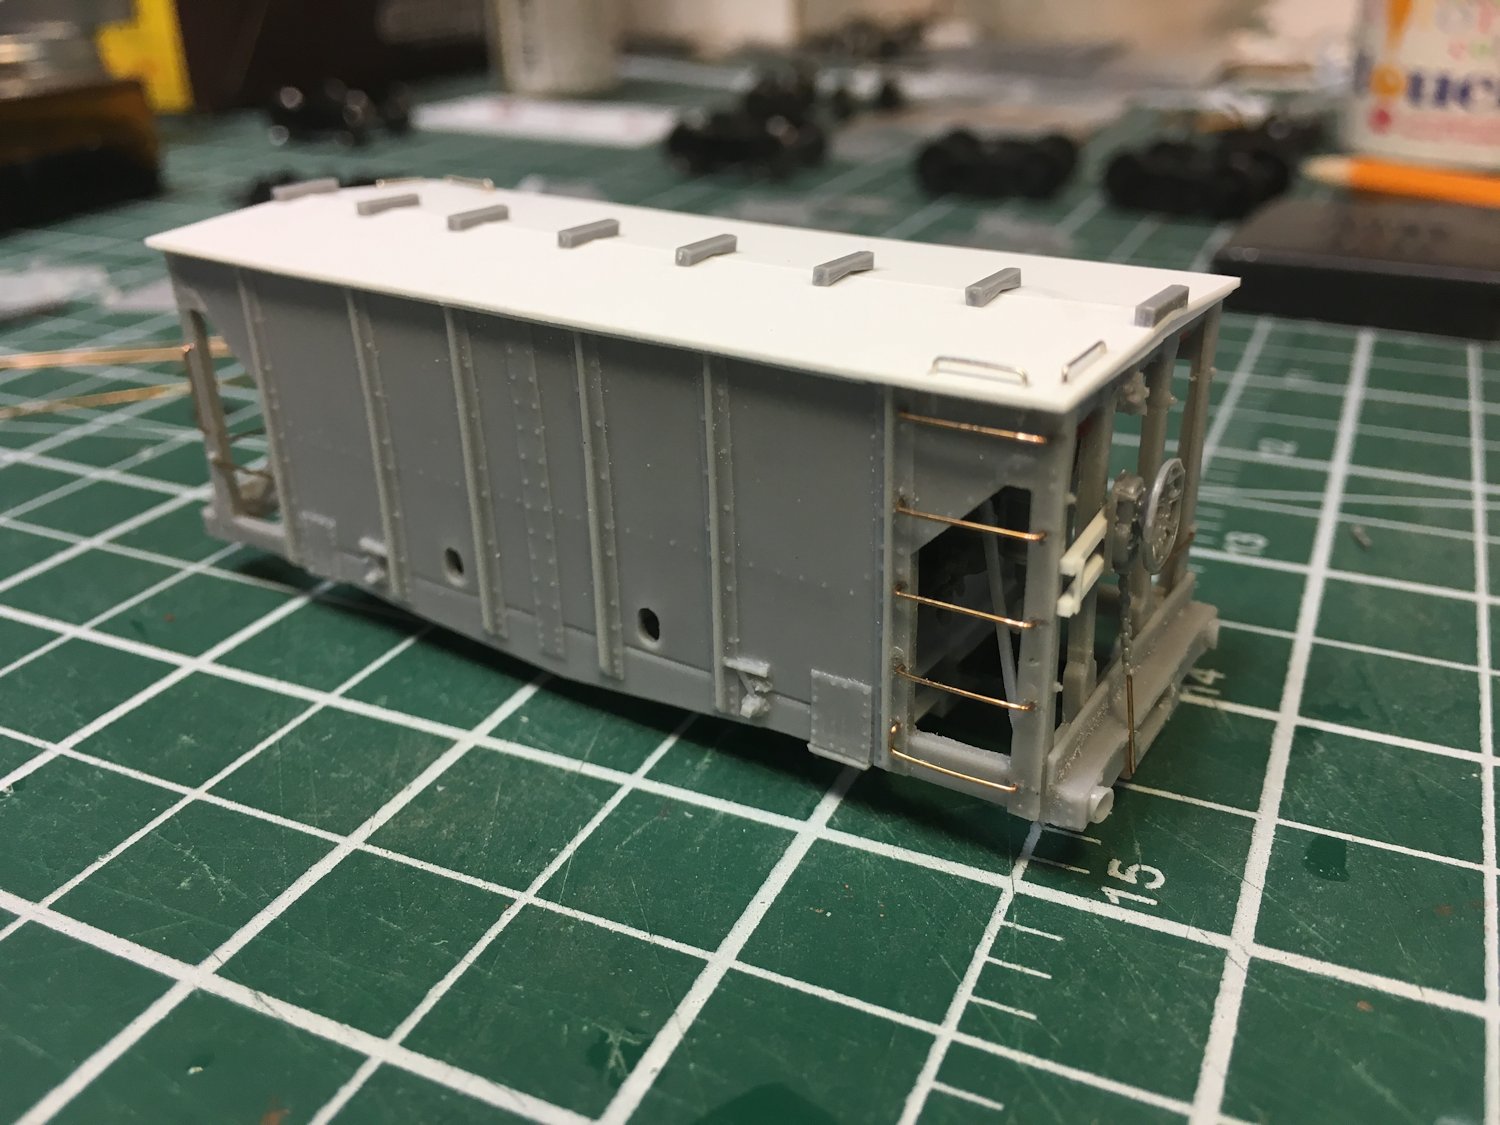
The most obvious modification when modeling the scale car conversion is of course the steel roof that was added to the car. This was simply fashioned from some .020″ sheet with some interior bracing and a 1×4 ridge pole to set the appropriate peak height and slope. This was glued to the tops of the sides with ACC. Fascia trimwork on the ends was added with 1×4 strip cemented to the roof.

Tichy running boards support and brass wire corner grabs added. I plan to try to add the actual wood running boards using weathered strip wood later once the car is painted.

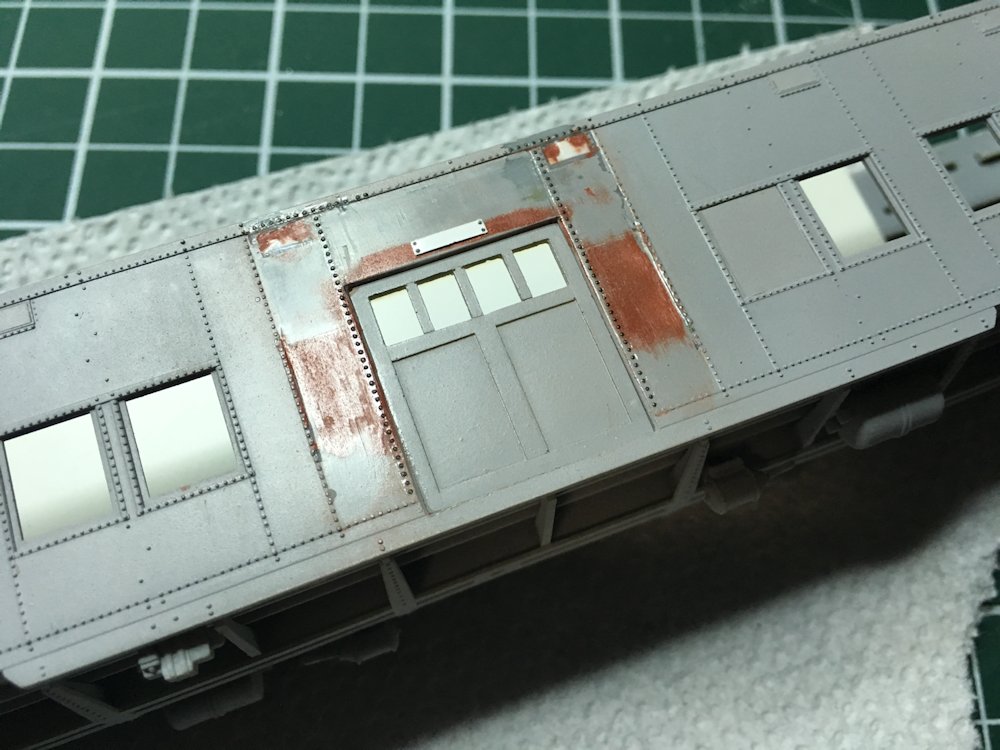
Another modernization feature on the prototype car is upgraded grab iron arrangements with full ladder grabs at the opposite corners of the car. This required drilling a number of new holes for the additional grab irons and bending them from brass wire.

Also, the original hand brake was upgraded with a power hand brake with the familiar vertically mounted brake wheel with geared housing, although the car retained the original split “K” air brakes. This was added by building up the mounting bracket for the brake wheel housing with styrene strip and adding a brake wheel & housing from a Tichy brake detail sprue.

One last note I should make on the brake equipment is that the kit box contained a Tichy parts sprue for a standard “one-piece” K brake, when the car should have a split K brake with separate piston and air reservoir. This may have just been a packaging mistake on my car, but I had to obtain another Tichy part sprue for the split version of the K brake system. The extra Tichy parts may eventually find their way under other old work equipment at some point.

The car still needs to be painted, and custom decals made to finish it off.

AC 306 Painted and Assembled

This Sunday I had the advantage of having pretty much the entire day to myself and spent the afternoon masking and painting my modified troop sleeper-cum-baggage car. Earlier in the week, the sides were assembled into the body frame and the body, roof and pipe were separately primered and painted “Aluminum”. Sunday afternoon was spent masking and painting the letterboard stripe (CPR Tuscan/Maroon) and the underbody and sills (flat black).

003

Once the paint had set and the masking was removed, I installed the window glass (using the original clear parts from the Walthers model for the existing windows and a sheet of clear styrene across the baggage door windows using a bottle of Microscale Kristal Kleer I had on hand (which seems to be more or less basically just regular white glue…?) and then installed the roof. The final bit of assembly involved installing the (previously bent and painted) air? pipe down the roof centreline, gluing it into holes above the end diaphragms, and tacked down at a couple of points to the roof carlines to keep it straight and attached. A small weight was placed on top to hold the pipe down while the glue dried.

With the body painted and assembled, one of the last tasks was to letter the car, which in this case consisted of only adding the car numbers to the four corners of the car using some of the extra digits from the number jumble in the Black Cat ACR passenger set. The railway never did get around to actually applying their name to the maroon stripe on the real car either, so that completes the lettering of this car…

A few final details remain such as stirrup steps below the baggage door and a light (passenger cars usually stayed in pretty good condition) weathering job, but this car is nearly complete!

Troop Sleeper Baggage Conversion Body Modifications and Details

So this project has been on the shelf for a long time. A very long time. I last wrote about this here in September 2013, and even that was to recount work that I had done before I actually started this blog. So far, I’ve posted about scratchbuilding the new doors, and briefly about plating some of the existing windows and vents (the easiest possible part of the job). Some of the work of cutting out the new opening had been started, but never fully cleaned up.

So recently I’ve pulled this out and started to finish that off.

The original troop sleeper configuration has a narrow personnel door in the centre, with single windows on either side. The new baggage door takes up part of this space. So the new opening needs to be marked and cut out, but also parts of the original openings need to be completely filled in. This involves filling in the windows with sheet styrene and removing all of the detail around them, as well as some of the same for the very top of the original door, which was slightly higher than the new sliding door. I used some styrene strip along the inside of the new opening to frame it up and unify the edges where the old window openings were, although this also helped correct some sloppiness in my original cut.

Then body putty was used on all the seams and areas around the door and window fill areas to fill and smooth things out, and everything sanded smooth. A bit of a rounded bevel was also filed into the door posts, although the top edge was left as square as possible.

130

The new rivet strips along the door posts were added using Micro-Mark 3D rivet decals. The small plate above the door was added using an .060″ wide strip of .005″ styrene with more Micro-Mark decals for the corner rivets. (In older photos this plate seems to have mounted some sort of hook/hanger above the door, probably to assist in hauling up express cargo. It appears though that this hook was removed by 1980s era photos of the car I’m modelling, so I don’t have to try to bend wire into such a small feature. Phew.)

This is really getting this car starting to look like something now, and is pretty much down to a few coats of paint for the next step…

ONT 9′ Door Boxcar Rebuild (AC 2917)

A while back I stripped the paint on a handful of True Line Trains 40′ Ontario Northland boxcars in preparation for modifying and repainting them as cars acquired second hand by the Algoma Central for LCL and company service. Naturally, these then sat on the workbench for a while awaiting detailing and painting while I tackled other projects. Last night I pulled these back out in order to start finishing off the details and get them ready for painting.

IMG_2775

First up is this car which will end up representing AC 2917. This car was built in 1947-48 by National Steel Car for Ontario Northland and rebuilt by the ONR in the early 1960s with a 9′ door opening. This rebuild required reinforcing of the side sill below the door opening and new door tracks. Note that the new doors used were taller than the original doors, being meant for a 10’6″ interior height car while the Ontario Northland boxcars were older cars with a 10’0″ interior height, so the door tracks in addition to being longer to accommodate the larger size of the door are mounted lower down.

The doors on the True Line model are unfortunately molded as part of the car body, so the first step of the major modification was to cut this opening out entirely. The side sills also had to be carefully cut off along the bottom edge of the car body so that new side sills and door tracks cut from styrene strip could be added. I don’t really recall where the doors came from originally, I pulled them out of my parts box where they’ve been for a while.

After removing the ladders and brake detail, original mounting holes were filled in with round styrene rod and the ladders were shortened and reattached. Tackboards on the doors and ends are original parts from the model relocated. The brake wheel housing was also remounted lower down.

This car just requires a few more of the brake detail parts to be re-applied on the “B” end of the car, and also the addition of a new horizontal grab iron on each end (I couldn’t find my small diameter brass wire last night) to complete the detailing. Then it should be ready for the paint shop.

I have a few more cars that basically just need all of the ladder and brake detailing work done which I hope to complete over the next week and then I should have a small fleet of about half a dozen ex-Ontario Northland boxcars for work and wayfreight service.

CP Woodchip Cars Painted and Lettered

IMG_2489

Last week I finished painting and decaling my pair of CP woodchip boxcars which are now numbers CP 31181 and 31202. On Saturday I was able to deliver them to the club layout, where they will enter service for now with some other modified cars.

The two cars were sprayed Pollyscale freight car brown and lettered primarily with CDS dry transfer sets, with some additional details (including Plate C markings, ACI labels, re-weigh dates, end reporting marks and numbers and some additional small data) from various Microscale and Black Cat sets.

Once the decaling was completed, I gave the cars a quick coat of Dullcote to seal the lettering and then a general spray of “grunge” using a thinned mixture of various weathered blacks.

That’s one project off the workbench that’s been there for a while!