Backdated ExactRail 65′ CP Gondola – Part 2: Corner ladders

In my previous post, I cut away and replaced the ends on an ExactRail 65′ Hawker-Siddeley CP gondola to backdate the model to an older National Steel Car version of a similar car. After a couple more evenings of work, the car now has its new corner ladders installed.

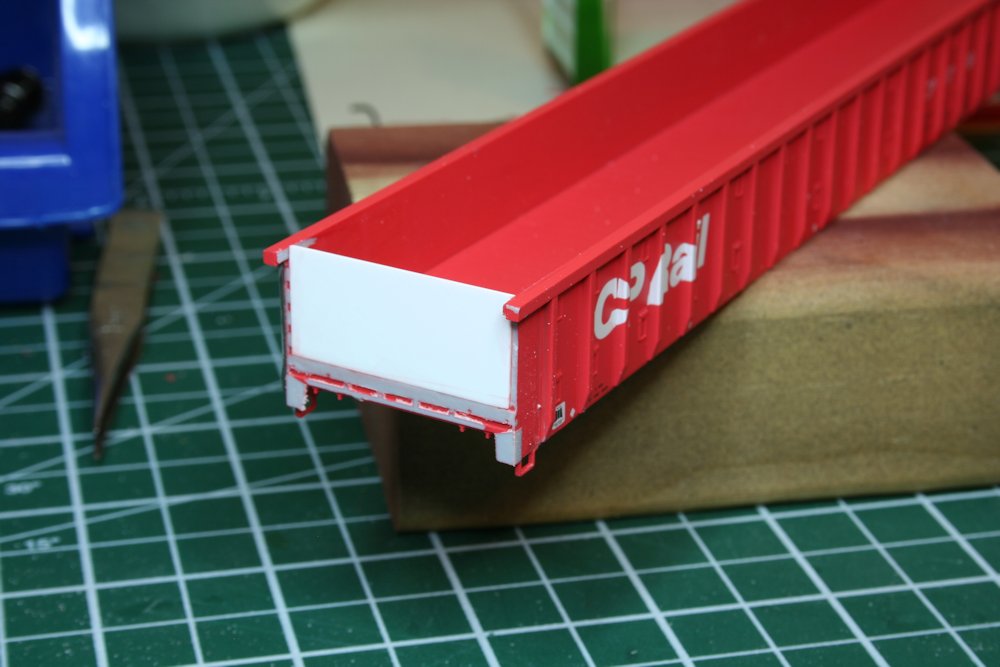
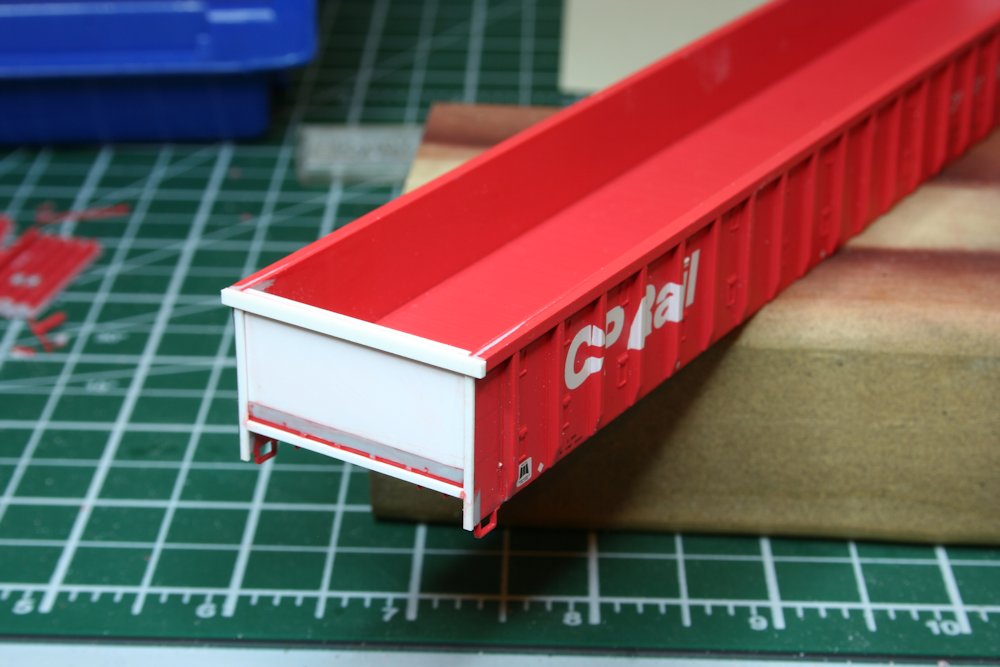
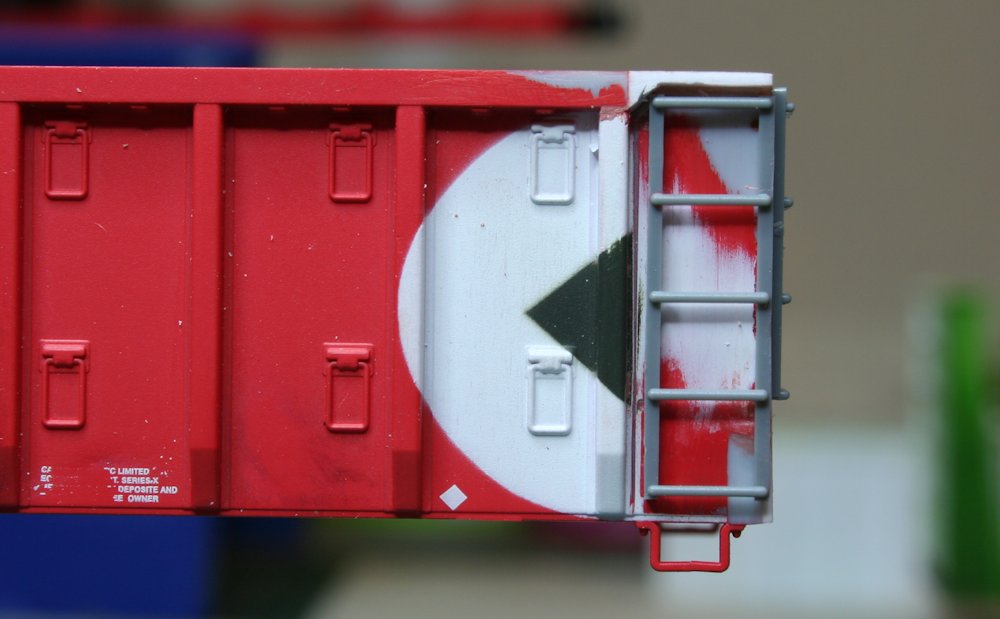
The last bit of major surgery on the car body was to carve away the top chord over the last panel on the right hand side of the car, as the NSC cars have a notch here for taller ladders. Comparing prototype photos of the NSC and H-S (which the stock model represents) versions, the NSC car has a 5-rung ladder with closer spacing compared to a 4-rung ladder on the H-S car. With the top chord cut away, the area was filed smooth and the new notched bit formed out of a scale 2″x6″ top piece and an angled bit cut and filed from a piece of 6″x6″. This little assembly was then cemented in place, and the cracks and seams filled in with Bondo body putty. (At this time the seams between the new end and the sides of the car body were also touched up with body putty.)

IMG_8495

After the putty set up overnight, everything was filed and wet-sanded smooth. Then the ladders could be installed.

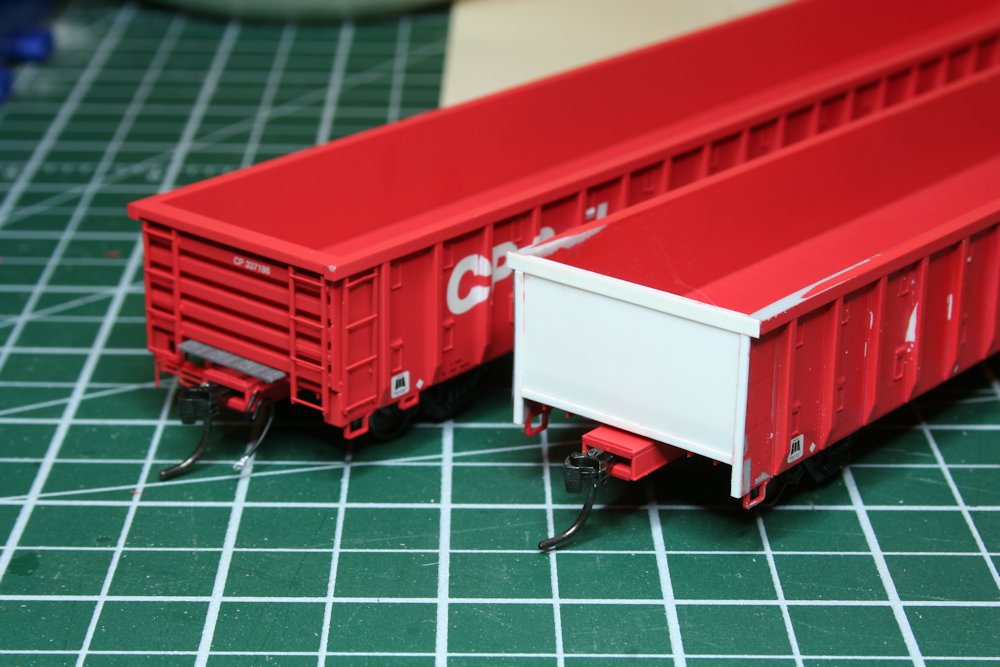
The ladders are cut to length from Tichy 8-rung boxcar ladders, and the rung spacing works out perfectly. Note the sides have a 5-rung ladder, and the ends have a shorter 4-rung ladder. The rungs of the side and end ladders align which each other. Note also that on the H-S car, the ladders are mounted below the heavy top chord, but on the NSC car that the modified model is intended to represent the top rung of the ladder is in front of the shallow top chord on the end, and located within a notch in the heavy side top chord.

IMG_8494

Also unlike the later H-S car, which has ladders at every corner of the car, the opposite corners on the NSC car just have a pair of grab irons instead of full ladders. The next step will involve drilling and installed these, and a few other minor details, and then I’ll be able to tackle the underframe modifications.

Backdated ExactRail 65′ CP Gondola – Part 1

A good portion of the traffic on the Algoma Central is finished steel products, and as a 300 mile wilderness route with no industrial users of this steel, basically one hundred percent of this traffic was interchanged to other railways, particularly in Sault Ste. Marie (CP and SOO Line), Oba (CN) and to a lesser extent Franz (CP). As such, CN and CP also provided a certain amount of cars for steel loading, so open cars from these railways would also be a regular sight on Algoma Central trains.

A few years ago, ExactRail released a model in their “Signature Series” of a Canadian Pacific 65′ gondola. This car is based on a version of a car built in the early to mid 1970s by Hawker-Siddeley and Marine Industries. Many of these are still in service today, so this is an excellent choice to be a part of my Canadian Pacific fleet. To add a little variety to the several cars I’ve collected, I’ve always been intending to take at least one car and backdate it to a late 1960s National Steel Car version of the same car. The NSC version is almost identical, having the same overall dimensions, number of side ribs, tie downs, etc., but has different ends and ladder arrangements. While the later HST/MIL cars have a distinctive ribbed end, the NSC car’s end is a solid, flat panel. Also, the NSC cars were built just before the introduction of CP Rail’s new “MultiMark” paint scheme, and were thus delivered in the older black paint. Interestingly, these cars were painted in simple block lettering, even though the Canadian Pacific script lettering was then the current lettering scheme in use at the time.

img0132

CP 336702 at Guelph Junction, sometime in the 1990s. Jurgen Kleylein photo.

The first step was to disassemble the car and remove most of the little detail bits. Then I cut away the original end with a razor saw and cleaned things up with a file. The side extensions that cap off the horizontal end ribs were also cut back and the bottom rib, which is below the level of the interior floor on the model, was carved away and things filed smooth. Then a plate of .040″ thick styrene was installed in the opening to form the core of the new end. The surface of this plate needs to be flush with the rest of the cleaned up end for the rest of the project to work.

IMG_8483IMG_8482

With the core of the new end in place, I cut away the protruding tail ends of the top chords of the sides flush with the end plate, and started framing in the new end with a 2×6 top chord and 2×4 framing around the sides and bottom. (Actually in the photo below I goofed and used a 4×6 on the top chord, which roughly matched the thickness of the top chord on the sides, but checking the prototype photo above, you can see it’s not actually that prominent on the end and is a lot more flush, so I had to cut this away and replace it with thinner material.)

IMG_8488

The basic assembly of the end was then finished off by cutting and filing a rectangle of .010″ styrene to fit snugly inside the end framing. Ladders and other details still need to be re-added, but here you can see the assembled end compared to the original ExactRail end on the car to the left.

IMG_8493

Stripathon! or, An Evening with my Good Friend Alcohol…

No, no, no. Not that kind of alcohol, and not that kind of stripping.

I spent some time tonight disassembling and stripping the paint off of some Walthers hopper kits to prepare them for detailing.

IMG_8475

Yesterday these dozen cars were in such varied paint schemes as Conrail, FEC, William Bros./Blue Circle Cement, and even WC/AC. It’s interesting how underneath the paint the cars were also cast in varying colours of plastic.

A bath of 90% rubbing alcohol from the drugstore attacked the paint and lettering quite nicely – in less than five minutes the lettering was literally floating off of the yellow cars. Most of the paint came off quite easily by scrubbing with an old tootbrush, although it took a little elbow grease to get most of the paint out of the corners.

Walthers Log Truck

I’ve had this old kit kicking around on a shelf somewhere probably for well over 10 years now!

This is a resin kit that was offered by Walthers. I don’t think it’s currently available anymore. I finally decided to actually glue some of the pieces together, and gave the whole frame of the thing a shot of black in the spray booth. It’s not a super-detailed model, but it’s building up into something that will look right at home near one of the sawmills on my future layout. (I’ll just have to give it a load of logs and place it closer to the rear of the scene so you can’t see that some of the wheels are a little cock-eyed on the axles.)

IMG_8471

The truck cab piece has obviously not yet been mounted; I’ll need to paint that another colour yet before assembling the model.

We now interrupt your regularly scheduled programming…

Ok, this one really has nothing to do with the Algoma Central, but I just love these oddball cars. This CP 40′ boxcar is a project that I’ve been working on that will ultimately see service down at my model railway club.

The prototype for this car is one of a very small group of 40′ boxcars that were rebuilt to increase the internal capacity for hauling appliances (i.e. kitchen stoves, etc.). I built this model from an Intermountain 40′ boxcar kit, performing a similar chop job, splicing the various bits with sheet styrene to increase the height. The Intermountain kit has separate ends, doors and roof pieces which really lends itself to this conversion job.

IMG_8470

I got this car painted red quite some time ago, and it’s been languishing on the shelf for a while behind other projects and life in general. This evening I finally moved it back into the paint shop to spray on the black part of the “multimark” logo. This stretched car also had a stretched multimark to fit the area beside the door, so this was masked and painted on, making this a three-colour paint job. (The white was done first (after a grey primer), then the red, and then finally this evening, the black.)

Now it’s finally ready for decals!