Chip Doors Completed

While I was away travelling this weekend I managed to stop off at a hobby supply store and pick up some of the raw materials I needed to keep my current projects moving forward. A little work this evening and the doors on the two wood chip boxcars are completed.

IMG_2331

Compared to the previous post, the hinge and locking bar details have been added with .025″ rod and .010x.020″ strip to catch the overall impression and look of the prototype photo.

The two cars now just need a minor touch up of body and underframe details, and they’ll be ready for the paint shop this week.

A Pair of CP Extended Side Woodchip Boxcars

Earlier this week I took the chance to take another look at an older project on the shelf. I’ve already documented one CP woodchip boxcar build on this blog (see Part 1, Part 2 here); both of these projects were originally started quite some time ago.

My second woodchip car project represents an earlier rebuild, converted in the late 1960s for service in Maine and Atlantic Canada and rebuilt with side extensions. As they were rebuilt for Atlantic service, all of the early cars were Pullman-Standard boxcars lettered for CP’s International of Maine Division, which was an early approach under customs regulations for assigning certain groups of American-built cars to international or US domestic service. At first, these rebuilt cars kept their original car numbers, with notes made in equipment registers identifying the modified cars.

cp269941

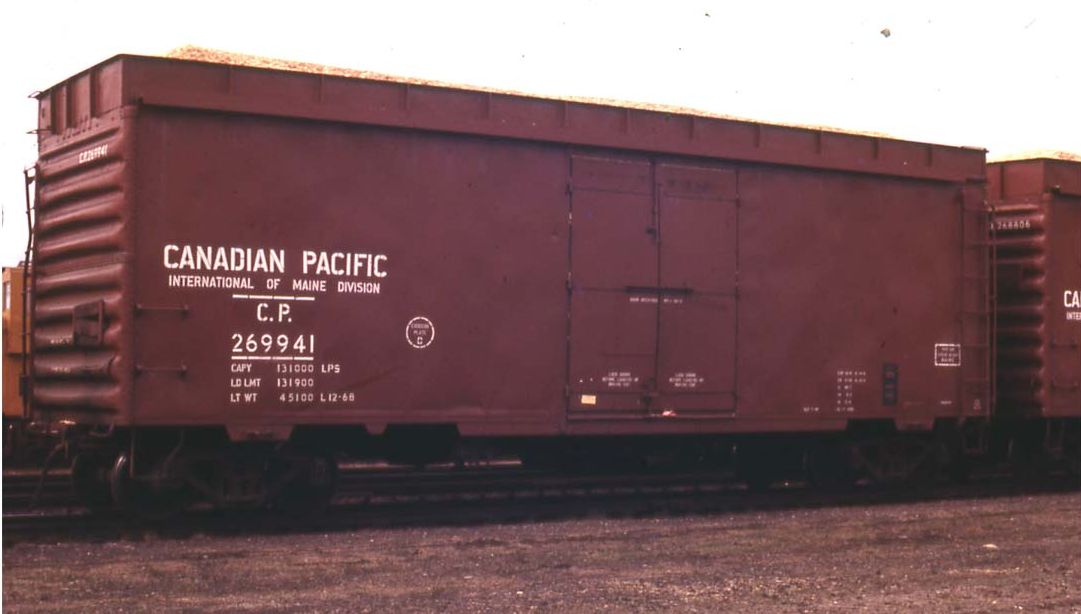
This photo of CP 269941, courtesy of Jim Parker, was taken in 1972 in Brownville, Maine, and shows the car in it’s original context, still with it’s original number and in Atlantic Region service.

By the end of the 1970s, many of these cars were randomly renumbered into the 31175-31374 series, at the same time as CP was beginning to convert more randomly selected old boxcars to woodchip cars through the early 1980s by the simple expedient of cutting away the old roof. Later cars however did not receive the extensions to the sides.

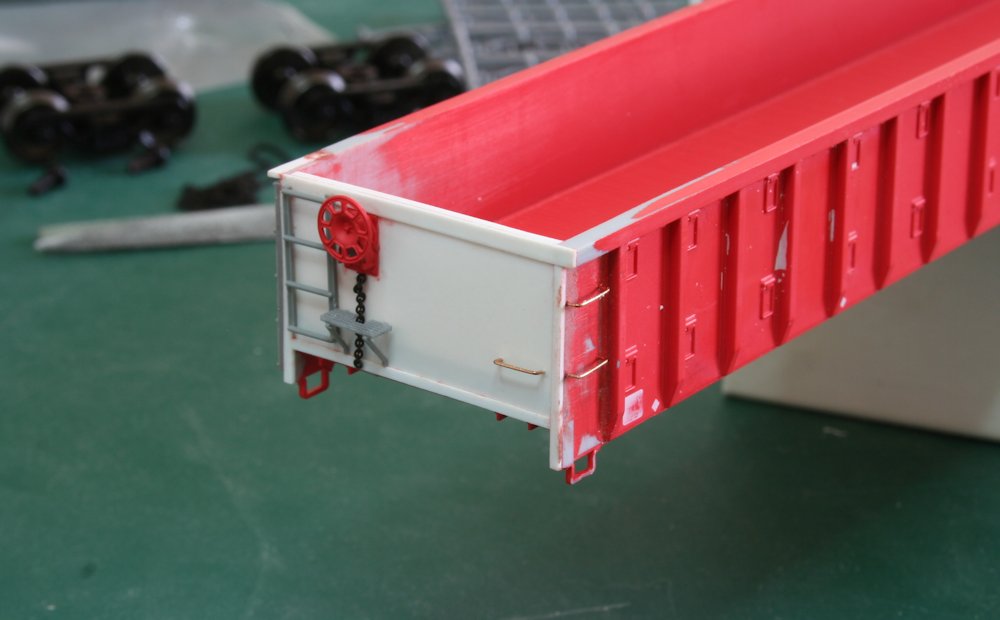
I built the side extension on one car quite some time ago, and then the car ended up on the side burner waiting for doors. Earlier this week I hauled out a second car that I had prepared for side extensions at the same time and finally built the side extension on that car, and then started the doors on both cars.

IMG_2055

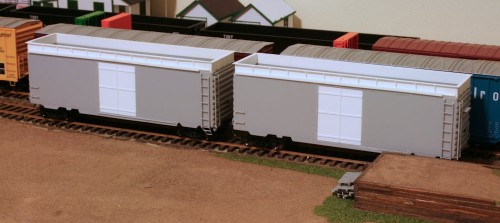
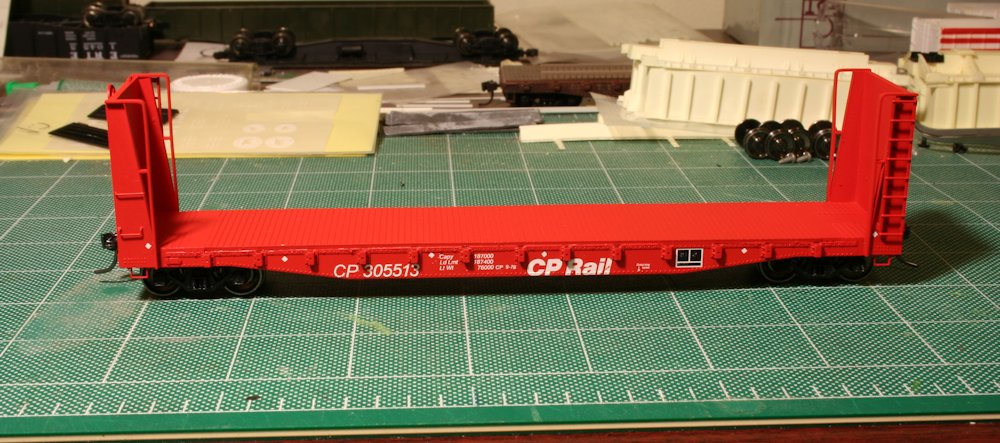
Here’s my two cars in their current state posing on my little switching layout.

I need to obtain a few sizes of wire or styrene rod in order to finish the hinge and door locking bar details, so the cars will unfortunately have to be set aside again for a little bit until I can acquire some needed materials, but hopefully I’ll be able to do that soon, and then finish up the doors and get this pair into the paint shop.

Like my previous CP woodchip box, this pair will eventually end up in service at the club layout. As far as I can tell, in reality these cars primarily ran between sawmills in White River or Chapleau to the Domtar pulp mill at Red Rock, on the north shore of Lake Superior, but we’ve used some modeller’s license to run these through Sudbury to other local paper mills. I’m not sure if these cars actually did that, photos of freight equipment in 1970s is harder to come by, particularly in remoter areas of northern Ontario, but there is definite proof of pulpwood travelling around in the late 1960s and 1970s in CP gondolas, and some evidence of woodchips as well, so there’s a certain plausibility to it, and these two extended height cars should mix in nicely with the half-dozen other cars we have in service.

CP 336702 65′ Gondola Painted and Lettered

IMG_1961

Over a few evenings the past week I got this car painted black and applied all the lettering. After languishing on the back burner for about a year, it feels good to put some attention towards finishing this project off.

The body was airbrushed black and then given a shot of GlossCote to prepare for decals. Lettering is (mostly) from a Black Cat set for 52′-65′ gondolas.

(The black sure is difficult to photograph well, particularly with the crappy lighting I have available in my apartment.)

IMG_1963

The digits of the car number are all individually applied. It would have of course been necessary to apply several numbers individually in any case to form the correct number, but also because of the narrow space between the ribs the numbers in this case had to be applied with almost zero spacing between them. The spacing of the C.P. initials was similarly reduced.

For this car I also applied the data to actually match the numbers on the prototype photo, and also a little trimming of the spacing was required for everything to actually fit. I left the capacity line off as this was no longer required and started to be painted over on many cars in the early 1980s and I hand painted a bead of black over where this would have been lettered.

The NSC builder’s logo and dimensional clearance Plate C stencil came from a Highball Graphics CP Rail flatcar set, and the nailable steel floor data stencil (rectangular data block to the right of the panel with the Plate C stencil) was included in the Black Cat set.

IMG_1964

Interestingly, in the prototype photo of 336702 that I have, the end reporting marks are in the modern italicized CP Rail font, which would not have been in use in 1965 when the car was built. This was probably re-applied at some point due to weathering of the original lettering on be end. I chose to reproduce this detail and used the small end reporting marks/numbers from a Highball Graphics CP Rail gondola set.

Now this car is almost ready for some basic weathering to complete its in-service appearance.

Backdated CP 65′ Gondola – Grab Irons and Final Details

Here’s an old project I was able to bring off the shelf on a peaceful Sunday afternoon. I documented the start of this project earlier in a couple of postings here on this blog, (see part one here, and part two here) and it’s been over a year since I’ve gone and done anything with this. Time to finish a few things up and get this project ready for finishing.

The next step that was holding me back on this project was drilling and installing the grab irons for the left corners on each side. Not that this was really a tough job.

IMG_1959

To aide in keeping everything neat and straight, I laid out the locations of the drill holes for the grab irons on a scrap piece of styrene to use as a drilling template/jig. The jig fits into the corner made by the top chord and first vertical rib on the side of the car. Then by drilling through the pre-drilled holes in the template into the car side, everything is lined up nice and neatly.

IMG_1958

I also reinstalled the brake wheel and housing, and used a piece of scale chain to represent the brake chain heading down from the brake wheel mechanism. The brake platform/step was cut down from the original long piece removed from the factory Exactrail model with a pair of supports out of a Tichy brake details set.

At this point the car is ready to be cleaned up and prepped for painting; I’ll probably fire up the airbrush this evening to give is a primer coat.

CP 305513 Lettering Completed

Over the last week I’ve been managing to get a little bit of work done each evening on this car, and over the weekend, I got it painted, and after a few more evenings of work, the lettering on this car is basically completed. The car was lettered with a set from Highball Graphics for CP flatcars, with end reporting marks taken from another set, as they were unfortunately omitted (since regular flatcars would not have them, but the set is intended to be used for bulkheads as well, and any of those would have had them…)

The car number and logo in the prototype photo of the 305513 are actually a little smaller than on most CP Rail flatcars, so comparing the model to the photo the lettering is a little large, but short of having a custom set created for this car, this was close enough.

IMG_1741

I only had photos of one side of the real car, but following standard CP Rail practice for flatcars the number and logo are located in different places on each side of the car.

IMG_1740

All it needs now is a little weathering to give it a nice in-service look to finish it off.