Section House Progress

While I was mostly busy with other things over the Christmas and New Year’s period, I’ve been managing to poke away at a couple of projects and have managed to complete another milestone on my Franz section house project, and now I have my first actual project posting of 2015.

The house is now painted, and has shingles applied.

IMG_1714

The house was airbrushed white and the trim carefully masked and painted Southern Sylvan Green. I had a setback at this point that rather threatened to ruin the entire project – on one side I sprayed a little too heavily with the green and it leaked and spread under the masking. After venting some frustration (“Model Railroading is Fun”?? – MR’s old tagline) including some choice words that would have disappointed my mother, I tried to recover the project by scraping away some of the green paint, and repainting the side again with white to touch it up and once again masking off the trim and windows and then touching up the green.

I think I managed to not botch it too much the second time around. Phew.

IMG_1717

The shingles are a heavy paper product from Rusty Stumps. They are pre-cut for a standard 3-tab shingle pattern and can be ordered with or without an adhesive backing. (Rusty Stumps has several different variations of shingle types available, and different colours are also available. Their dark green will likely come in handy when I build Hawk Junction station…)

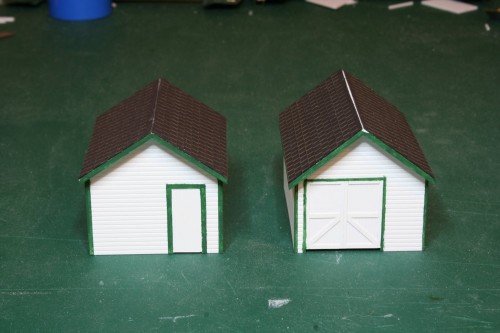
You can see above that I have also been working on finishing off the assorted tool and speeder sheds with shingle roofing material as well (I actually completed a few of these over the Christmas season, and applied the last shingles to the section house tonight). Some of these small structures are known to have tarpaper/roll roofing but I’ve managed to source some photos here and there and some of the specific locations I’m intending these for (Franz, Mosher) had shingle roofing on these sheds. Even some of the different section houses had varying roofing and siding treatments, with some of them also having tar paper roofing as well. Franz however, is well documented as having normal black asphalt shingles.

All of the model structures just need a ridge cap applied yet to complete the roofing treatment.

IMG_1715

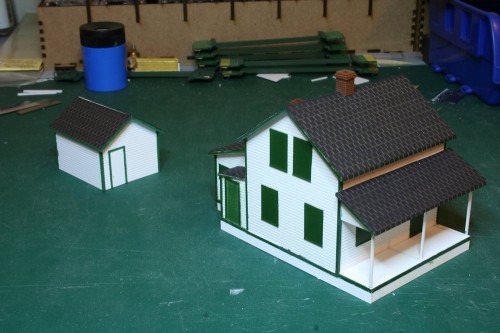
Here we see what the Franz section house would look like in context with its storage shed, although you kind of have to imagine a forest around and behind it, a nearby outhouse, and chances are when I actually build Franz, you’ll end up looking at the back of the house from the aisle.

It’s taken a while, and had it’s bumps along the way, but I’m happy that these structures are really starting to look a bit more like the real ones they represent.

Speeder and Tool Sheds Painted

IMG_1620

This week I’ve spent a few evenings finishing up this collection of small speeder and storage sheds. Roofs were installed on the three storage sheds and then all 6 structures were painted in the ACR’s standard white and green colour scheme.

The bodies were given a coat of white with the airbrush, and then I tried to carefully mask off the corner and door trim and touch it up with a fine brush.

These structures now just need to have shingle or roll roofing applied as appropriate to complete, other than a little bit of weathering/aging.

Franz Section House – Porch and Trimming

I’ve had the opportunity to put a little more work into my section house build, and it’s starting to get a lot closer to finished.

Across the front of the structure is a covered porch which extends the full width of the building. According to the standard drawings, the porch extends five and a half feet forward from the structure. To start the porch roof, I built an open framework using scale 4×4 strip for the porch roof. This was a very delicate piece to work with, but holds together fairly strongly once fully assembled with the sheet material for the roof’s surface cemented to the rafters.

IMG_1584

After this was all set up, I proceeded to add the fascia trim to all of the roof edges of the structure.

I also built the porch with a sheet of .020″ thick scribed Evergreen styrene sheet material and some .060x.060″ strip framing. Then, to complete the model down to the ground and also hold everything together more rigidly, I added the vertical board cladding all around the bottom supports of the structure. (Some more recent photos at this location show some of this replaced with lattice, but I have a couple of older photos that I’ve saved and archived in my reference folder where this is vertical siding all the way around, so I went with this approach.)

IMG_1611 IMG_1612

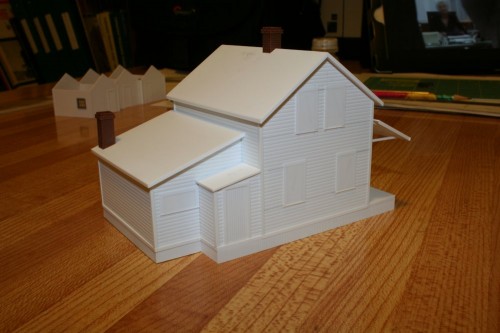
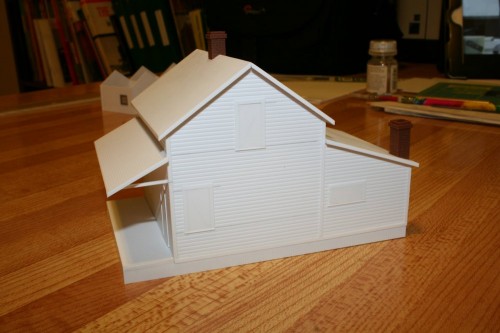
You’ll also notice I’ve added the chimneys for the stoves that heat the structure. To mount the main chimney at the peak of the roof, I filed a notch into the roof itself so that the chimney could be cemented down on a flat surface rather than trying some sort of painful attempt to cut a peaked bevel into the base of the molded plastic chimney which I never would have pulled off cleanly.

The kitchen chimney however had the based filed off at an angle to bevel it to the slope of the roof.

First Scratchbuild

Earlier this weekend, John Longhurst published a post over on his M&M Sub Blog about some early scratchbuilt structures on his layout, including his first ever scratchbuild, a small industrial building, although he states how the structure has no place on his current layout, partly because it doesn’t fit, and partly because like many first efforts it no longer holds up to his current standards.

John posted a link to the same post and started a discussion over on the Trains/Model Railroader forums inviting others to share examples of their first scratchbuilt structure efforts.

Here’s mine.

IMG_1607

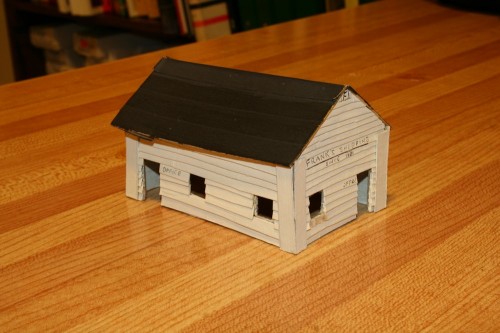
I built this small building out of cereal box cardboard when I was still in grade school, cutting strips of boxboard glued to a core of the same to simulate clapboard siding. The tarpaper/roll roofing is regular masking tape.

I’ll never actually use this building on a layout again, as everything about it is of course well below any current standard I would set for myself, but I keep it around out of some sort of sentimental value as my first building that I made myself.

Franz Section House Scratchbuild

Thanks to a couple of days off this week for American Thanksgiving (while I live and work in Canada, my office does the lion’s share of our business south of the border, so the office is closed these two days) I had a chance to actually spend a good amount of time working on model projects this week. And the main project I’m working on right now is a model of the section house for Franz, where the ACR crossed the Canadian Pacific transcontinental main line.

IMG_7615

Being able to just kick back and relax and spend a couple of evenings and pretty much most of my Saturday enjoying my models allowed me to actually make quite a bit more progress than I expected and the main body of the section house is essentially completed:

IMG_1580

IMG_1581

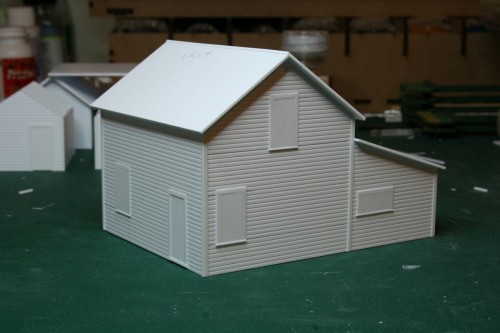
The body of the structure and the doors and corner trim were constructed in the same manner and using the same approach and techniques as with the tool sheds, just with a slightly different shaped building.

As the windows on the Franz section house were all covered (and a 1981 slide in my collection showing a general view of the structures along Franz siding shows that this was the case then as well, and the newer bunkhouse and maintenance tool/storage shed are also in place then) I did not cut out the window openings to install window castings, but overlaid rectangles of .010″ styrene on the surface of the structure wall to represent the cover over the window opening and scratchbuilt frames with .010x.060″ strip and a .020x.020″ bottom sill.

The roof is .040″ sheet and still needs some fascia trimming to finish up the detailing, and a mount for the chimney in the centre of the roof line.

Next will be a matter of constructing the porch and porch roof and the footings on which the structure sits and is raised off of the ground.