It’s a Wrap…

…wrapped lumber bundle that is.

IMG_2648

I’ve been spending some time lately working on making up some wrapped lumber bundles that can be used to put together some flatcar loads (and any extras will be saved to make stacks of finished lumber around the mill property when I build that location on my layout.

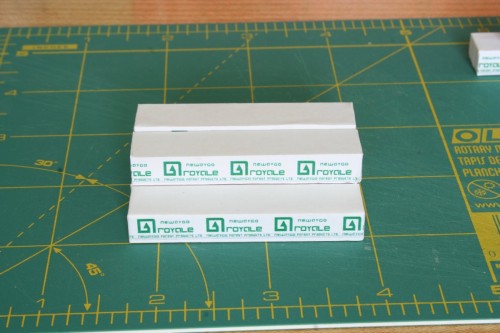
These bundles are wooden blocks wrapped in paper printed with custom graphics matching the logos used by Newaygo Forest Products. Since Newaygo is a bit of an obscure operation compared to say, Canfor (Canadian Forest Products) or Weyerhauser or other larger lumber companies, I was going to have to come up with a custom solution. Very fortunately I have this Ted Ellis photo of AC 2425 with a Newaygo lumber load as well as a straight-on photo of the sign in front of the old Newaygo office still standing at Mead to work from in order to draw out the logo and letter font.

I am not particularly proficient with graphic design or Photoshop, but I was able to draw out the logo and text using the 3D drawing program Sketchup, as the squarish logo and letters with rounded corners actually lead themselves nicely to being drawn with this program, and then exported the front view as a PNG image, which I cleaned up a little with Paint and resulted in the graphic below:

Newaygo Royale lumber wrap graphics single

The bottom line “Newaygo Forest Products Ltd.” was a bit of a guess, as you can’t really quite make out that lettering in the Ted Ellis photo, but this prints out pretty small in the end result and you have to really lead in close to read it. Feels about right though.

My dad’s hobby is woodworking, and he has a pretty nicely fitted out workshop at his house. As I am fortunately currently living in my hometown again, an evening visit to my parents place last week with a couple of hours with my dad in his workshop turned a scrap piece of 2×6 into a large pile of wooden blocks sized for scale bundles of lumber in 8′, 10′, 12′ and 16′ stud lengths. The original block of wood was ripped into small strips using the table saw, and then the strips cut off to length using a band saw with carefully measured fence distances.

The final sizes of the blocks are 8mm tall by 13mm wide/deep, with lengths of 28mm (scale 8′ stud bundle), 35mm (10′), 42mm (12′) or 56mm (16′).

Since then I’ve slowly been cleaning up the blocks by sanding off any surface burrs and splinters (I’ve got a large pile to go through yet!) and started gluing on the paper wraps on a few blocks to start getting some finished pieces. I’ve got to finish off quite a few more in order to start assembling a load, but when I’m done wrapping all the blocks we cut last week, I should have enough to do at least half a dozen various loads with some left over for lumber mill scenery in the future.

If anyone else modelling the ACR or upper Michigan (or just looking for something a bit different) would like to print off some graphics to make their own Newaygo load(s), I’ve uploaded a ready-to-print PDF file which will print off a series of graphics to the correct size for HO scale bundles.

Net Storage Boxes

These storage boxes are a simple detail, but due to their position right at the top centre of the door (yep, the box is actually mounted right on the door itself) makes for a prominent feature on the A end of the car.

These boxes were used to stow mesh netting, which would be used to cover a load of woodchips to (try to) prevent the contents from blowing out of the car while in transit.

IMG_2518

The boxes of course are straightforward simple construction, with a front cut from .020″ sheet and sides and bottoms cut from pieces of .020x.100″ strip. Of course the one wrinkle is that the box does come over the top frame of the door, so the top corners have to be carefully notched .040x.040″ to clear the frame but not leave any visible gap when finished.

The lids (installed after the assembled boxes were cemented to the end assembly) are pieces of .010x.080″ strip.

IMG_2519

Here’s one of the partly completed ends with the storage box installed.

Apart from grab iron and ladder details, my stack of parts is really starting to look like something now.

AC Woodchip Car Progress and Doors

IMG_2517

Over the could of weeks I’ve been continuing to make some progress on my scratchbuilt Algoma Central woodchip gondolas. I’ve completed some more sides so that I have enough for three cars currently and I’ve also been getting some work done on the door ends of the cars.

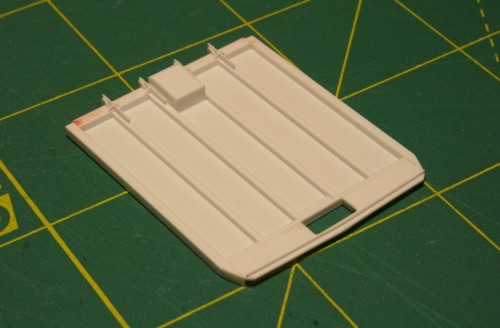
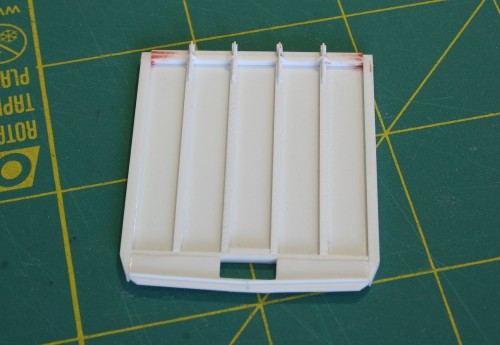
These took some careful laying out, but other than that have been going together fairly well. Like the other parts of the car so far, this mainly consists of a .020″ sheet forming the backing of the main door with .040″ square styrene strip for the vertical ribs on the door. The corner posts are .060″ square and the top beam is .080″. These parts of the frame are glued to the edges of the .020″ door sheet, not using the surface backing.

The trickiest part actually turned out to be cutting the angles on the bottom sheet representing the reinforced end sill on theses cars (since the majority of the end isn’t structural, but a top-hinged door that can open up like a dump truck). I had to throw out a few attempts that weren’t quite symmetrical.

IMG_2515

The hinge detail was also a little tricky to manipulate due to the extreme small size of the pieces, but otherwise the design is pretty straightforward.

The vertical parts of the hinges attached to the door are .010x.040″ strip while the hinge mounts were carefully cut out of bits of .010x.080″ strip.

There’s still some additional detail to add (ladders, grab irons, latches and a storage box attached to the door for mesh nets used to contain loads and prevent chips from blowing away in transit), but otherwise I have all the major pieces now to complete three bodies except for the next major project: the underframe/floor.

CP Woodchip Cars Painted and Lettered

IMG_2489

Last week I finished painting and decaling my pair of CP woodchip boxcars which are now numbers CP 31181 and 31202. On Saturday I was able to deliver them to the club layout, where they will enter service for now with some other modified cars.

The two cars were sprayed Pollyscale freight car brown and lettered primarily with CDS dry transfer sets, with some additional details (including Plate C markings, ACI labels, re-weigh dates, end reporting marks and numbers and some additional small data) from various Microscale and Black Cat sets.

Once the decaling was completed, I gave the cars a quick coat of Dullcote to seal the lettering and then a general spray of “grunge” using a thinned mixture of various weathered blacks.

That’s one project off the workbench that’s been there for a while!

Chip Doors Completed

While I was away travelling this weekend I managed to stop off at a hobby supply store and pick up some of the raw materials I needed to keep my current projects moving forward. A little work this evening and the doors on the two wood chip boxcars are completed.

IMG_2331

Compared to the previous post, the hinge and locking bar details have been added with .025″ rod and .010x.020″ strip to catch the overall impression and look of the prototype photo.

The two cars now just need a minor touch up of body and underframe details, and they’ll be ready for the paint shop this week.