ProtoFile: Perry Siding

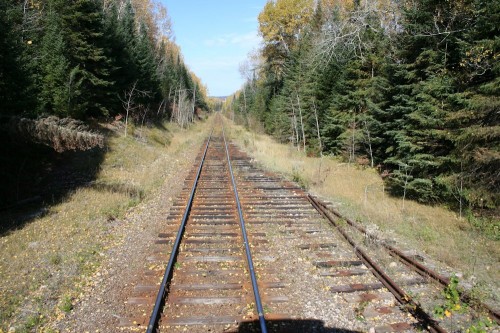
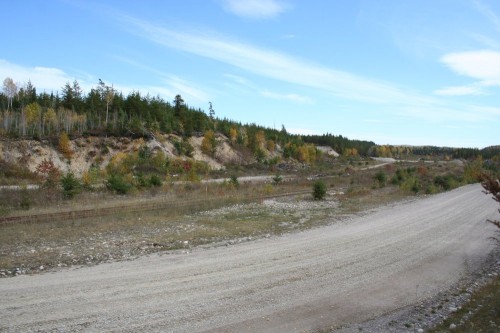
Perry (mile 149.9) is located 15 miles south of Hawk Junction. Perry was the location of a passing siding, the railway’s ballast pit, and one of the old regularly spaced track section bunkhouses. While the proximity of the spur to the old ballast pit adds some interest, Perry is a good example of a pretty typical location along the Algoma Central Railway, although while many such locations along the ACR are completely inaccessible except via the the railway, Perry is accessible (at least today) via an unimproved logging road.

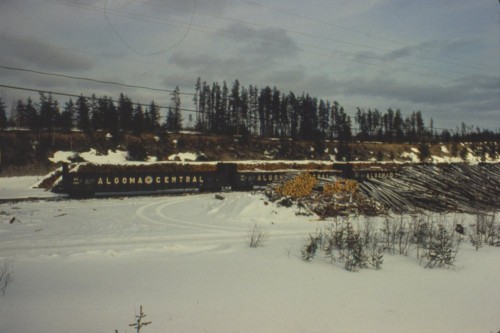
Of course operationally the key feature of Perry is the passing siding, as a meeting point for trains. Here we see a pair of freights meeting at Perry in March of 1981:

scan0039

The lack of lit classification lights or flags on 180 South indicates that this is regular Hawk Junction to Steelton (Sault Ste Marie) southbound freight No. 10; our train is most certainly a slightly late running No. 9. As the northward direction is inferior by timetable, No. 9 takes the siding to clear the main for No. 10.

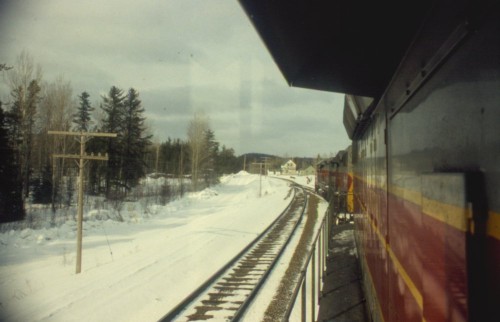
Having cleared the passage of No. 10, No. 9 now pulls out of Perry siding. The Perry section house is visible ahead, beyond the north switch of the siding.

scan0038

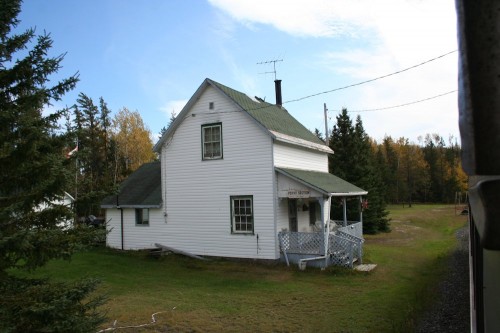
Here’s a close view of the Perry sectionhouse as it appears today (photographed on my trip in October 2013).

IMG_7530 IMG_7531

Today the section house is a privately owned cabin. Originally, the purpose of this building was as a bunkhouse for railway track maintenance workers. Various small sheds nearby served as storage for various supplies and materiel required for the track worker’s trade.

This structure is pretty typical of the ACR’s standard section house design, although the rough stone chimney is a unique feature and a result of remodelling by the new owner. The metal plate in the centre of the roof along the ridge line indicates where the original chimney for the wood stove would have been located.

Looking north at the section house we can see the shed beyond the section house near the edge of the clearing which would have once housed the track foreman’s “speeder” (motorcar) used for conducting track inspections of the section:

IMG_8049

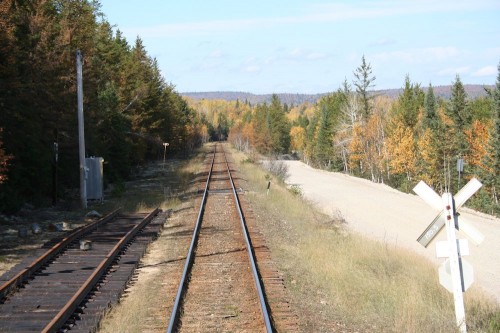
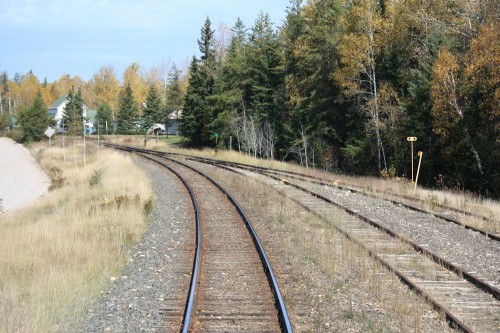
Travelling back south along the siding, looking out the back of a southbound passenger train, we see the north siding switch at Perry. The house track at Perry also starts immediately at the north end of the siding:

IMG_8053

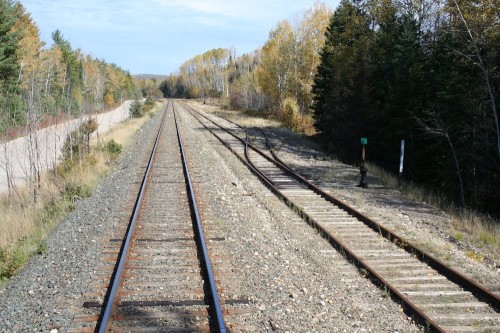
After travelling through a sweeping curve, the siding straightens out. Here there is a cleared area along the house track; it’s possible this area may have at one time been used for loading pulpwood, like many such sidings along the ACR:

IMG_8056

The house track at Perry runs along a sizeable portion of the siding. The timetable indicates the siding’s capacity (in 50′ car equivalents) at 82 cars, and the house track is listed at 39 cars capacity. Factoring in the clearance points of the track and the length of the switches, the house track runs along at least half the length of the siding itself:

IMG_8058

The south switch of Perry siding. The conductor of the passenger train is throwing the switch so that the short train can back into the siding so we can meet a northbound freight:

IMG_8061

IMG_8067

In order not to make this post too large, I will post several views of the ballast pit and area to the north of Perry siding in a separate later post.

Notes on an old Slide Collection IV: Wreck at Canyon

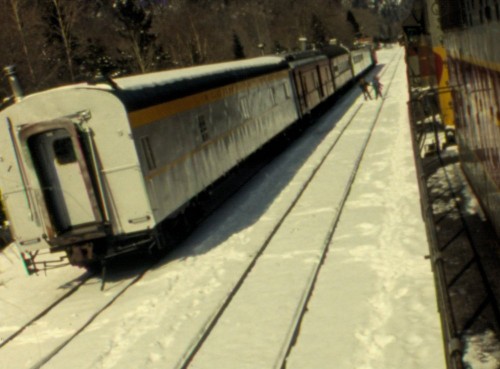
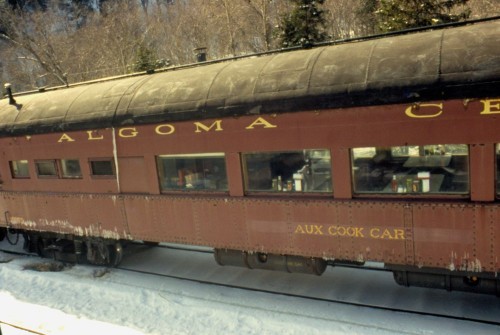
Here’s an interesting sequence of images taken by a photographer riding in the cab of the trailing unit of northbound freight train No. 9 from Steelton Yard (Sault Ste. Marie) to Hawk Junction. As the train arrives at the north end of Canyon siding we see several cars of a work train parked in the siding and house track at Canyon. The siding has a string of gondolas and flatcars which be loaded with ties, track parts and other maintenance materiel. The farthest gondolas may be crane support cars. In the house track is a string of crew accomodation cars.

scan0043 scan0044 scan0046scan0045

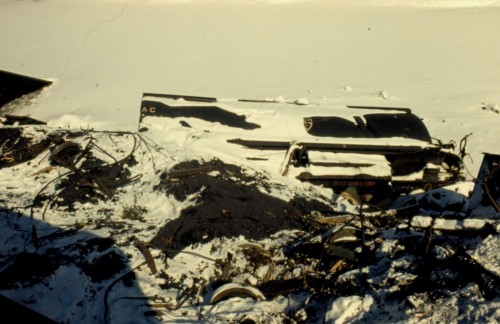
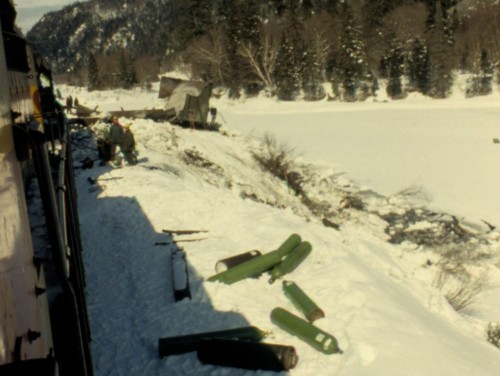
The reason for the railway service cars becomes quite clear as we encounter the mangled remains of several wrecked hopper cars. A recent wreck at the north switch of the Canyon siding has spilled several cars and their contents of sintered iron ore down the embankment and into the Agawa River alongside the tracks.

scan0029scan0042scan0041

We can see that crews are quite busy cutting up many of the damaged cars for scrap on the spot. There’s not much left of this hopper car, and look at that pile of acetylene bottles:

scan0040

Several cues have already led me to date the slides in this collection to a trip made sometime during the winter of 1980-81. Ted Ellis also has a pair of photos of a similar wreck at the north end of Canyon siding on his website:

http://algomacentral.railfan.net/images/AlgoCenRy/AC_Canyon_wrk-1_3-9-1981.jpg

http://algomacentral.railfan.net/images/AlgoCenRy/AC_Canyon_wrk-2_3-9-1981.jpg

These photos are dated March 9, 1981. I think it’s pretty safe to say we are looking at the results of the same wreck, with the slides in my collection having been taken several days to a couple of weeks after Ted’s photos, which appear to show the beginnings of the wreck cleanup to re-open the line. Aside from providing an interesting angle of a few wrecked cars, these wreck shots pretty conclusively date this set of slides to March of 1981.

And to tie things off, here’s a neat sequence of images of a southbound work train carrying the ruined remains of those wrecked cars on their last trip by rail, on April 1, 1981:

http://algomacentral.railfan.net/images/AlgoCenRy/AC_166T_Sault-4-1-1981.jpg

http://algomacentral.railfan.net/images/AlgoCenRy/AC_166T-2_Sault-4-1-1981.jpg

http://algomacentral.railfan.net/images/AlgoCenRy/AC_166T-3_Sault-4-1-1981.jpg

ACR Regular Passenger Service to End This Spring

Disappointing news out of Sault Ste. Marie this week for Algoma County. Apparently subsidies for the regular passenger service between Sault Ste. Marie and Hearst has been suddenly cut by the federal government, and as a result CN has announced that the passenger service to Hearst will be cancelled on March 31, 2014.

See news article here:

http://www.sootoday.com/content/news/details.asp?c=67653

Turns out it was a really good thing I was able to make my trip up to ride the train in October on short notice. Otherwise I may have missed my chance to ride it in good weather.

Cancellation of this service will have a negative effect on tourism and the many camps and cabin owners along the line, which are only accessible by the railway, with no other forms of access. Expect to see some heavy lobbying from local tourist outfitters, private camp/cabin owners and especially any larger resort/adventure camps along the line that would lose their entire livelihood by becoming inaccessible. However even if the communities rally around this service, the prospects don’t seem encouraging.

So, if you were ever planning on riding the Tour of the Line to Hearst, and haven’t yet had the chance, you’ve got about two months to book your trip before the chance might be lost forever.

Update: On Friday, February 14 CN announced a four week extension to April 29.

Rapido FP9A Arrived

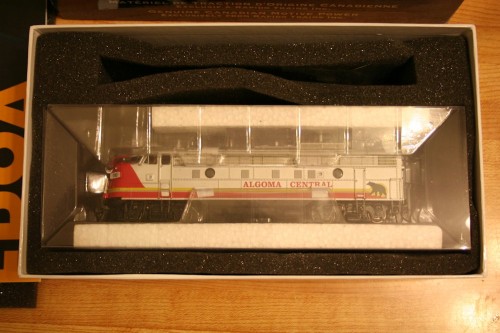
Today I got a package in the mail from my dealer containing one of the new Rapido FP9A locomotives factory decorated for Algoma Central #1750. Acquired by WC in 1995 for the ACR passenger trains, it’s a little completely out of my era, but I just “had” to collect a couple of Rapido’s models to put together a “modern” (1995-2000) version of the ACR’s regular passenger train. It’ll mostly reside on a display shelf, but be fun to run through every once in a while.
IMG_8608

In the box, with solid protective packaging.

The model comes packed in a protective plastic holder that securely wraps around the engine and holds it tightly, and did a good job of protecting it from any damage in shipping. Every little bit and piece appeared to be completely intact.
IMG_8614

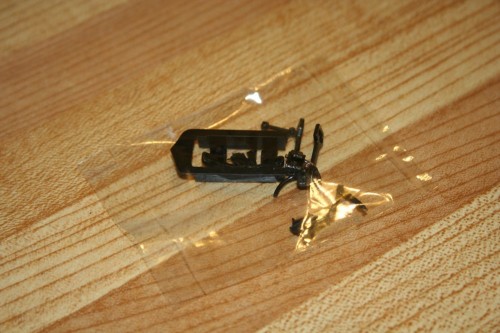
Additional parts bag.

Little parts baggy including extra re-rail frogs, steam line connections and extra couplers and a part for a rear diaphraghm. The AC units didn’t have them (and neither did the majority of the old CN units, and many that did had them removed later), so that piece won’t need to be installed.
IMG_8620

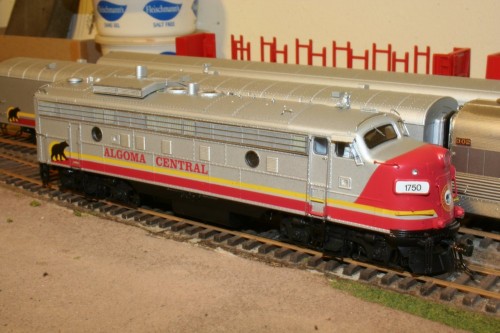
The model, out of the box!

Here’s the model taken out of the box and set on the rails of my in-progress switching layout. You’ll have to excuse the background and the quality of some of these photos; this small layout isn’t very finished and the lighting in this room isn’t the best.
ACR From Blair 015

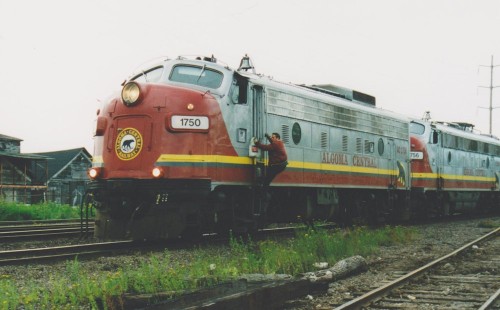
The real 1750 arriving at Steelton Yard on the head of the southbound Agawa Canyon Tour Train. Blair Smith photo, August 1996.
IMG_8625

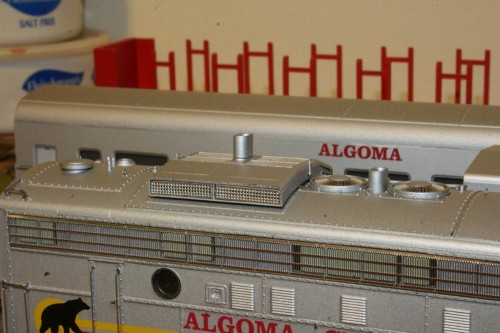
Winterization hatch detail, with stack extension.

The model has a lot of gorgeous detail, although a couple of things stuck out. On the large winterization hatch over the radiator fans, there’s a tall exhaust stack extension which doesn’t appear to have been present on the AC units. This may have been applied at some point in the past to the CN units that eventually (by way of VIA) became AC 1750 and 1751, but weren’t there under ACR ownership. Fortunately with a bit of firm but careful pressure, this stack extension can be pulled out. The hatch also doesn’t appear to be quite fully seated all the way down on the close side, but this should be fixable.
IMG_8627

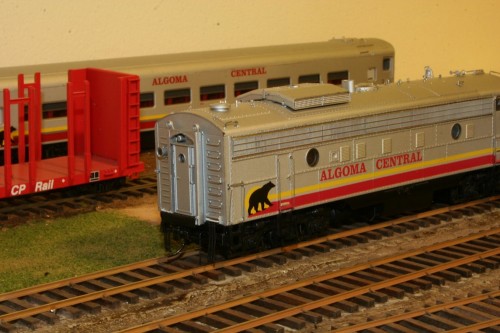
Rear detail, also showing exhaust stack extension removed. The back-up light to the left of the door lights up when the engine is set in reverse.

Since I got the DCC/Sound version, naturally I wanted to get the locomotive fired up on the NCE PowerCab I’m powering the switching layout with. At first – nothing happened. I checked the manual with the model, and the text indicated that the decoders are set by default to address “3”. (3 is the standard default address for a decoder, but I kind of expected the installed decoder to be set to the model’s road number in this case. No big deal, reprogramming a decoder address is a pretty standard task.) Once I was able to select and send a command to the engine, a quick tap of the F8 function key on the throttle (Function 8 is the standard mute/un-mute function for most sound decoders) brought the sound to life. The sound sounded quite agreeably like the EMD 567 engine in the FP9, which it well should – Rapido has a couple of videos on their YouTube channel of their antics in recording the actual sounds off a pair of real FP9s on a tourist railroad in the US. The sound volumes will probably eventually be adjusted down, but aren’t nearly as loud as many other sound decoders are on their factory settings, which usually seem to be set to “max”, when 25-50% level would probably sound much better.

I haven’t quite finished the points on several switches on this layout, so I was only able to run the engine back and forth about a foot or two. It seemed to run reasonably well (although it was a little jerky on speed step 1, but smoother on step 2), and the sound revved up and down nicely, but I think I’ll need to take it out to the club layout sometime to really give it a good breaking in.

The engine has some nice lighting functions as well. Headlight and ditch lights are independently controllable, as are the class lights and numberboard lights (although the numberboards end up being just about as bright as the headlight). The headlight, ditch lights and numberboards appeared to have a slight greenish tint to them, when I’d prefer a more “natural” incandesant-looking warm yellow. Note sure yet if I’ll look at possibly replacing the LEDs used.

IMG_8626

Powered up with headlights, ditch lights and white class lights lit. Numberboards are also able to independently light up, but turned off in this photo.

The class lights lit up nice and bright white; the instructions indicated that the F10 function should switch them between Off, White and Green, but I seemed to only be getting them rotating between Off and White. No green. Not sure if I did something wrong, or if it’s something in the programming setup of the decoder, but it’s not too likely that I’ll ever be running this particular unit on the head of a train with additional sections following.

(Edit: Jason from Rapido pointed out in a comment that the decoder on this model is changed and the white and green lights are separately controlled on F10 and F11. This was actually indicated on a technical reference insert sheet for the decoder, which I hadn’t closely read at the time as I didn’t realize the functions would be mapped differently from the information in the original instruction manual for the FP9s.)
IMG_8629

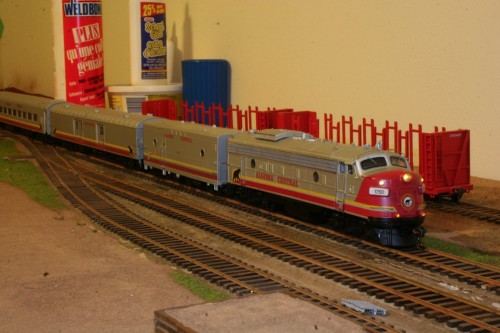
A full set of Rapido Algoma Central passenger equipment: FP9A locomotive, steam generator car, baggage car and coach.

The silver paint on the locomotive is a good match to the shade used on Rapido’s previous offerings: the steam generator car, baggage car and second run of coaches (the original run of AC coaches came out in an odd tan colour, which was changed for the later run(s)). With one of each, it makes a nice solid train.

The lettering and decoration looks pretty good. The model does not have the reporting marks and numbers on the sides near the rear – these were added a little bit later, not when they were originally painted, so it’s not inaccurate, although the units would have spent more of their lives with the numbers than without. So it might have been nice if the side numbers were included, or if a small decal sheet with the numbers was included so modellers could choose. Since I actually model the 1980s, I’m not running this set as any particular year, but it is something that some might wish to note.

Postscript:

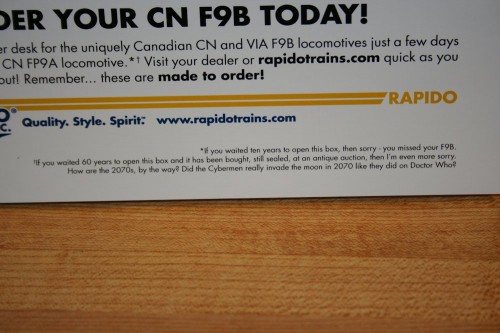
Included in the box was a flyer for Rapido’s upcoming CN/VIA F9B models. The fine print at the bottom is a classic example of the geeky institutional humour brought by Rapido’s founder and owner, Jason Shron:
IMG_8612

Always read the fine print…

25 Hopper Interiors Completed

Slowly but surely over the last few weeks I’ve been working on completing the interior detailing on all of the Walthers hoppers I’ve stripped so far. That’s a total of 25 cars currently in progress at the same time. (This actually represents a little under half my current fleet of these cars.)

These twenty-five cars now have the interior bracing and the treatment to the top chord completed. I explain the modifications a bit more in this previous post, but the process basically involves patching the holes on the inside of the body (where the solid bulkhead part from the stock model was fitted) with body putty, adding the extended lip over the end of the car, filing the top of the sides smooth, instead of the peaked side on the model representing an angle iron for stiffening, and finally installing the new interior bracing. On the older cars I did, I fashioned the bracing from .040″ brass wire, but I’ve now taken to using 3/64″ (.047″) styrene rod from Evergreen to make these, as it’s far easier to file and work with, and the welded styrene-styrene bond is stronger and more flexible than the brittle CA bond to glue the brass to the plastic body.

IMG_8562 IMG_8563

Now i just need to get the other twenty end platforms all up to the same point…