Rapido FP9A Arrived

Today I got a package in the mail from my dealer containing one of the new Rapido FP9A locomotives factory decorated for Algoma Central #1750. Acquired by WC in 1995 for the ACR passenger trains, it’s a little completely out of my era, but I just “had” to collect a couple of Rapido’s models to put together a “modern” (1995-2000) version of the ACR’s regular passenger train. It’ll mostly reside on a display shelf, but be fun to run through every once in a while.

IMG_8608

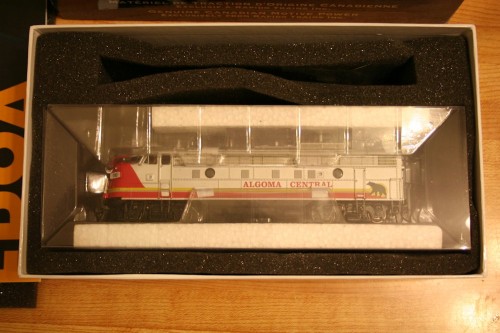
In the box, with solid protective packaging.

The model comes packed in a protective plastic holder that securely wraps around the engine and holds it tightly, and did a good job of protecting it from any damage in shipping. Every little bit and piece appeared to be completely intact.

IMG_8614

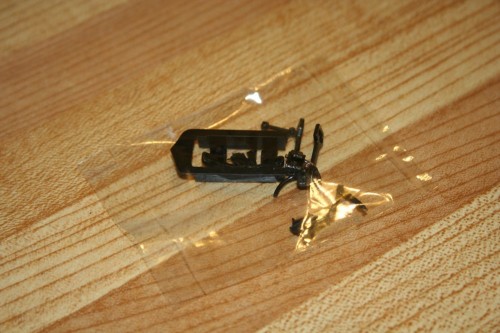
Additional parts bag.

Little parts baggy including extra re-rail frogs, steam line connections and extra couplers and a part for a rear diaphraghm. The AC units didn’t have them (and neither did the majority of the old CN units, and many that did had them removed later), so that piece won’t need to be installed.

IMG_8620

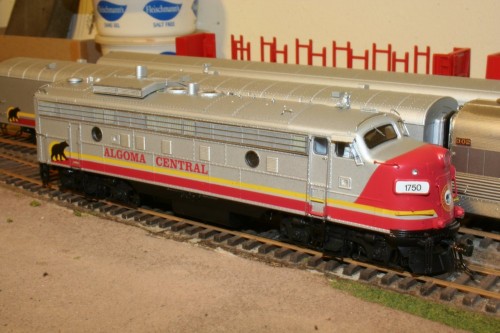
The model, out of the box!

Here’s the model taken out of the box and set on the rails of my in-progress switching layout. You’ll have to excuse the background and the quality of some of these photos; this small layout isn’t very finished and the lighting in this room isn’t the best.
ACR From Blair 015

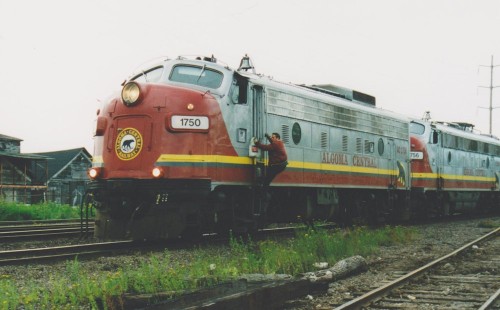
The real 1750 arriving at Steelton Yard on the head of the southbound Agawa Canyon Tour Train. Blair Smith photo, August 1996.

IMG_8625

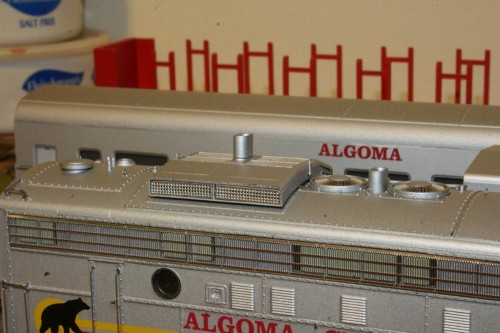
Winterization hatch detail, with stack extension.

The model has a lot of gorgeous detail, although a couple of things stuck out. On the large winterization hatch over the radiator fans, there’s a tall exhaust stack extension which doesn’t appear to have been present on the AC units. This may have been applied at some point in the past to the CN units that eventually (by way of VIA) became AC 1750 and 1751, but weren’t there under ACR ownership. Fortunately with a bit of firm but careful pressure, this stack extension can be pulled out. The hatch also doesn’t appear to be quite fully seated all the way down on the close side, but this should be fixable.
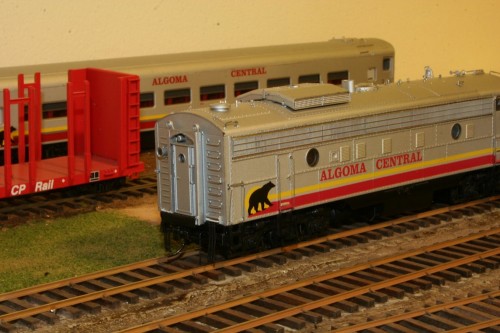
IMG_8627

Rear detail, also showing exhaust stack extension removed. The back-up light to the left of the door lights up when the engine is set in reverse.

Since I got the DCC/Sound version, naturally I wanted to get the locomotive fired up on the NCE PowerCab I’m powering the switching layout with. At first – nothing happened. I checked the manual with the model, and the text indicated that the decoders are set by default to address “3”. (3 is the standard default address for a decoder, but I kind of expected the installed decoder to be set to the model’s road number in this case. No big deal, reprogramming a decoder address is a pretty standard task.) Once I was able to select and send a command to the engine, a quick tap of the F8 function key on the throttle (Function 8 is the standard mute/un-mute function for most sound decoders) brought the sound to life. The sound sounded quite agreeably like the EMD 567 engine in the FP9, which it well should – Rapido has a couple of videos on their YouTube channel of their antics in recording the actual sounds off a pair of real FP9s on a tourist railroad in the US. The sound volumes will probably eventually be adjusted down, but aren’t nearly as loud as many other sound decoders are on their factory settings, which usually seem to be set to “max”, when 25-50% level would probably sound much better.

I haven’t quite finished the points on several switches on this layout, so I was only able to run the engine back and forth about a foot or two. It seemed to run reasonably well (although it was a little jerky on speed step 1, but smoother on step 2), and the sound revved up and down nicely, but I think I’ll need to take it out to the club layout sometime to really give it a good breaking in.

The engine has some nice lighting functions as well. Headlight and ditch lights are independently controllable, as are the class lights and numberboard lights (although the numberboards end up being just about as bright as the headlight). The headlight, ditch lights and numberboards appeared to have a slight greenish tint to them, when I’d prefer a more “natural” incandesant-looking warm yellow. Note sure yet if I’ll look at possibly replacing the LEDs used.

IMG_8626

Powered up with headlights, ditch lights and white class lights lit. Numberboards are also able to independently light up, but turned off in this photo.

The class lights lit up nice and bright white; the instructions indicated that the F10 function should switch them between Off, White and Green, but I seemed to only be getting them rotating between Off and White. No green. Not sure if I did something wrong, or if it’s something in the programming setup of the decoder, but it’s not too likely that I’ll ever be running this particular unit on the head of a train with additional sections following.

(Edit: Jason from Rapido pointed out in a comment that the decoder on this model is changed and the white and green lights are separately controlled on F10 and F11. This was actually indicated on a technical reference insert sheet for the decoder, which I hadn’t closely read at the time as I didn’t realize the functions would be mapped differently from the information in the original instruction manual for the FP9s.)
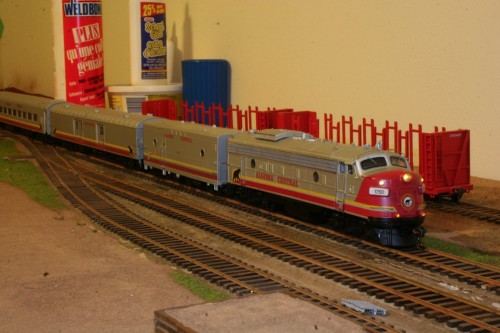
IMG_8629

A full set of Rapido Algoma Central passenger equipment: FP9A locomotive, steam generator car, baggage car and coach.

The silver paint on the locomotive is a good match to the shade used on Rapido’s previous offerings: the steam generator car, baggage car and second run of coaches (the original run of AC coaches came out in an odd tan colour, which was changed for the later run(s)). With one of each, it makes a nice solid train.

The lettering and decoration looks pretty good. The model does not have the reporting marks and numbers on the sides near the rear – these were added a little bit later, not when they were originally painted, so it’s not inaccurate, although the units would have spent more of their lives with the numbers than without. So it might have been nice if the side numbers were included, or if a small decal sheet with the numbers was included so modellers could choose. Since I actually model the 1980s, I’m not running this set as any particular year, but it is something that some might wish to note.

Postscript:

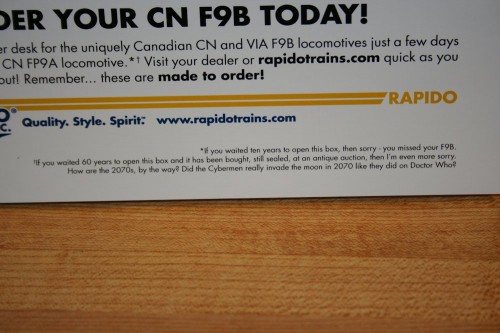
Included in the box was a flyer for Rapido’s upcoming CN/VIA F9B models. The fine print at the bottom is a classic example of the geeky institutional humour brought by Rapido’s founder and owner, Jason Shron:

IMG_8612

Always read the fine print…

25 Hopper Interiors Completed

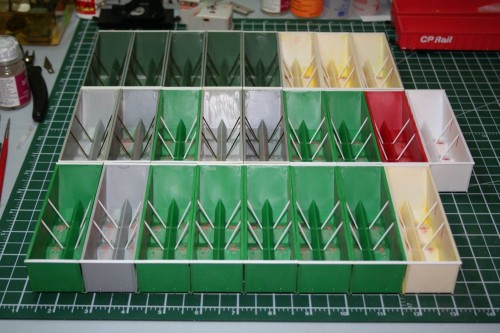
Slowly but surely over the last few weeks I’ve been working on completing the interior detailing on all of the Walthers hoppers I’ve stripped so far. That’s a total of 25 cars currently in progress at the same time. (This actually represents a little under half my current fleet of these cars.)

These twenty-five cars now have the interior bracing and the treatment to the top chord completed. I explain the modifications a bit more in this previous post, but the process basically involves patching the holes on the inside of the body (where the solid bulkhead part from the stock model was fitted) with body putty, adding the extended lip over the end of the car, filing the top of the sides smooth, instead of the peaked side on the model representing an angle iron for stiffening, and finally installing the new interior bracing. On the older cars I did, I fashioned the bracing from .040″ brass wire, but I’ve now taken to using 3/64″ (.047″) styrene rod from Evergreen to make these, as it’s far easier to file and work with, and the welded styrene-styrene bond is stronger and more flexible than the brittle CA bond to glue the brass to the plastic body.

IMG_8562 IMG_8563

Now i just need to get the other twenty end platforms all up to the same point…

CP 252250

Another car lettered with CDS dry transfers:

IMG_8552

Still need to add the re-weigh shop & date (the CDS set only had one for the 1952 NEW date) which I’ll need to pull out of another set in my stock, and extra details such as the ACI label, lube stencils and U-1 wheel inspection dot. And also weather this thing within an inch of its life, as this represents the original paint scheme for this car, and in 1985 it’s over 30 years old.

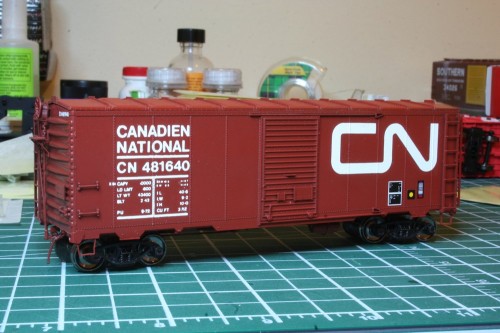
CN 481640

This is a project I pulled out of the pile on the back burner.

IMG_8547 IMG_8549

This boxcar was an undecorated Intermountain model of a 10’0″ interior height boxcar, which I painted some time ago, and started work on the lettering, but then it got left aside.

The model was assembled from the kit as intended, except I also added a small piece of .020x.020″ strip along the botton of the sill tab at the truck bolsters to represent the jacking plate that pretty much all CN 10’0″ cars had at the bolster. The model was then airbrushed with TrueLine Trains “Mineral Brown”.

The lettering is a rub-on dry transfer set from C-D-S Lettering. Using dry transfers is quite a bit different than water slide decals, and there are a few advantages and disadvantages to both. Dry transfers apply just the lettering to the finished model and have no decal film to deal with. You can finish a model relatively quickly with them, and do both sides in an evening since you don’t have to wait for decals to dry. You don’t have the chance to move a dry transfer into position once on the model; it needs to be positioned exactly and held in place while you burnish it onto the model. It helps to apply a small piece of tape to the corners once the sheet with the lettering is located in place. The main disadvantage of dry transfers is in the smallest lettering; the printing process doesn’t allow as fine of detail as can be printed on decal paper. Also multi-coloured graphics (not an issue here with the all-white CN lettering) on C-D-S sets have the different colours printed separately.

I finally pulled this car out and finished off the lettering (except for the last couple of numbers on the Capacity and Load Limit data – that needs to be completed yet). The extra little detail bits (the yellow & black wheel inspection dot, COTS data block and ACI bar-code label) were added from various Microscale data sets.

A little bit of weathering and installation of the couplers, and this car will be just about ready for service hauling various cargos on the remote branchlines of Northern Ontario.

Updated Builders Logos on ExactRail CP Gondolas

So in a follow-up comment on one of my previous posts, I mentioned that the ExactRail CP 65′ gondolas are modeled after a series of cars built in 1979 by Hawker-Siddeley, and to which an identical series of cars was built in 1982 by Marine Industries. The ExactRail models all bear numbers drawn from the 1979 HST series, but have Marine Industries builders logos and 1982 NEW dates. (Naturally.) This is a little annoying, but fixable.

The various CP series that may be represented by the ExactRail model (with varying amounts of work) are:

Series Builder Date Notes
CP 336700-336799 NSC 10-11/1965 Flat ends, high brake rigging
CP 337185-337299 HST 11-12/1979 Ribbed end, low brake rigging
CP 337300-337449 ? 6-7/1969 Flat end, high brake rigging
CP 337450-337549 MIL 4-5/1982 Ribbed end, low brake rigging

You can follow my efforts to model a car from the 1965 336700-336799 series in this other series of posts.

I’ve been endeavoring to correct some of the other ExactRail cars I have, removing the Marine Industries logo and adding in the Hawker-Siddeley logo. The old lettering can be removed by VERY carefully scraping with a curved scalpel blade. Done very lightly and carefully, this can remove the printed lettering without damaging the paint underneath. Another method I’ve used to successfully remove lettering is to rub it with a Micro-Sol soaked Q-tip.

The Hawker-Siddeley logos came from a Microscale data set of various freight car builder logos (set # MC-4309).

The original Marine Industries logo is at left in the below photo, and the Hawker-Siddeley logo and placement is illustrated on the car to the right.

Image1

I haven’t addressed changing the new date by the weight data lettering below the car number yet; I probably will, but that will involve piecing some things together from some proper CP data lettering (which I will need to make sure I have).

To maintain a little bit of variety, I also wanted to leave one car as representing the later Marine Industries, which would allow keeping the existing MIL logos and build date data, but require renumbering the car into the new series. The snag here of course is that the numbers on these gondolas are a bit smaller than the standard numbers on other cars, so the reporting marks and numbers from standard CP Rail lettering sets don’t fit here. Naturally I fully realized this after I removed the car number from the car. (D’oh.) Hopefully I’ll be able to turn up some appropriate letters to redo the car number on that car so I can have a car from the MIL series. If not, I suppose I’ll have to rebuild it into second black NSC car from the 1965 336700-336799 series…


_______________________

Last week I stripped up to 20 of my Walther hoppers in preparation for detailing. I’m currently working on the interiors of these cars, puttying the slots and holes where the bulkhead pieces used to go and preparing for the interior bracing remodeling. This brings the total number of these cars currently in production to 27, and that’s less than half of what I have stockpiled. I’m hoping to bring this batch of about 2 dozen up to about the same point and then proceed with the next steps as I figure them out in assembly-line fashion. So it might be a little bit while I catch up, and then hopefully you’ll see new posts on that topic.