With two sides finished, I moved on to preparing the ends and cutting the roof to length.
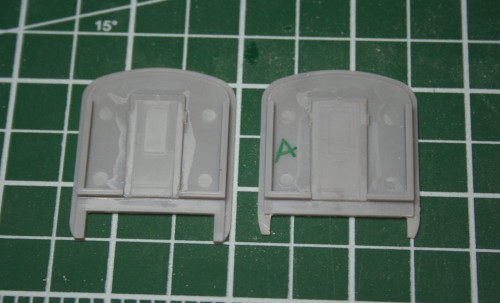
The ends from the Train Station Products Pullman-Standard core kit just needed a minor adjustment near the bottom to handle the curved skirts at the end of the cars. The stock ends have a bit of thick bracing all the way down to the bottom, which interfered with the curved skirt on the USP side. I cut this back with my razor saw, and also shortened up these tails and filed a different curve profile into them to match my sides. A picture being worth a thousand words, the below image comparing the modified end (marked with an “A”) to the stock end probably explains it better and clearer than I can:
Necessary to make the sides fit the ends properly, but pretty simple.
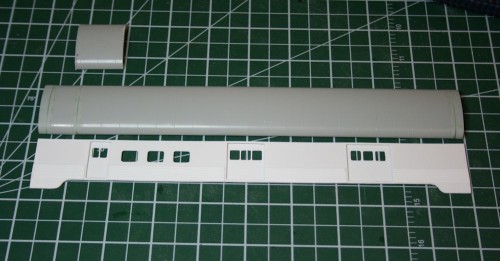
With the ends taken care of, it was time to tackle the roof. These baggage cars are quite a bit shorter than a full size 85′ coach, so the roof needed to be cut down to length. I ended up making a total of four cuts; with the extra piece that’s removed taken out, there were three places where the roof is spliced back together.
In a lot of the reference photos I have it’s a little difficult to make out the seams in the roof, but it appears from one or two photos that the third panel from the one end is a fair bit narrower than the others. This then is where the cuts were made to remove the extra bit of roof. I also cut the two end-most panels to narrow them down a little. A lot of careful filing to clean up the cuts and remove extra material to bring the length down to exactly the right amount for the splices, and we end up with something like this:
You can see I’ve also installed the baggage doors from the kit. Like the sides, these are .020″ styrene sheet with the window openings milled out. They’re cut oversize to the opening so they can be glued to the back of the clear base. I made one modification here to the doors, trimming away the extra material below the door in order to clear the floor.
Here’s the underside of the roof, showing styrene strip used to hold the spliced roof together:
You can also see in the above image that I cut away short stretches of the inner ridge on the roof in order to clear the doors on the sides.
With the ends and roof prepared, next I can assemble the car’s body!


