Wawa Station Doors and Windows

Part of this project was done quite a long time ago, and then other projects got in the way for a while. After a big cleanup of my hobby workspace last weekend, I rotated the Wawa station back onto the workbench to actually finish off some detailing on this structure.

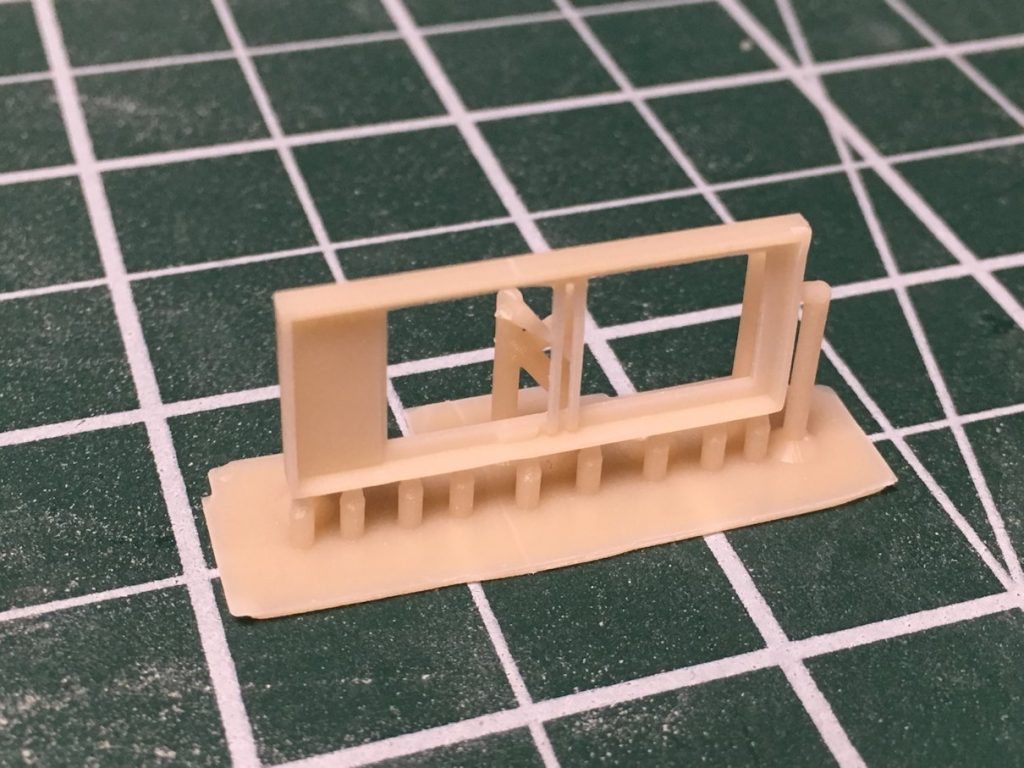
The station featured some unique windows in different sizes, so I drew and 3D printed the windows and entry doors for the station. With bathroom, operator’s bay, and upstairs hallway and kitchen windows all being unique sizes, and upstairs windows being frame mounted and ground floor windows mounted in brick, there are no fewer than a dozen unique windows and two doors (left and right versions) that were drawn for this project.

3D printed entry door

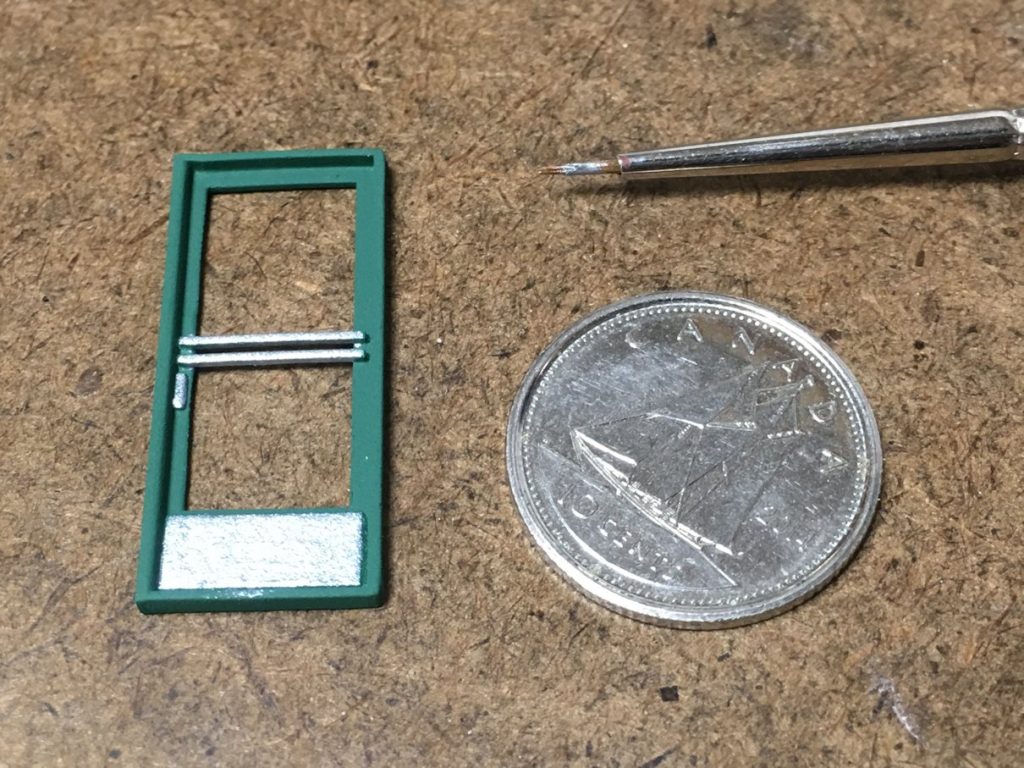
Having been designed following the architectural blueprints and printed, the windows were all primed and painted in the green colour I used for the station trimwork, and clear plastic installed on the back side with clear parts cement. The doors featured aluminum push bars in front of a large glass window. The aluminum bars and door locks were hand painted with a fine tipped brush.

Finished door after detail painting.

Once the windows were painted and had their clear plastic “glass” installed, it was a matter of carefully cleaning up the openings in the structure with a file to precisely fit the doors and windows, and glue them in.

Windows and doors installed on track side, except baggage room glass block windows.

The baggage room of the station featured glass block windows instead of framed windows. To model these, I scratchbuilt the glass block using some heavy plastic from some clear packaging. Lines were scribed at scale 6″ spacing, and the front side painted with light grey acrylic which was quickly wiped off the surface with a paper towel in order to just fill in the mortar lines between the “blocks” and leave the glass clear.

Mortar lines scribed into clear plastic for glass block windows.

After painting the mortar lines on the “front” of the piece, I flipped it over and sanded the back side with super fine sandpaper in order to rough up the surface and make it cloudy looking. Then the pieces were cut to size and filed to fit precisely in the window openings and glued in place using clear parts cement.

Finished windows and doors including glass block windows in baggage room. (Rear/street side.)

When gluing in the glass block pieces like this, push them into the opening from the inside of the structure, as any glue that gets on the rear/inside of the window will smooth out the roughed up surface and make a visually clear spot again.

The main details left to complete the station are the name signs and to re-do the gravel roof. The station was disused by the time period I am modelling, and it is possible that I should actually board up the glass windows for the abandoned structure, but for now I’ll leave all the windows intact.

Steam Generator Roof Details

Catching up on some projects that I worked on a while ago, but haven’t posted to this blog recently. One of those projects is my pair of scratchbuilt ACR steam heater cars.

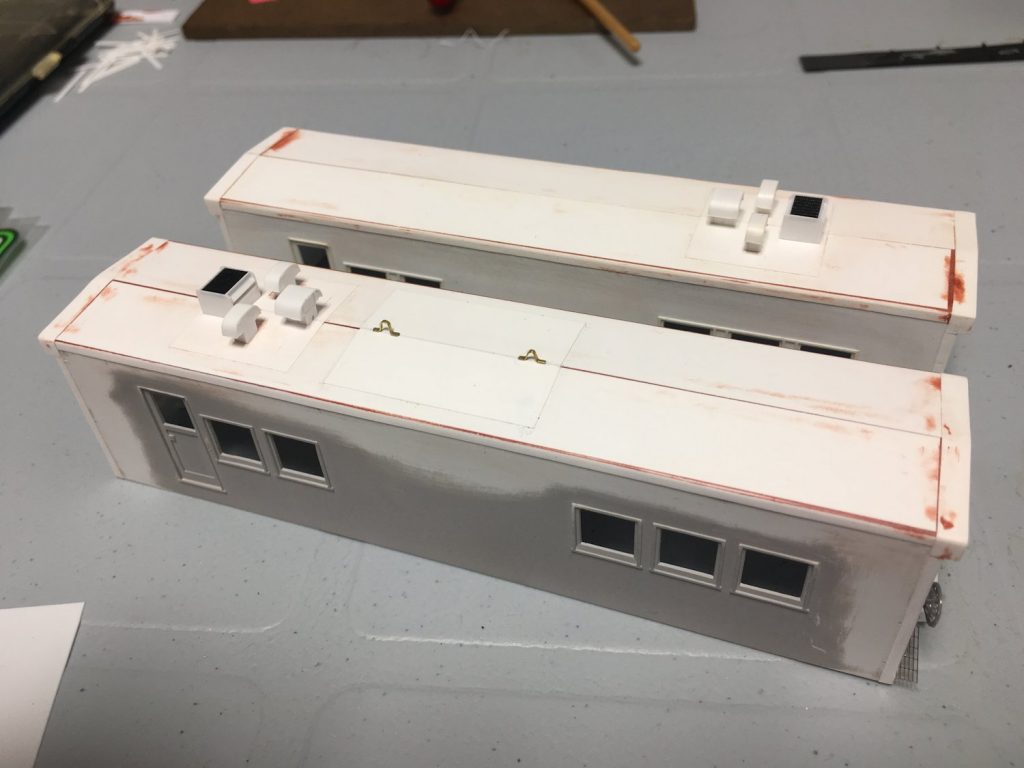
I assembled the bodies, and then these sat for a while while I worked out the roof details.

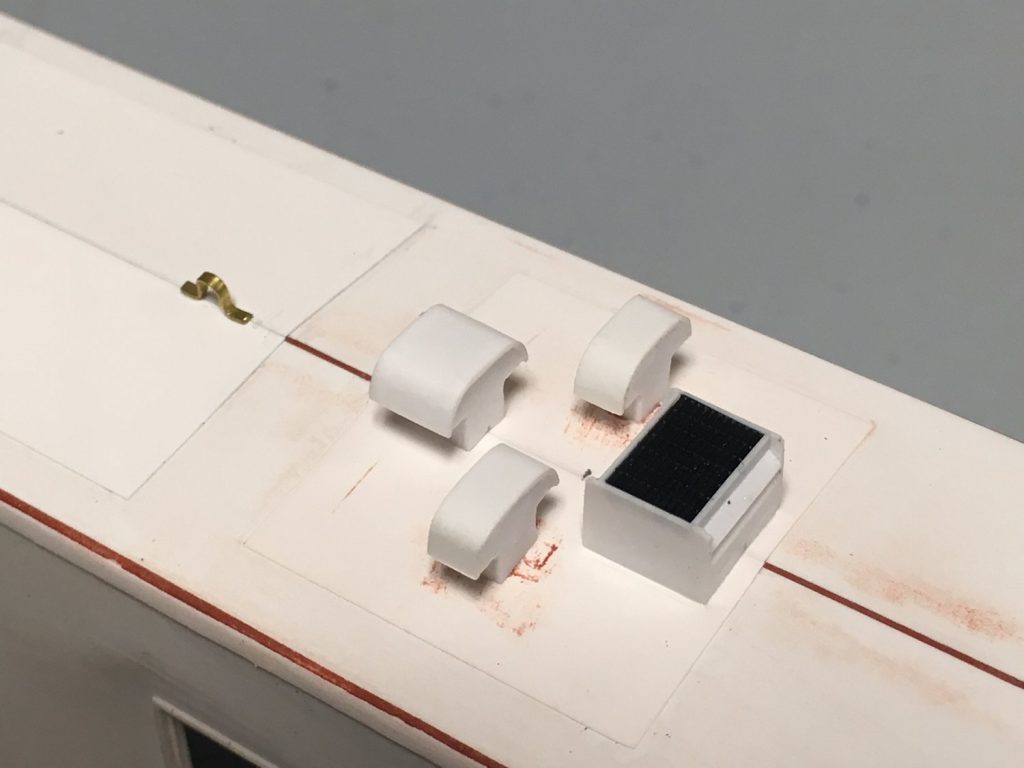
The main details are of course the various vents for the steam boiler. These are placed on top of a hatch on the roof. The hatches were made with .005″ styrene sheet glued to the surface of the roof. *Good* roof photos are hard to find, most of the detail is only worked out from side or oblique shots, but I have enough to go on to make out the size and positions of the hatches. Photos also seemed to indicate the one car had an extra hatch in the middle of the roof (not sure if and/or when this was added to the car, so it may or may not have been there in the mid-eighties, but it makes for a good visual variation). A couple of bits of flat brass wire formed into lifting loops finishes off the middle hatch.

The actual steam vents were an interesting challenge to build from .010″ styrene sheet and strip. The mushroom-shaped stack ends were carefully cut and filed to shape, then assembled with simple sides, and then the top was added by curving strips cut from styrene sheet over the top. Liberal use of styrene cement and patience holding the part in place while the solvent evaporated and dried was involved.

The boxy vent was fairly simple by comparison, assembled from assorted .010″ strip and sheet. The “grillwork” on top was cut from a scrap piece of walkway material in my junk/parts box.

There’s not much more to do on this pair of cars any more before painting them, but I have a few other passenger car related projects in the works as well, and I’ll probably hold off on the painting for a bit yet until I can put a bunch of them into the shop. Need to get some appropriate shades for the grey and maroon paint…

CP Napanee Industries Coil Steel Cars

As the large Algoma Steel plant in Sault Ste. Marie is arguably the primary industry on the Algoma Central Railway in any era, steel traffic forms a major part of the tonnage carried by the railway, and included in that is “coil” steel (as far as I know, the only major steel product not produced by the Algoma mill is wire). Thin sheet steel is wound into coils that are shipped out to manufacturing plants across the continent to be turned into all manner of steel products.

To transport this valuable cargo by rail, the rail industry developed cars with V-shaped wood-lined loading troughs to transport the coils without damaging them. Some of these cars were flatcars or gondolas with the loading troughs added, but by the 1960s several builders were producing various specially designed cars for coil steel service.

Note – There seems to be a bit of a gray area in whether or not to class these special cars as flats or gondolas – indeed today most of the modern equivalents are now pretty universally considered as gons (“GBSR” AAR designation), and while many identical cars were also classed as “GBSR” by their owning roads, the cars I’m about to discuss were classed (at least initially) as “FMS” by both CN and CP.

A major builder and innovator of this type of design – a coil car with lengthwise loading troughs, removable hoods, tracks for moveable load restraint bars, and cushioned underframe to protect the contents – was Evans Products which built hundreds of these cars for most of the major American railways. A minority builder was Canada’s Napanee Industries (NI) of Napanee, ON which built a total of 75 cars in 1967 following the Evans design (probably under license for the Canadian market) for Canadian National (25 cars – CN 190200-190224) and Canadian Pacific (50 cars – CP 313500-313549).

CP 313533 in October 1970 in original as-delivered black with script logos. Jim Parker photo.

A model representing the Evans Products coil car was and is produced in HO by Walthers. (A very similar US Railway Equipment car is produced by Intermountain (formerly Red Caboose tooling) but the body is different and has a straight sill). The Walthers car is somewhat of an older model, dating back to when Walthers actually sold their cars as kits (and I picked up a 3-pack of kits quite a number of years ago that lived for a [long] time on my shelf), but with a few upgrades these can still make respectable models, and an easy kitbash to one of the Napanee cars.

The first thing to do to the Walthers model is to cut away the original walkway and throw it out. Not only is this part rather thick and crude by today’s standards, the Napanee cars did not have the full-length side walkways featured on the model. I also carved off moulded grab irons and stirrup steps to replace them with finer wire parts.

To cover the holes left by the walkway supports and seam between the body halves, rather then trying to fill and sand body putty along the length of the body between the upper and lower flanges (or to be more honest, trying and giving up), I simply laminated 0.005″ styrene sheet cut to fit to the car side to get a smooth result.

Pre-paint construction photo.

Since the NI cars didn’t have full walkways, the removable hoods did not have lengthwise handrails on them either, which the Wathers model has. This is a pretty simple matter to carve off the handrail supports and sand them smooth. At the same time I took the opportunity to replace the corner grabs on the hoods with wire. Otherwise the hoods are essentially “stock” with all the kit parts, although I did scratchbuild matching hoods using the kit part as a pattern for a fourth car that had come with rounded hoods…

Wire grabs were mounted to the body, and step handrails also added from brass wire. The walkway grating on the ends of the cars was added using Plano etched material. The final modification is a small triangle of styrene strip angling from the side sill outboard of the trucks to the bottom of the main body, and a small loop of brass wire representing a protective guard around the brake control valve on the side.

Painting and lettering the cars is where things get a little interesting, as there’s no specific decal sets available. I built and painted two cars for CP, one in original black and one in red (2 more cars for CN are still in the paint shop).

CP 1979 “Action Red” car painted but unlettered.

The red CP car was painted and lettered following a prototype photo of
freshly painted CP 313500 on pg. 99 of “Canadian Pacific Color Guide to Freight and Passenger Equipment: Volume 2” by John Riddell and published by Morning Sun Books. This shows a car in a 1970s repaint.

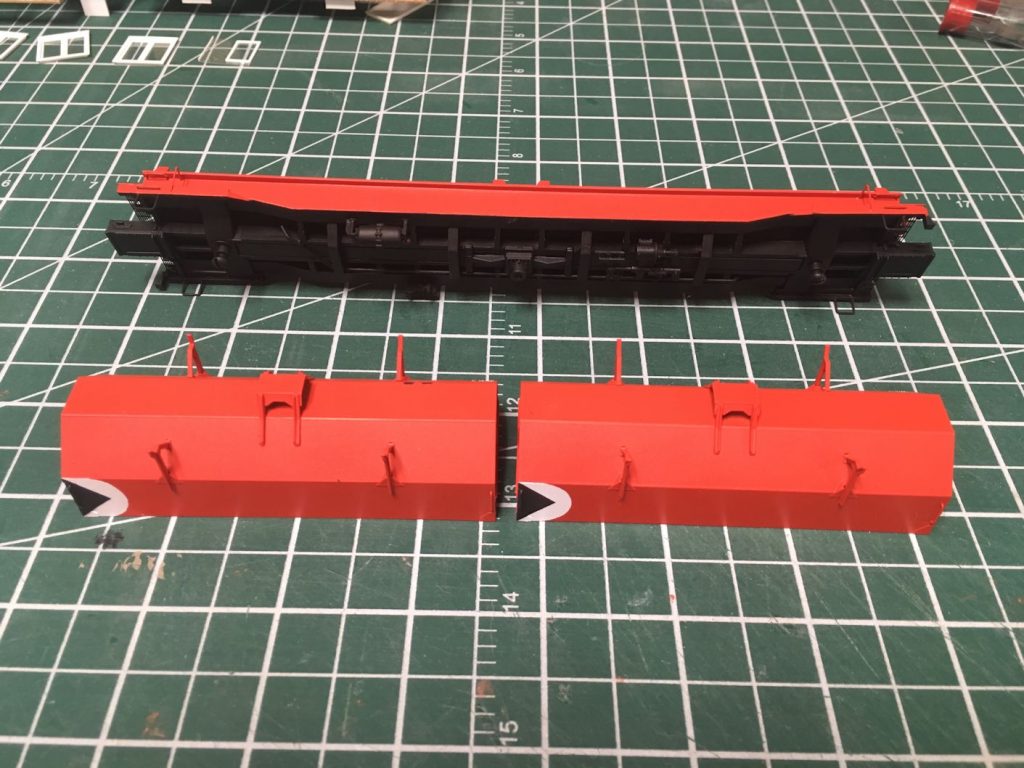
The car and hoods were sprayed with Rapido ProtoPaint “CP Action Red”, and then masked off to paint the underside of the car and the draft gear black. Also the multimarks on the hoods were custom masked and painted as no decal was exactly the right size. The rest of the lettering was cobbled primarily from a Highball gondola set (although almost any CP Rail freight car decal would work as a source) and some Microscale consolidated stencils. The prototype was a 1979 repaint, so no ACI label is present on this car. Numbers and data were painstakingly put together with a magnifying visor.

Two CP cars painted and lettered.

The black car consumed no less than three sets of Black Cat decals – 2 sets of a gondola with script lettering (CPR340998) for the hood logos and end reporting marks, and a skeleton “stake” flatcar (CPR305560) set for the correct size reporting marks and numbers. This provided ample data to work with. Incidental decals such as ACI labels and consolidated stencils were added from Highball and Microscale sets. As these are 100-ton cars, U-1 wheel dots do not apply.

Perhaps if I were doing a larger set of these cars in the future I might commission a custom set of specific decals, but I was able to piece enough of it together from existing sets.

The cars still need to be sealed and weathered, but for now the paint and lettering work is for the most part completed on these two CP cars. Hopefully the CN fleet will have its pair completed soon as well.

Freight Car Friday #74 – CP 305560 Model

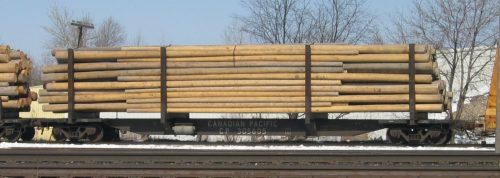
This unique Canadian Pacific skeleton flat is a new model I just finished* this week.

*(Assembly, paint and decals; still needs clear coat and weathering.)

The model is a Custom Finishing kit, which is made up of a series of soft metal (pewter) casting. After cleaning up all the parts with a fine file, and drilling holes for grab irons and truck and coupler box mounting screws, the model was assembled per the kit instructions using two part epoxy to glue the major parts together. As there’s barely a dozen pieces, it’s actually a very easy and straightforward build. I also drilled through the joint at each end between the main spine of the car and the end platforms and pinned it with a short piece of wire to reinforce the joint, so that the main structural pieces aren’t only held together by the epoxy. One extra addition I made was to apply 1×10 plates for the KarTrack ACI barcode labels on the right-most stake on each side, and I also drilled holes in the end sills to mount Kadee #438 air hoses.

With the assembly completed, the model was airbrushed black and lettered with decals from Black Cat Publishing specifically for this car. ACI labels came from a MicroScale set, and a couple of missing elements (“Plate C” marking and NSC builder’s logo) were added from a Highball CP Rail flatcar set.

The prototype for this car is one of 50 cars built in September 1968 by National Steel Car as CP 305560-305609. (Another 300 identical cars were built for Pacific Great Eastern in two batches in 1966 and 1968.) The cars were designed for use transporting full length logs and poles.

I’ve heard some mention of shipments of telephone poles to the Sault Public Utilities Commission; I’m not sure where such shipments would be unloaded, but all that is needed is a team track with a driveway beside it. Whether such movements actually happened with any regularity, the “rule of cool” applies here a little as well, and that’s what the waybill for this car will show when it runs on my eventual layout.

Just need to make a (removable) pole load for this car now…

Custom Finishing Log Truck Kit – Frame and Modifications

With pulpwood loading operations being a major feature of the Algoma Central Railway, I want to have some vehicles and loading equipment as well to feature at at least a few of the loading spots on the layout. To that end, some while back I picked up a couple of Custom Finishing pulpwood truck conversion kits. These kits are cast in white metal and contain all the parts including log bunks and parts for an integrated loading crane to kitbash from a semi truck model (you have to supply the base truck to combine with the kit.)

The Custom Finishing Kit has a cast metal frame piece and the instructions indicate that it is designed to fit the old Atlas Ford “LNT” truck. I didn’t have any Atlas trucks but I did have an old Athearn Kenworth truck kicking around from my old 4×8 layout in my parent’s basement 20 years ago. I didn’t have any other real use for this truck cab so I decided to convert this into the pulpwood truck.

I did my own frame modifications on this one, removing the fifth wheel and filling any remaining nubs and raised detail flat on the top surface of the rear frame and cutting the frame right in front of the axle springs. The frame was extended with pieces of HO 4×10 strip and capped with a piece cut from .040″ sheet. A few pieces of .010x.040″ strip along the bottom of the frame also helped reinforce and strengthen the joints.

The fuel tanks in the Athearn kit are designed to sort of clip on over the frame, which looks rather toy-like. I cut the mounting clips off of the tanks and glued them directly to the sides of the frame, which looks a little better.

The rest of the frame conversion consists of gluing the protective bars and log bunks to the frame with CA, as well as the assembled base for the integrated log handling crane. There’s also an end piece for the frame.