Newaygo Lumber Loads

So a couple months back, I showed the first few completed blocks representing wrapped lumber bundles for Newaygo Forest Products which operated a sawmill at Mead from roughly 1974-1985. Well over the last two months, that small pile of about half a dozen blocks has turned in to a much larger pile of blocks in four different lengths, and I’ve been able to start building the first few loads.

This is the first full-size load completed and I probably have enough material for at least 8 to 10 more.

IMG_4123

The blocks are glued together into a solid mass with scale stripwood spacers between the blocks, paying close attention to how the blocks align and staggering different lengths to represent how the load would be secured as a cohesive unit. In the model world, the load is all glued together, but in the real world it’s all held together with strapping. (Spend some time studying older photos of lumber loads on standard (not the modern centre-partition lumber cars which are loaded a little differently) flatcars to see how the bundles are secured together.) The strapping on the model is represented with 1/64″ wide Chartpak graphics tape, which actually roughly scales out to about 1.5″ wide, not too oversize.

It’s taken a LOT of work to get to this point (researching, creating the graphics on the computer when I’m not an expert at graphics design and drawing programs, cutting all the blocks (actually that part just took an hour or two), **sanding** all the blocks (and this week’s Blu-ray movie selection(s) are…), gluing the paper wrappers on all the blocks, cutting the stripwood spacers for the load, finally building the load, and applying the strapping details) but the end result totally kicks the pants off some generic block of plastic or resin, the graphics actually match the particular prototype mill that the railroad served, and each load can be a little varied and completely unique from each other. This load ended up with a slight gap in the top row. I plan to have others with the small gaps at the ends, hopefully a few that are actually solid, and at least one with only a half row on the top.

I’ve also made four of these little loads for the 40′ cars based on a pair of late 1970s photos.

IMG_4124

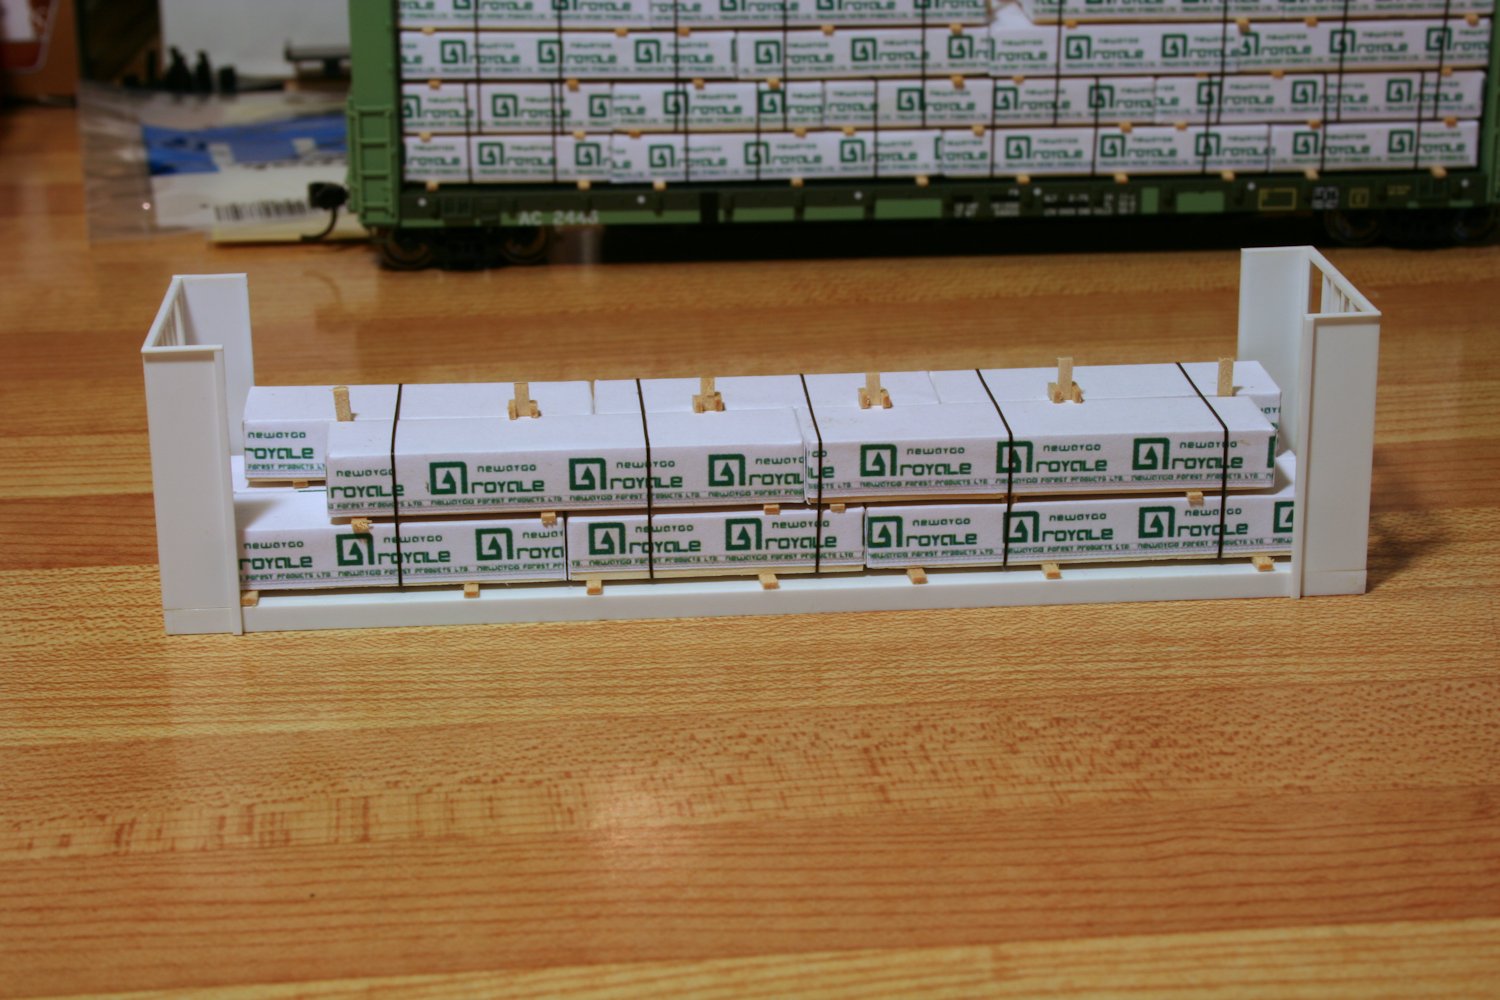
These cars were non-interchange though at this point, so presumably anything being shipped on these would have to be transloaded in the Sault. These small cars also have about a third of the capacity of the larger, more modern 52′ bulkheads so they probably won’t get used regularly, but might be thrown in occasionally for some variation. The rest of the loads I build will all be for the larger cars that will typically be used.

It’s a Wrap…

…wrapped lumber bundle that is.

IMG_2648

I’ve been spending some time lately working on making up some wrapped lumber bundles that can be used to put together some flatcar loads (and any extras will be saved to make stacks of finished lumber around the mill property when I build that location on my layout.

These bundles are wooden blocks wrapped in paper printed with custom graphics matching the logos used by Newaygo Forest Products. Since Newaygo is a bit of an obscure operation compared to say, Canfor (Canadian Forest Products) or Weyerhauser or other larger lumber companies, I was going to have to come up with a custom solution. Very fortunately I have this Ted Ellis photo of AC 2425 with a Newaygo lumber load as well as a straight-on photo of the sign in front of the old Newaygo office still standing at Mead to work from in order to draw out the logo and letter font.

I am not particularly proficient with graphic design or Photoshop, but I was able to draw out the logo and text using the 3D drawing program Sketchup, as the squarish logo and letters with rounded corners actually lead themselves nicely to being drawn with this program, and then exported the front view as a PNG image, which I cleaned up a little with Paint and resulted in the graphic below:

Newaygo Royale lumber wrap graphics single

The bottom line “Newaygo Forest Products Ltd.” was a bit of a guess, as you can’t really quite make out that lettering in the Ted Ellis photo, but this prints out pretty small in the end result and you have to really lead in close to read it. Feels about right though.

My dad’s hobby is woodworking, and he has a pretty nicely fitted out workshop at his house. As I am fortunately currently living in my hometown again, an evening visit to my parents place last week with a couple of hours with my dad in his workshop turned a scrap piece of 2×6 into a large pile of wooden blocks sized for scale bundles of lumber in 8′, 10′, 12′ and 16′ stud lengths. The original block of wood was ripped into small strips using the table saw, and then the strips cut off to length using a band saw with carefully measured fence distances.

The final sizes of the blocks are 8mm tall by 13mm wide/deep, with lengths of 28mm (scale 8′ stud bundle), 35mm (10′), 42mm (12′) or 56mm (16′).

Since then I’ve slowly been cleaning up the blocks by sanding off any surface burrs and splinters (I’ve got a large pile to go through yet!) and started gluing on the paper wraps on a few blocks to start getting some finished pieces. I’ve got to finish off quite a few more in order to start assembling a load, but when I’m done wrapping all the blocks we cut last week, I should have enough to do at least half a dozen various loads with some left over for lumber mill scenery in the future.

If anyone else modelling the ACR or upper Michigan (or just looking for something a bit different) would like to print off some graphics to make their own Newaygo load(s), I’ve uploaded a ready-to-print PDF file which will print off a series of graphics to the correct size for HO scale bundles.