Side Tracks

So I was just routinely checking in here recently, and I realized it’s been well over a year since I posted anything new on this blog. Where does all the time go?!

I thought I should at least throw some sort of update here on this blog. While I haven’t really completed any projects worth writing about on this AC blog, I’ve remained active with various things in the hobby, although non-ACR projects have been dominating my workbench over the last while, but I supposed I can highlight some of the things I’ve been doing. After all, this is my blog site, and I can post whatever I like, although the focus here will always remain on the ACR.

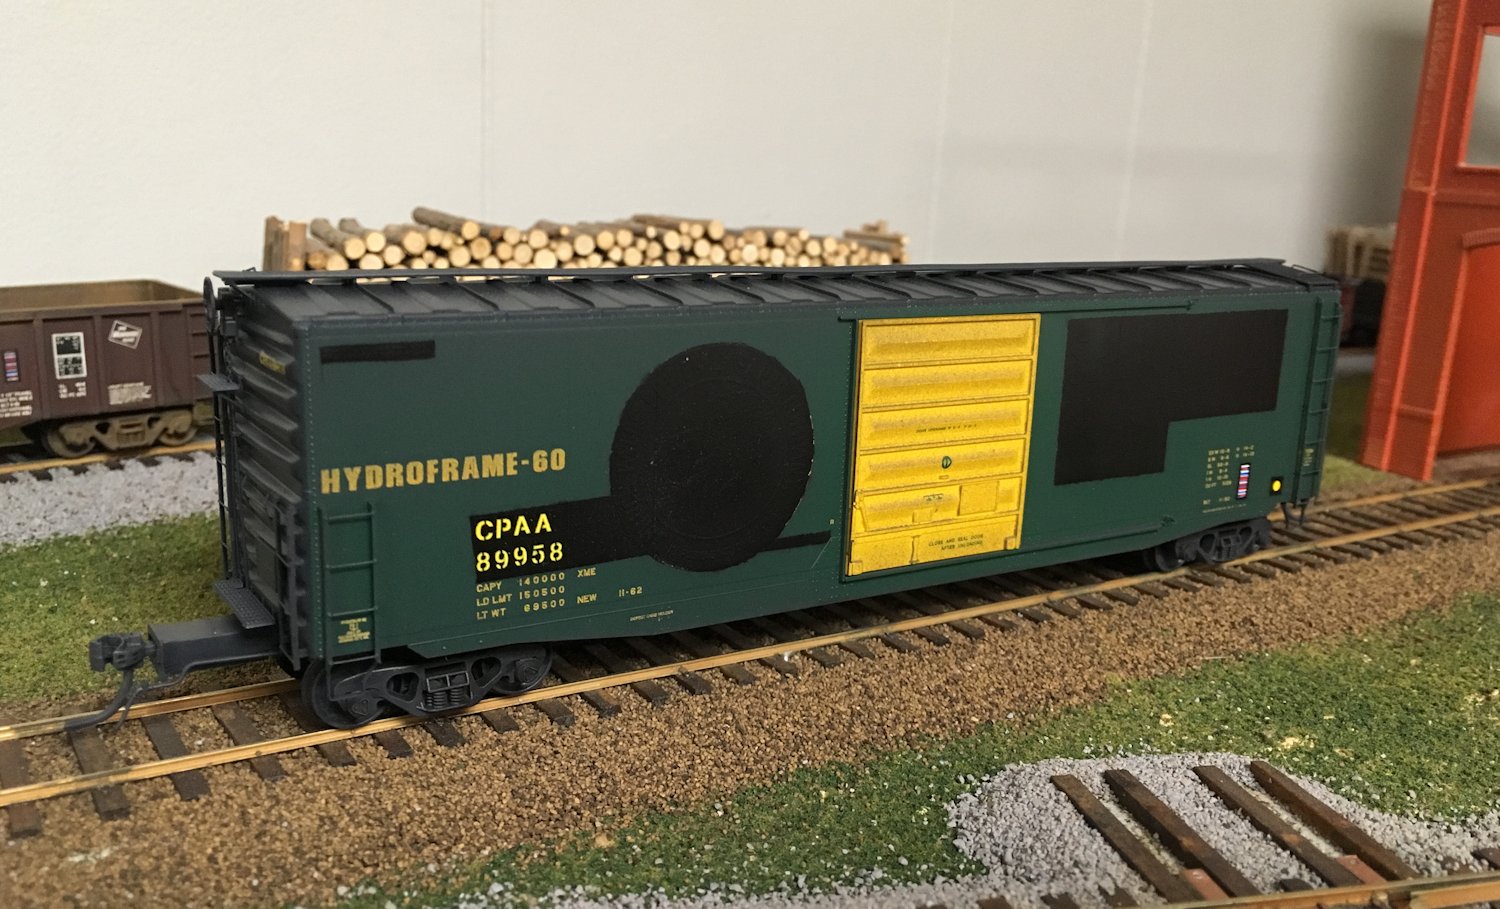
As you can see from my last post here about AC covered coil steel gondolas, I’ve gotten into some 3D design and printing. While it’s certainly providing an avenue for certain ACR projects, my major current projects have been CPR related projects for the club layout, not my personal ACR.

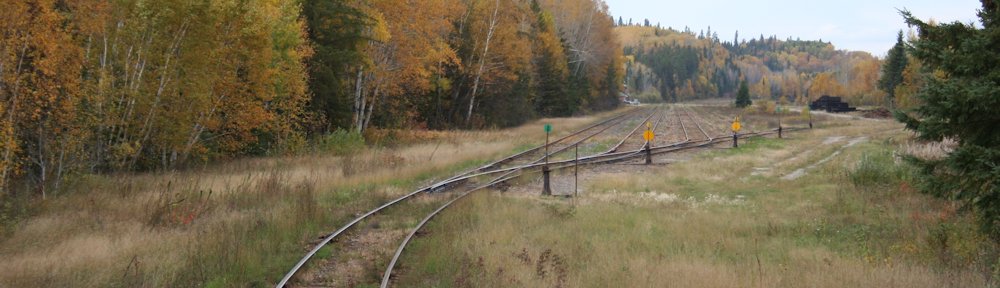
A lot of people who know me – particularly in person, but I’ve mentioned it here once or twice as well – will be aware that I’ve been involved with the Waterloo Region Model Railway Club for many years. If you don’t know the club, we are trying to model the actual location and operations of the Canadian Pacific Railway around Sudbury, Ontario as it existed during the decade of the 1970s. This means a lot of custom structures, but also some unique rolling stock and equipment that was used in the area.

In this vein, I’ve been working on a pair of large, long-term projects for the CPR Sudbury Division. One of the biggest and most important things that I saw 3D printing would solve is the unique fleet of 26′ drop-bottom gondolas that were used for hauling nickel ore from local mines to the INCO smelter near Sudbury.

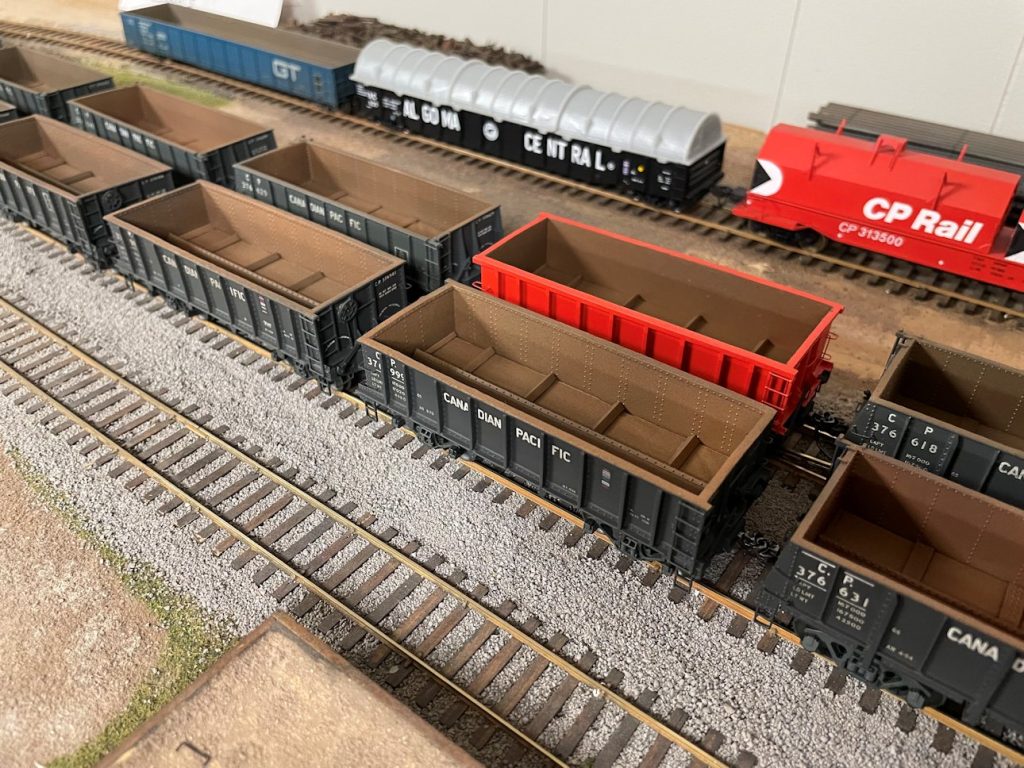
These cars were unique to this area and its operations, so other than grossly inaccurate stand-ins painted in CP colours, these are cars that will never be done as mass-produced models. There was one version of these cars that was made as a resin kit many years ago by Sylvan Scale Models, but it’s a tricky build and only one of roughly half a dozen different variants of these cars that was in service.

I’ve been working on a massive project over the last three years to design, print, and build an entire fleet of ore cars for service on the club layout. I’ve completed four distinct model designs (including a replacement for the Sylvan car, which builds up much easier than the old kit, which during this design process I also found rides a bit high with an underframe that’s a bit too tall).

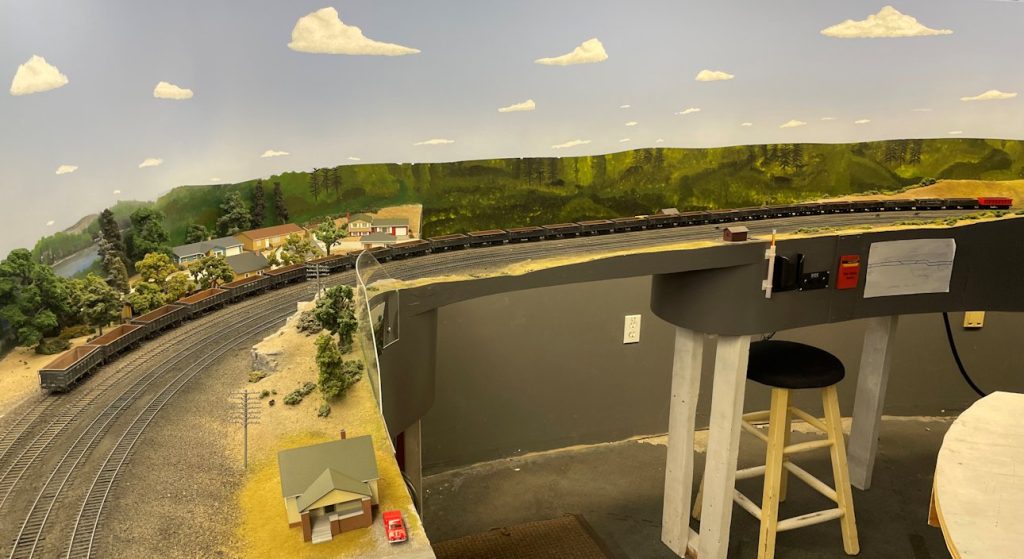
As of last summer, we have 35 completed cars allowing our first nickel mine on the layout to actually open for service, running loaded and empty trains back and forth to Sudbury yard. Many more cars still need to be built to service two more mines and a quartz quarry, which aren’t built yet, but construction expansion on the layout is steaming ahead and while the project scope is large enough to take a few more years, being able to run to these locations is at least visible on the horizon.

I’ve done some detailed posting on this project in a thread on the Model Railroad Hobbyist forum, which you can read here.

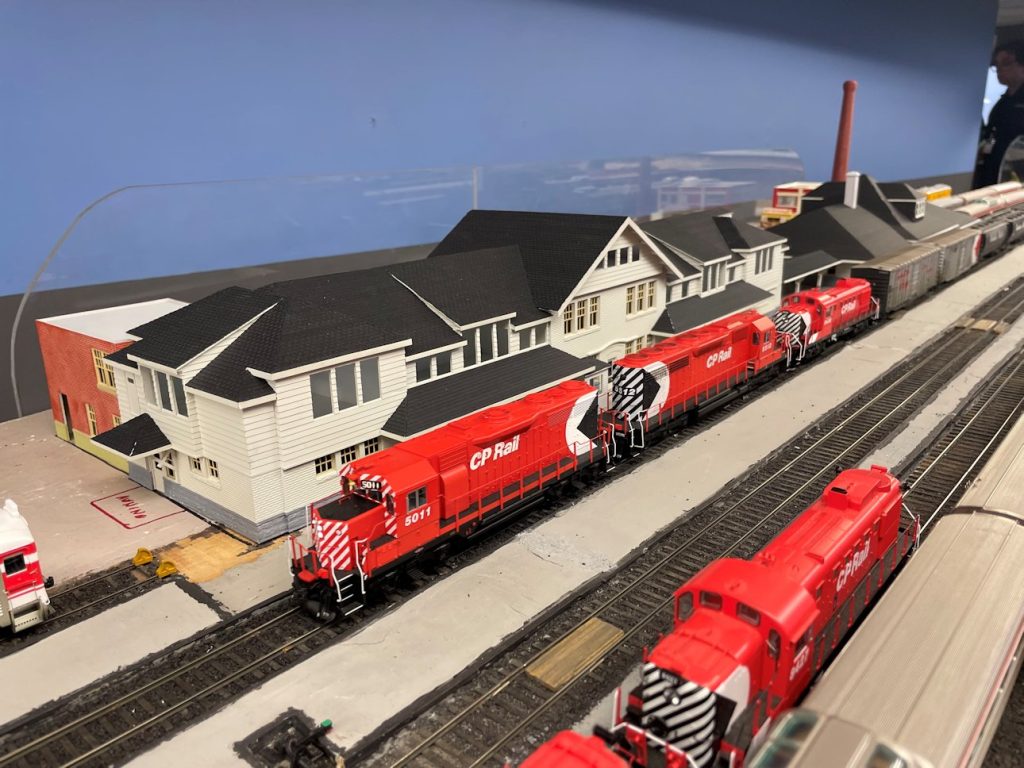
My other large project which has taken almost three years of off-and-on work is the passenger station and attached division office building at Sudbury.

Both of these structures are significant large structures that are a unique signature of the prototype location. Both structures together are nearly four real feet in length.

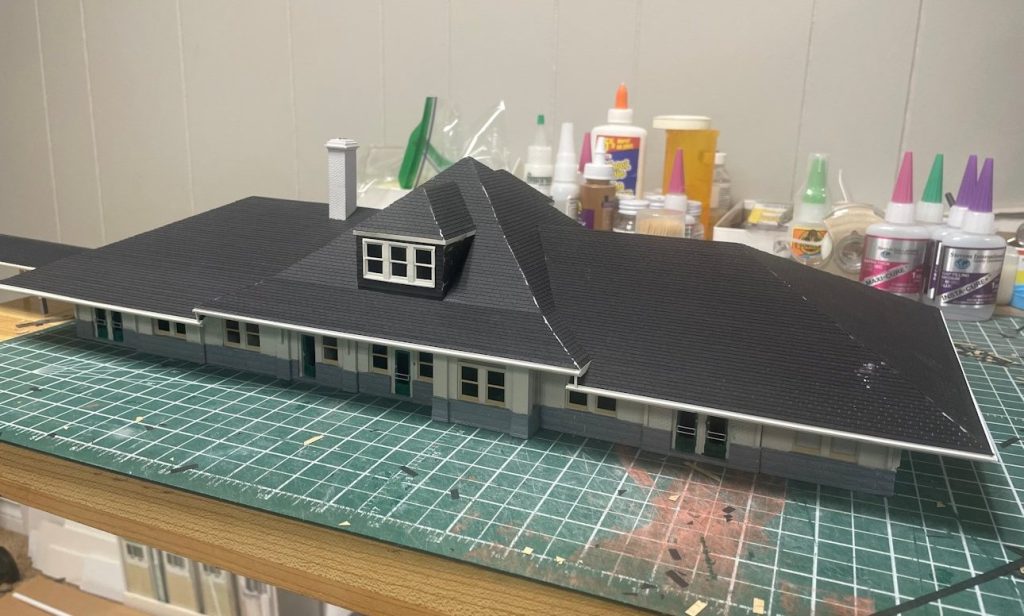
The station (which still stands today, and is still used by VIA Rail for their Sudbury-White River local RDC service) was modeled by 3D printing the walls in sections. The roof is constructed from sheet styrene, but everything below the roof line, as well as the dormer windows, was printed.

The second building, which housed the administrative offices for the Sudbury Division and baggage-express functions (which later moved into the station after the old station restaurant closed in the mid 1970s), was built as a conventional styrene scratchbuild, however I printed all my own custom doors and windows (over a hundred, in about half a dozen different varieties). (The prototype structure was abandoned after the Sudbury Division was merged with the Schreiber Division and administrative functions moved to Schreiber, and torn down around 2000.)

Both model structures aren’t quite finished, and need some more finishing work, but they’re getting close. I’m hoping to at least have the station finished 100% early this fall, and get as much done on the administration building as I can and actually complete this project over the fall/winter.

I’ve also posted a bit more detail about these buildings and this construction project in an MRH forum thread.

You can see all of the above projects at the fall open house of the WRMRC on October 18, 2025.

My other little sideline isn’t really taking a lot of actual modeling work at the moment, and may seem like it comes completely out of left field, unless you know a bit more about my personal life.

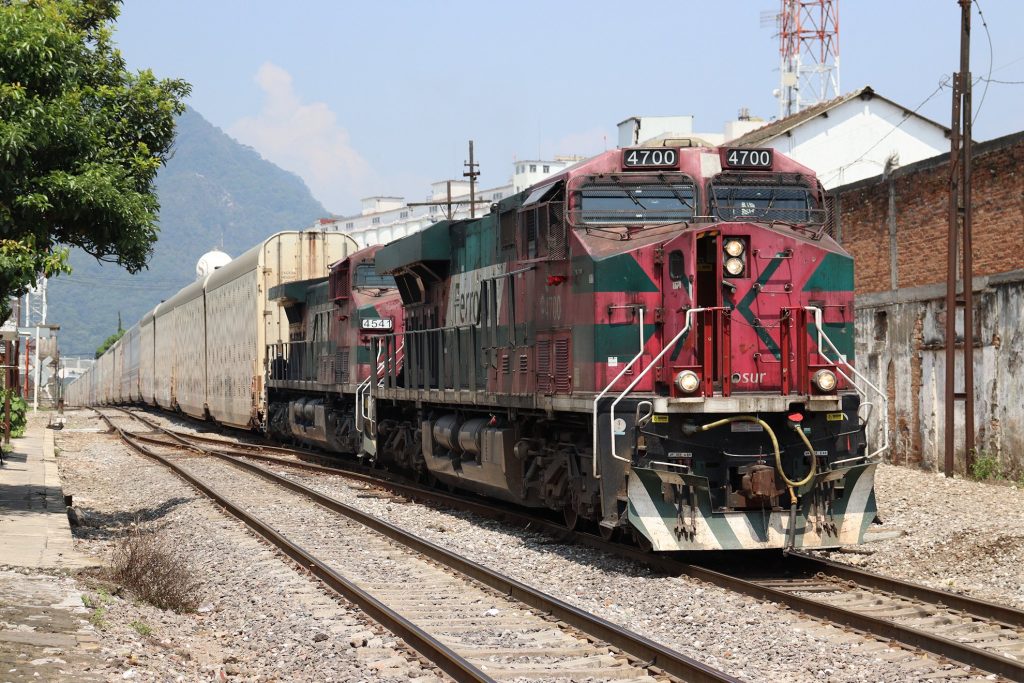
Two years ago I got married, and my spouse is from Mexico. Over the last year we’ve made a pair of trips to Mexico to her home town to visit her family. Her home is in Orizaba, Veracruz, which happens to be located on a busy line operated by Ferrosur running between Mexico City and Gulf of Mexico ports of Veracruz and Coatzalcoalcos. Apart from spending time getting to know my new family and seeing where my wife is from, we also managed to catch some railway action while we were there.

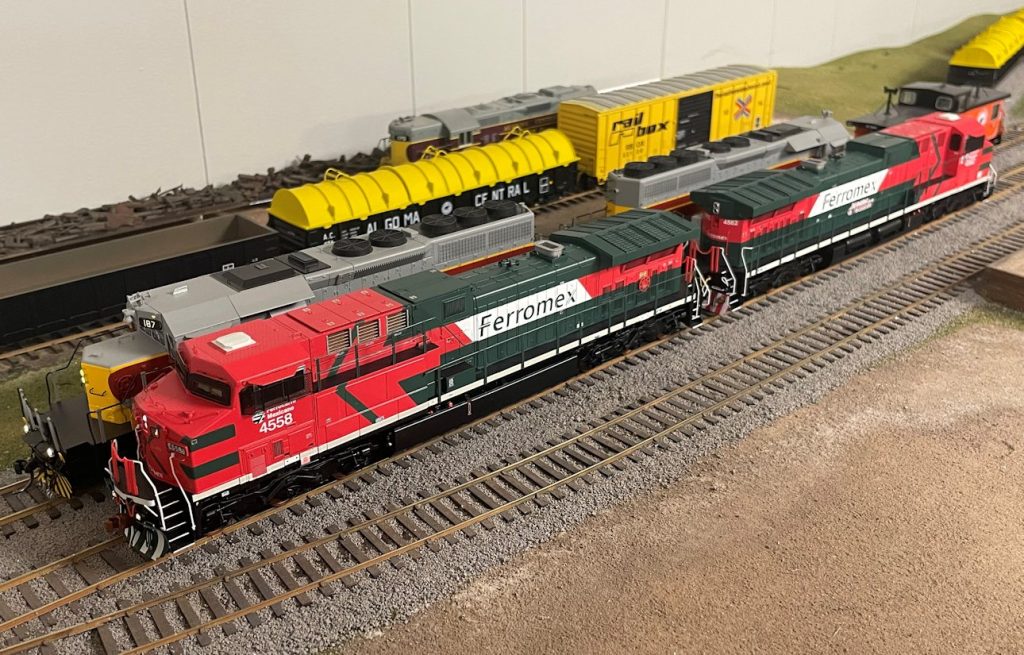
This has inspired a bit of an interest in Mexican railways, and I’ve been diving into learning more about the Ferrosur line, and I’ve been picking up a small representative collection of equipment, starting with a pair of beautifully rendered ScaleTrains Ferromex AC4400CWs. And then a small collection of various rolling stock to build one or two representative train consists similar to what runs on this line.

It’s definitely a very different sort of flavour to either the ACR or the CN line where I live, with different equipment and operations. Mountain railroading in this district leads to some pretty wild usage of DPU, and rock guards over the windows on all the locomotives used down there adds a unique character, and I kinda dig the Ferromex red/green/white colour scheme (although it’s being actively replaced by a newer red and grey scheme on the prototype).

I’ve also been posting in more detail on this topic on another MRH forum thread, if you’re interested.

Not to worry though, I have no current plans to abandon the Algoma Central, although when I have the layout space to actually build the ultimate layout, I might dedicate some space to include an area dedicated to small layout or “operating diorama” based on a Mexican theme. I still have lots of different ACR projects in various forms of “in progress” – some more actively than others – including working on 3D design and printing some AC wooden cabooses.

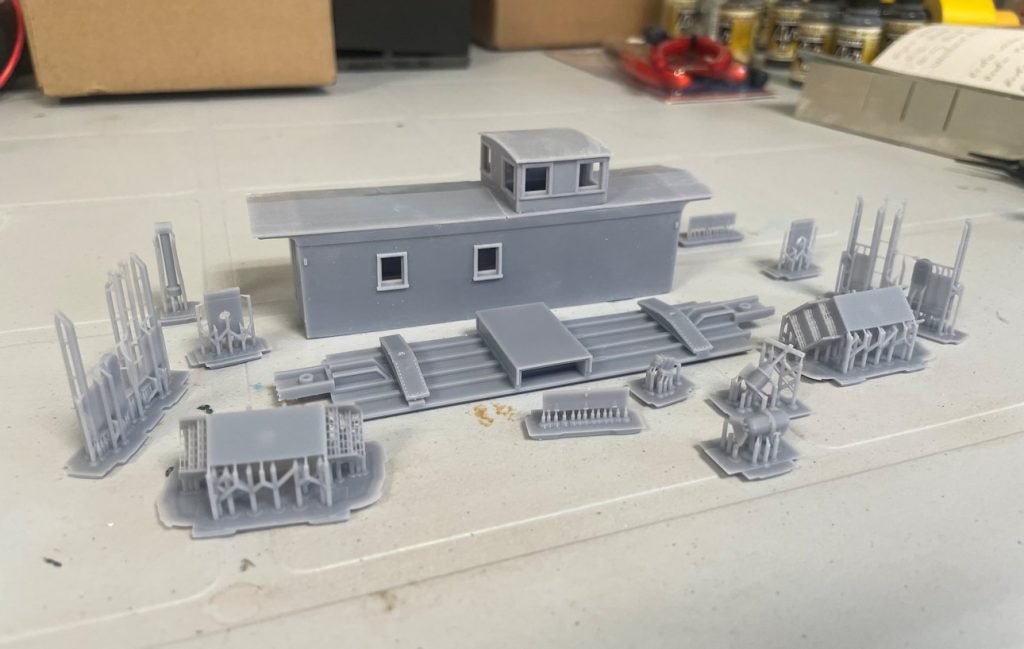
These are mostly done and ready for assembly and finishing; a half dozen bodies are all laid out in my paint shop next to another batch of those CP ore gondolas. Between balancing various projects such as wanting to finish up the Sudbury station project this fall/winter, and general other life priorities, hopefully I can also get these painted this winter.

Anyways, there’s plenty of other projects either on the workbench or shelf as well, so there’s definitely more to come, even if I’m not sure when exactly.

CP Napanee Industries Coil Steel Cars

As the large Algoma Steel plant in Sault Ste. Marie is arguably the primary industry on the Algoma Central Railway in any era, steel traffic forms a major part of the tonnage carried by the railway, and included in that is “coil” steel (as far as I know, the only major steel product not produced by the Algoma mill is wire). Thin sheet steel is wound into coils that are shipped out to manufacturing plants across the continent to be turned into all manner of steel products.

To transport this valuable cargo by rail, the rail industry developed cars with V-shaped wood-lined loading troughs to transport the coils without damaging them. Some of these cars were flatcars or gondolas with the loading troughs added, but by the 1960s several builders were producing various specially designed cars for coil steel service.

Note – There seems to be a bit of a gray area in whether or not to class these special cars as flats or gondolas – indeed today most of the modern equivalents are now pretty universally considered as gons (“GBSR” AAR designation), and while many identical cars were also classed as “GBSR” by their owning roads, the cars I’m about to discuss were classed (at least initially) as “FMS” by both CN and CP.

A major builder and innovator of this type of design – a coil car with lengthwise loading troughs, removable hoods, tracks for moveable load restraint bars, and cushioned underframe to protect the contents – was Evans Products which built hundreds of these cars for most of the major American railways. A minority builder was Canada’s Napanee Industries (NI) of Napanee, ON which built a total of 75 cars in 1967 following the Evans design (probably under license for the Canadian market) for Canadian National (25 cars – CN 190200-190224) and Canadian Pacific (50 cars – CP 313500-313549).

CP 313533 in October 1970 in original as-delivered black with script logos. Jim Parker photo.

A model representing the Evans Products coil car was and is produced in HO by Walthers. (A very similar US Railway Equipment car is produced by Intermountain (formerly Red Caboose tooling) but the body is different and has a straight sill). The Walthers car is somewhat of an older model, dating back to when Walthers actually sold their cars as kits (and I picked up a 3-pack of kits quite a number of years ago that lived for a [long] time on my shelf), but with a few upgrades these can still make respectable models, and an easy kitbash to one of the Napanee cars.

The first thing to do to the Walthers model is to cut away the original walkway and throw it out. Not only is this part rather thick and crude by today’s standards, the Napanee cars did not have the full-length side walkways featured on the model. I also carved off moulded grab irons and stirrup steps to replace them with finer wire parts.

To cover the holes left by the walkway supports and seam between the body halves, rather then trying to fill and sand body putty along the length of the body between the upper and lower flanges (or to be more honest, trying and giving up), I simply laminated 0.005″ styrene sheet cut to fit to the car side to get a smooth result.

Pre-paint construction photo.

Since the NI cars didn’t have full walkways, the removable hoods did not have lengthwise handrails on them either, which the Wathers model has. This is a pretty simple matter to carve off the handrail supports and sand them smooth. At the same time I took the opportunity to replace the corner grabs on the hoods with wire. Otherwise the hoods are essentially “stock” with all the kit parts, although I did scratchbuild matching hoods using the kit part as a pattern for a fourth car that had come with rounded hoods…

Wire grabs were mounted to the body, and step handrails also added from brass wire. The walkway grating on the ends of the cars was added using Plano etched material. The final modification is a small triangle of styrene strip angling from the side sill outboard of the trucks to the bottom of the main body, and a small loop of brass wire representing a protective guard around the brake control valve on the side.

Painting and lettering the cars is where things get a little interesting, as there’s no specific decal sets available. I built and painted two cars for CP, one in original black and one in red (2 more cars for CN are still in the paint shop).

CP 1979 “Action Red” car painted but unlettered.

The red CP car was painted and lettered following a prototype photo of
freshly painted CP 313500 on pg. 99 of “Canadian Pacific Color Guide to Freight and Passenger Equipment: Volume 2” by John Riddell and published by Morning Sun Books. This shows a car in a 1970s repaint.

The car and hoods were sprayed with Rapido ProtoPaint “CP Action Red”, and then masked off to paint the underside of the car and the draft gear black. Also the multimarks on the hoods were custom masked and painted as no decal was exactly the right size. The rest of the lettering was cobbled primarily from a Highball gondola set (although almost any CP Rail freight car decal would work as a source) and some Microscale consolidated stencils. The prototype was a 1979 repaint, so no ACI label is present on this car. Numbers and data were painstakingly put together with a magnifying visor.

Two CP cars painted and lettered.

The black car consumed no less than three sets of Black Cat decals – 2 sets of a gondola with script lettering (CPR340998) for the hood logos and end reporting marks, and a skeleton “stake” flatcar (CPR305560) set for the correct size reporting marks and numbers. This provided ample data to work with. Incidental decals such as ACI labels and consolidated stencils were added from Highball and Microscale sets. As these are 100-ton cars, U-1 wheel dots do not apply.

Perhaps if I were doing a larger set of these cars in the future I might commission a custom set of specific decals, but I was able to piece enough of it together from existing sets.

The cars still need to be sealed and weathered, but for now the paint and lettering work is for the most part completed on these two CP cars. Hopefully the CN fleet will have its pair completed soon as well.

Freight Car Friday #74 – CP 305560 Model

This unique Canadian Pacific skeleton flat is a new model I just finished* this week.

*(Assembly, paint and decals; still needs clear coat and weathering.)

The model is a Custom Finishing kit, which is made up of a series of soft metal (pewter) casting. After cleaning up all the parts with a fine file, and drilling holes for grab irons and truck and coupler box mounting screws, the model was assembled per the kit instructions using two part epoxy to glue the major parts together. As there’s barely a dozen pieces, it’s actually a very easy and straightforward build. I also drilled through the joint at each end between the main spine of the car and the end platforms and pinned it with a short piece of wire to reinforce the joint, so that the main structural pieces aren’t only held together by the epoxy. One extra addition I made was to apply 1×10 plates for the KarTrack ACI barcode labels on the right-most stake on each side, and I also drilled holes in the end sills to mount Kadee #438 air hoses.

With the assembly completed, the model was airbrushed black and lettered with decals from Black Cat Publishing specifically for this car. ACI labels came from a MicroScale set, and a couple of missing elements (“Plate C” marking and NSC builder’s logo) were added from a Highball CP Rail flatcar set.

The prototype for this car is one of 50 cars built in September 1968 by National Steel Car as CP 305560-305609. (Another 300 identical cars were built for Pacific Great Eastern in two batches in 1966 and 1968.) The cars were designed for use transporting full length logs and poles.

I’ve heard some mention of shipments of telephone poles to the Sault Public Utilities Commission; I’m not sure where such shipments would be unloaded, but all that is needed is a team track with a driveway beside it. Whether such movements actually happened with any regularity, the “rule of cool” applies here a little as well, and that’s what the waybill for this car will show when it runs on my eventual layout.

Just need to make a (removable) pole load for this car now…

Freight Car Friday #73 – CPAA 89958 Model

The prototype for this car was built by Pullman-Standard in late 1962 for their Transport Leasing Company and leased to Spruce Falls Power & Paper Co. of Kapuskasing, Ontario for what appears to have been a ten-year lease. Originally numbered TLCX 1001-1075 and decorated in an attractive dark green paint scheme with large and eye-catching yellow logos for the paper company, the lease expired by the end of 1972 and by early 1973 the cars were then leased to Canadian Pacific and they were renumbered into the CPAA 89910-89980 series and had their original lettering patched out. These lasted on the CP roster until about 1987 at which point they disappeared, disposition unknown.

The model is a Kadee PS-1 boxcar that was factory decorated for Spruce Falls Power & Paper. I gave the car a basic layer of airbrush grime weathering and masked and painted over the original logos much like the prototype did and added the new numbers using MicroScale stencil decals. This should be a unique and eye-catching addition mixed in with other CP and CPAA marked boxcars for paper and pulp service via Franz.

Freight Car Friday #72 – CP 80967 Model

CP 80967 is a simple study in very minor paint and decal tweaks to update the appearance of a (basically) RTR car.

The subject is a factory decorated model originally produced by Life Like under the Proto1000 brand label. (This tooling is now owned by Walthers.) It’s basically Ready to Run, other than the ladders and door rods being modeler-applied parts although they don’t really take any special skill to install.

One thing about the model is the colour of the roof. The roof is factory painted a pale grey colour to represent a bare galvanized steel roof, but just being a flat grey fails to really “pop” properly. So to improve the car (actually a trio of cars I have in these colours) I masked off the roof and re-sprayed it with Model Master “Steel”. The overall colour is almost the same shade except the Steel actually gives it a proper metallic finish. Next, as the 80967-81216 (yep, this car is actually the “class unit” for the series) were delivered in 1967 and actually originally painted in script, the Action Green MultiMark represents a repaint of these cars, and a little bit of Action Green overspray was added around the edges.

Standard decal additions of COTS and U-1 stencils in varying locations on the different cars and updated weigh dates completes the standard lettering updates before weathering.

One really neat feature of this model also needs to be addressed here. Life Like tooled two body version with different styles of plug doors – an inside-post (flush appearance) as shown on this car, and an exterior-post (recessed appearance). The interior post doors were on cars built up to 1968, and cars built 1969 or after had the exterior post doors. Another key difference between the earlier and later cars was the wheelbase, with cars built up to 1967 having a shorter 38’10” length between truck centres, and cars built 1968 and later have a longer 40’8″ truck centre distance. The model does something super clever here that a lot of people may not even be aware of – the truck bolsters are actually separate pieces that can be removed, rotated 180 degrees and reinstalled to shorten the wheelbase. (The truck centres should be narrowed on this car, but I took the photo before addressing the trucks.)

A roster of prototype cars that match the models, with door and wheelbase information:

Series Date Door Wheelbase UF Notes
CN 401483-401882 12/66-1/67 YPD 38’10” C
CN 400600-400999 1-3/67 YPD 38’10” C
CP 80967-81216 4/67 YPD 38’10” C
QNSL 1670-1679 5/67 CPD 38’10” C
PGE 4601-4642 5/67 YPD 38’10” U re# BCOL 4601-4642
CN 400350-400599 6-7/68 YPD 40’8″ C re# CNIS 400350-400599 /70
DWC 403000-403149 1-2/69 YPDX 40’8″ C
CVC 402000-402499 2-4/69 YPDX 40’8″ C
PGE 4651-4750 4/69 YPDX 40’8″ U re# BCOL 4651-4750
CPI 85000-85499 5-7/69 YPDX 40’8″ C re# CP 85000-85499
MDW 7001-7099 7/69 YPDX 40’8″ C re# CPAA 86000-86099 /88

Door: YPD = interior post (flush) Youngstown plug door, YPDX = exterior post (recessed) Youngstown plug door, CPD = interior post Camel plug door.
Underframe (UF): C = HydraCushion cushioned underframe, U = rigid underframe