Tour of the Line – Part 2

(This post is a continuation of a previous post describing my recent visit to ride the Tour of the Line over the Algoma Central Railway.)

At dawn on Tuesday morning, we got up, had our complimentary continental breakfast at the hotel and walked back to the “station” to catch our train back to Sault Ste. Marie.

IMG_7714

As we arrived were our train was ready for boarding, there was an Ontario Northland GP38-2 parked on the ladder which appeared to be blocking things for the CN C44-9CW which had arrived some time earlier off of train 571. (This was one of the two engines seen switching at Hawk Junction the day before on train 573. No trace of the second engine was seen this day, so it must have returned to Sault Ste. Marie on a 574.)

IMG_7704

After we boarded the train and waited to get rolling, the Ontario Northland began switching the yard tracks and the CN unit was moved out of the way onto side track next to the main, seen in the foreground of the above image. Leaving Hearst we could see that all of the yard tracks had been stub-ended on the west end, except for the first track which served as the siding/runaround.

IMG_7752

At Mead there was this office building and a maintenance garage; this was once the site of a large sawmill, but that operation closed down in the mid 1980s. All traces of the mill itself are gone except for a large cleared area, but these two buildings and a portion of the south end of the spur into the mill area are still intact (and the switch to the spur is still in place). Clearly this location must have still been used for some time afterwards to load logs and pulpwood, even though the sawmill was gone. Satellite images of the area shows extensive signs of logging operations in the area.

At Oba and Franz we again crossed the CN and CP main lines. At Oba there were quite a few cars in the old ACR yard tracks, which had been entirely empty the day before. A number of these I recognized as havening been seen at Hawk Junction the previous day.

IMG_7788

At Langdon, the first siding south of Oba (but clearly used now only as a log spur and not a passing siding) several new empty pulpwood flatcars had been added to the number of cars that had been there the previous day. For an interesting observation, note in the above photo how the switches to the old house track have been removed, but actually the siding track between them removed, so now the siding routes through the old house track. This sort of thing could also be seen at a couple of other locations.

IMG_7910

And at Franz, there were a number of cars in the siding which blocked a good view of some of the structures on the west side of the tracks, so I wasn’t really able to get the good overview shot of the location (but fortunately I was able to shoot those buildings from the vestibule the day before when they were not blocked by cars, and I have establishing shots saved from others). Clearly train 571 had had a busy trip from Hawk Junction to Hearst. On our part, we stopped no less than half a dozen times at various locations (along the entire trip) to pick or drop off campers, and by the time we returned to Sault Ste. Marie our little one-coach train was actually relatively full.

IMG_7836

And of course I would be remiss in not sharing at least one shot of the famous trestles across the bays of Oba Lake just south of the old Mosher siding and about 15-20 miles north of Franz. The bridge in the photo above is one of the shorter bridges which are both original timber trestles. These bridges are referred to as the “floating bridges.” When they were built, construction crews driving the pilings never did get them resting on solid bedrock, and the bridges essentially float in the mud and silt. The conductor was mentioning this to some of the other passengers while we were still approaching the bridges and remarked that from the ground you can actually see the bridge deflect several inches when a train passes over it! Both bridges have a severe 15 MPH speed retriction. The longest of the three bridges is almost 1200′ long and has at some point been replaced by a modernized version with steel pilings (you could see the old wooden pilings for the original bridge alongside – the water levels were high so these were just below the surface of the water – and also the causeway approaches were wider and showed signs of the realignment) and was not so severely restricted.

IMG_8067

After passing through a much emptier Hawk Junction once more, we met the day’s northbound freight 573 at Perry siding. Today the train was short – just 8 cars.

IMG_8147

And of course Agawa Canyon is scenic from any angle. Roughly halfway between Eton and Canyon, the valley abruptly narrows from a wide valley to a narrow gorge before widening again through the rest of the canyon. The above photo is taken just after passing through the narrowest point of the Canyon.

Climbing out of the canyon, our train made good time, screaming through the curves between Canyon and Frater. No really, the amount of flange squeal was pretty amazing. Particularly when you’re in the open shooting out the side window of the coach vestibule!

IMG_8248

I’ll end this post with one final shot of the train passing through typical (for the south end) rocky terrain just north of Montreal Falls. It’s a long journey but it was enjoyable, and a very relaxed way to travel by rail, with a very different flavour to travelling on VIA or Amtrak!

Tour of the Line – Part 1

So earlier this week I was in Sault Ste. Marie again with a friend of mine to ride the full Tour of the Line from Sault Ste. Marie to Hearst.

First thing in the morning we went down to the station to pick up our reserved tickets and watched it depart and picked up our reserved tickets. My friend had booked a little earlier and was riding the Agawa Canyon Tour Train to Canyon and then getting on the Tour of the Line on a “Canyon Combo” package, allowing the tour of the line and also a short stopover at Canyon park. I booked a little later and the Canyon train was fully sold out, but ultimately this probably turned out for the best as shooting from the vestibules is not permitted on the Canyon train. The regular train to Hearst has a far more relaxed attitude. We definitely spent more time shooting out the vestibule window or the rear door of the coach than actually sitting in our seats.

The Canyon train was absolutely running at full capacity, so I finally got to fill in the missing names on my roster of the ex-“Ski Train” cars as every single one of them was in use on the train.

CN 633 Full consist northbound on Sept. 30, 2013:

CN 105 (F40PH)
CN 104 (F40PH)
AC 5700 “Achigan Lake”
AC 5701 “Montreal River”
AC 5710 “Agawa River”
AC 5705 “Spruce Lake”
AC 5702 “Lake Superior”
AC 5655
AC 5703 “Chippewa River”
AC 506 (Diner)
AC 5707 “Hubert Lake”
AC 5708 “Ogidaki Lake”
AC 5704 “Island Lake”
AC 5706 “Batchewana River”
AC 5709 “Mongoose Lake”
AC 5711 “Trout Lake”
AC 5712 “Goulais River”
AC 5713 “Rand Lake”
CN 106 (F40PH)

(3 engines, 16 cars)

After the Canyon train pulled out of town it was time to head over to the yard to catch my train. For the last couple of years now the regular train to Hearst has been boarding from the near the shops facilities rather than the passenger depot downtown. With all three of the F40PHs assigned to the Canyon train, the regular train to Hearst this week was powered by a CN GP38-2.

IMG_7348

CN 631:

CN 4710 (GP38-2)
AC 78 (Power Car)
AC 312 (Baggage Car)
AC 5656 (Coach)

We hit patches of thick morning mist around the Heyden to Searchmont area, but otherwise the weather was generally clear, and the temperature quite pleasant:

IMG_7372

At Northland, we pulled into the siding to allow the southbound freight to pass:

IMG_7379

CN 574:

CN 2575 (C44-9W)
CN 2136 (C40-8W)
(25 cars – several coil steel cars and a bunch of empty gondolas)

At Ogidaki we dropped off a group heading to their cabin for a few weeks; this was pretty much our only northbound stop before Canyon. Much of the south end of the line skirts along a multitude of lakes and rivers, and many of these lakes are dotted with small private camps and cabins, accessible only by rail (and additionally in many cases, by boat across the lake from the railway stop.)

IMG_7408

Of course a highlight of any trip on the ACR is crossing the famed trestle at Montreal Falls, made all the more spectacular by the peak fall colours:

IMG_7431

At Canyon we passed the tour train, dropped off a young honeymooning couple who were going to be staying at the Camp Car which was set out in the house track and picked up half a dozen passengers (including my friend) riding on the “Canyon Combo” package.

IMG_7484

After leaving the park at Canyon, it was a straight shot to Hawk Junction. As we pulled through Hawk, train 573, which had preceded the passenger trains out of Sault Ste. Marie (Steelton), was switching two full tracks of cars in the yard. Quite a bit more traffic than I saw in my July visit. A lot of these cars would be noticed the next day in the interchange tracks at Oba. (Those three gondolas being pushed by the power were the only cars in Hawk Junction yard the next day.)

IMG_7574

CN 573:

CN 2562 (C44-9W)
CN 5631 (SD75i)
(no accurate car count as this train was actively engaged in switching, and there were long strings of cars on at least two tracks)

At Hawk Junction we boarded another small group and their supplies who travelled as far as Tatnall to a camp. That was our last stop northbound before Hearst. The CP and CN main lines at Franz and Oba were crossed without delay from cross traffic on the other lines. At Mosher, the old station and some signs of the abandoned pulpwood operations still remained:

IMG_7648

We arrived at Hearst just after 8 pm, which made it well after dark with the shortening fall days. Tired and hungry (but having enjoyed the ride) we sought out our hotel and some dinner before preparing to do the whole thing in reverse.

I ended up taking at least 900 photos during the trip, so there’s far too much material to share here in one blog posting (and a lot of the photos are somewhat similar, but serve as some future modeling reference for some areas. I’m going to split the second day’s southbound trip into a separate post, and I may have enough material to organize into some additional related posts over the next week or so. I’ve tossed about about a dozen new header images into the random page header rotation.

For now I’ll pause to make some general observations from the trip:

  • Our timing worked out brilliantly. We were lucky enough to hit the absolute peak of the fall colour season in the Sault. A week earlier wouldn’t have been quite so colourful, and we could see that some trees particular on the tops of some hills and ridges were already dropping their leaves. Another week later and a lot of the colour would already be disappearing. We also lucked out with some beautiful weather the whole time. (It was a little overcast on the second day between Canyon and the Sault, but was otherwise mostly sunny and the temperatures were very comfortable.
  • About those colours: the south end of the line was brilliant with almost every colour of red, orange and yellow imaginable. The maple trees were bright, bright red. As the geography transitioned to the flatlands north of the canyon, the scenery became predominated by birch and evergreen trees, so the north end of the line was basically just two colours: yellow and dark green. This is an important observation to make for when I’m working on scenery on my future ACR layout. Getting that type of tree mix right will be a huge factor in pulling off the right effect.
  • There was a fair bit of interchange traffic at Franz, Oba and Hearst, but on-line industry north of the Sault is essentially nil today. The sawmill at Dubreilville appeared inactive, and while the Jaeger strandboard plant  south of Hawk Junction could not actually be seen from the main track, IIRC it closed down about 5 years ago or more.

IMG_7496

  • (Quite) active log spurs at approx. mile 10, Eton (mile 120) – pictured above – and the siding at Langdon, just south of Oba, basically comprise the actual on-line traffic sources on the former ACR. Other sidings on the south end such as Batchewana, Mekatina and Frater and other places have been known to feature log loading operations in the past but these all appeared to be quite inactive for some time. There were also spurs at mile 132 and 155 that were still in place, but didn’t appear to be currently active. Still the above mentioned log spurs were significant current operations, and there did seem to be a fair bit of interchange traffic at Franz and Oba.
  • I’d been led to believe a few years ago that freight traffic over the former ACR had been reduced to only a three times a week service and that track conditions on the line had suffered to the point where almost the entire line was severely speed restricted. I wouldn’t have thought traffic levels to have actually improved since then, but today freight trains definitely are operating in both directions on a daily basis over the ACR, at least south of Hawk Junction. While there were slow spots here and there, over the majority of the line we regularly hit speeds of 40-45 miles per hour, very similar to what the old speed limits in ACR timetables were. While I’m certainly no track maintenance worker or a qualified expert on such things, the ROW generally appeared in decent shape, although I did notice some pretty horrifically shelled rail on at least one siding; however many old sidings have been removed or single-ended, and particularly on the north end of the line are pretty rare. The particular siding(s) in question probably hasn’t been used to actually execute a train meet in a decade. The only freights we passed on both days were south of Hawk Junction. There’s definitely a lot of jointed rail, but significant sections have actually been upgraded with CWR.
  • The meets our train made with opposing freight trains were handled by the passenger train either pulling into one end of the siding, waiting for the freight to pass, and then backing out again, or the reverse: backing into a siding to make the meet and then pulling out normally. Dispatching-wise this was accomplished by giving all the passenger trains “work” clearances, which allow a train to operate in either direction over a section of track, and the opposing trains were given “protect against” orders referencing the passenger train. Thus the two trains would actually set their own meet over the radio somewhere within that stretch of track.
  • Several maintenance foremen were also patrolling the tracks, and once or twice we were delayed waiting for highrail trucks to pull into a siding to clear our train.

I think that’s enough for now, we’ll continue with the southbound trip in Part 2.

AC 3100 series wood boxcars from Accurail’s 40′ wood boxcar kit

This weekend I got back to working on a couple of assorted modeling projects that I’ve had on the workbench for a while. One of these is this trio of 40′ wood boxcars.

These models represent cars from a 100-car batch built in late 1927 numbered AC 3101-3200; by the late 1970s any of these cars still running would have been restricted to maintenance service; in 1970s-1980s freight car lists in the Official Railway Equipment Register the Algoma Central lists no boxcars in interchange service. My three cars will therefore likely spend the majority of their life parked in a side track with other maintenance equipment at Hawk Junction yard as material storage cars, or moving occasional OCS (“On Company Service”, i.e. non-revenue) cargos. Here’s a good prototype photo from Ted Ellis’s Algoma Central site of one of these cars in a work train at Frater (mile 102) in 1977:

http://algomacentral.railfan.net/images/AlgoCenRy/AC_3195_Frater_6-12-1977.jpg

These three cars were modelled using Accurail’s 40′ wood boxcar kit with wooden doors and ends. This kit is a pretty close match to the AC cars; they might not be 100% dead-on – I note some minor differences in the horizontal metal straping at the top of the vertical end braces, and the doors stops are located differently, but the side bracing looks pretty much the same – it’s close enough for me.

I chose not to do a lot of fine detailing on these cars; while Accurail’s details (i.e. grab irons and ladders) are molded onto the car body and not separately applied freestanding pieces, Accurail’s tooling is fairly well rendered, and on the wood car it’s not really bothering me that much. If it was a steel car, I’d probably upgrade the detail. Might seem a bit quirky, but in this case I can accept the level of detail of the car body.

The shells were actually painted quite some time ago; these were some of the first things I painted while practicing with my new airbrush. I sprayed the shells with CN Mineral Brown from TrueLine Trains; really any shade of generic “boxcar red”/freight car brown will do here.

Lettering is from a rub-on “dry transfer” lettering set from CDS Lettering. Following photographs, I deviated from the lettering set a little. The set includes horizontal lines above above and below the reporting marks (initials) and numbers. While when new these cars would have included those in their original lettering, all photographs from later years around the 1960s-80s show these cars without these lines. As I’m modeling this later period, these lines were excluded, and the reporting marks and numberes were moved up a bit, to put the reporting marks and number around the upper grab iron on the left side.

IMG_3892

Once all three cars were lettered, I weathered them up with Bragdon weathering powders applied with a stiff brush. I kept mostly to the darker browns – burnt umber and burnt sienna – as these are wood cars I avoided the oranger rusty colours. I also used a bit of black (soot) on the roof to darken it and accent the roof ribs; and also on the sides to darken and bring out the board detail of the sides. The Accurail car has a lot of grain molded into the sides and accenting this really gives the car a more worn appearance. I also tried concentrated the darked colours around the door opening and the end of the door track where rain would tend to wash off the car roof to try to make these areas a bit darker and more weather-worn. This wasn’t precision detailing, and it spreads out a lot by working it with the brush, and the effects of the powders are actually very subtle, but I think it did generally work to darken the general area just a bit. It’s not necessarily really consciously noticeable that those areas specifically have been darkened, but it brings out the details and the wood grain of the sides, and darkens and varies the colour of the car a bit. And on a couple of the cars even from a distance (maybe even more from a distance) the door and right side of the car is slightly darker in colour than the left side where the majority of the lettering is.

I then gave the three cars a quick spray of Dullcote last night to seal the lettering and weathering. Here’s a pair of the cars mounted back on their underframes and posed on my switching layout with one of my Overland cabooses:

IMG_7291

There’s a few details to be done yet, and the underframe needs some minor detailing and then the frame, trucks and wheels all need to be painted/weathered. The completed car will probably get some additional road weathering along the bottom at that time yet as well, but that’s another day.

Ideas for Adapting a Tonnage Rating for a Model Railway

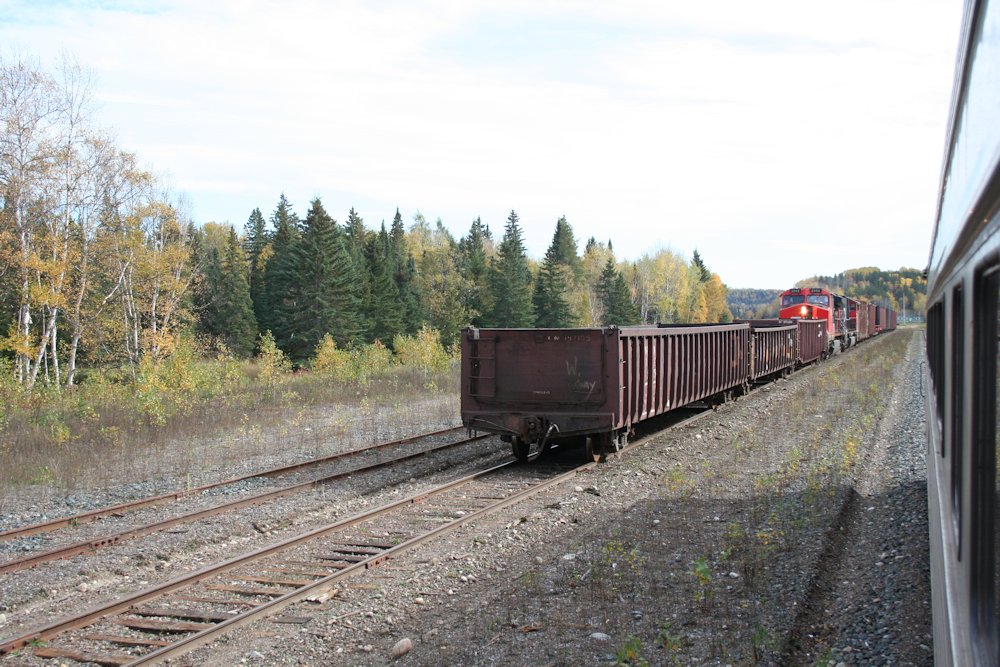
Tonnage ratings are, put simply, a table of figures detailing the maximum tonnage a single locomotive of a particular type can handle across a railway or portion thereof. While certainly not the only consideration when applying power to a train (for example, in addition to tonnage ratings, some railroads may also specific a minimum horsepower per ton for specific trains, with priority fast freights given higher horsepower ratings to ensure quick movement), tonnage ratings are an important tool to make sure a train has at least the minimum amount of power (locomotives) to make it over the line.

Tonnage ratings are broken down by locomotive class (usually grouped by horsepower), and will vary on different portions of a railway based on ruling grades and curvature. The ratings are also listed separately in each direction over a portion of the railroad since uphill ruling grades will vary. For every class, there are three ratings listed, an A (best possible conditions), B and C (really miserable conditions like rain or ice making things really slippery) rating. The ratings are given on a per-unit basis; to know how much tonnage a particular consist can handle, you just add up the tonnage ratings for each unit for the overall rating.

Below are the actual ACR tonnage ratings copied from the 1982 summer employee’s timetable. It’s a bit of a dizzying wall of figures, and I’m not going to study the entire thing in detail, but the figures aren’t too difficult to interpret.

As a simple example, let’s say you have a 9000 ton train to haul from Hawk Junction to Hearst, and that conditions are good, so we’ll use the A rating. (We won’t worry about adding or dropping cars enroute.)

Looking at the table, we can see that a pair of SD40s will handle this nicely. (2units x 4620tons/unit = 9240)

However 2 GP38-2 units only have a combined tonnage rating of 6880, well under the 9000 tons we need to move, so we need a 3rd unit, which will bring the tonnage rating to 10320 if all three units are GP38-2s.

If all we have on hand are GP7s, 3 units at 2950tons/unit only gets us to 8850, so we’d need a fourth unit.

Of course we can mix and match units and just add up the tonnage ratings for each unit, the examples are just easier with similar units.

Table 1: ACR Tonnage Ratings from Timetable #139, May 29, 1982

GP7 GP9, GP38-2 SD40, SD40-2
A B C A B C A B C
Northward:
Steelton-Goulais 1600 1490 1440 1865 1740 1680 2510 2330 2260
Goulais-Frater 1250 1160 1125 1460 1350 1310 1960 1825 1765
Frater-Hawk 1500 1395 1350 1750 1625 1575 2350 2185 2115
Hawk-Hearst 2950 2745 2655 3440 3200 3100 4620 4300 4160
Southward:
Hearst-Hawk 3100 2890 2790 3615 3370 3255 4800 4450 4320
Hawk-Mekatina 1400 1300 1260 1630 1515 1470 2170 2020 1955
Mekatina-Goulais 1550 1440 1395 1810 1680 1625 2400 2230 2160
Goulais-Steelton 1650 1535 1485 1925 1790 1730 2560 2380 2305
Westward:
Hawk-Siderite 1350 1255 1215 1575 1465 1415 2120 1970 1910
Siderite-Brient 1800 1675 1620 2100 1955 1890 2820 2620 2540
Eastward:
Brient-Helen 1000 930 900 1165 1085 1050 1550 1440 1395
Helen-Hawk 1430 1330 1285 1670 1550 1500 2220 2065 2000

There are two things I’d like to draw your attention to in the table.

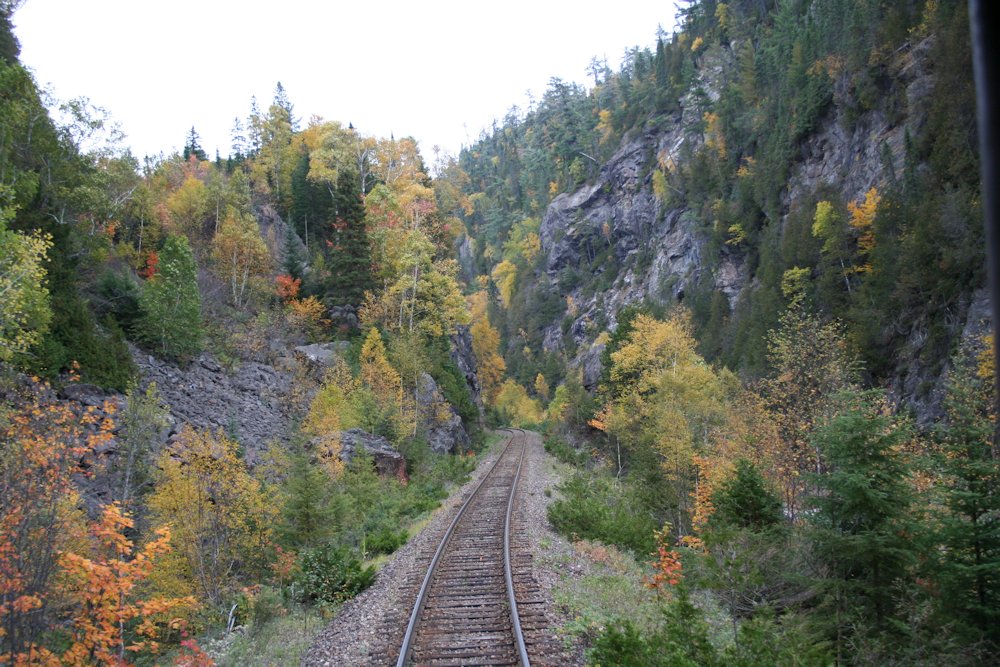
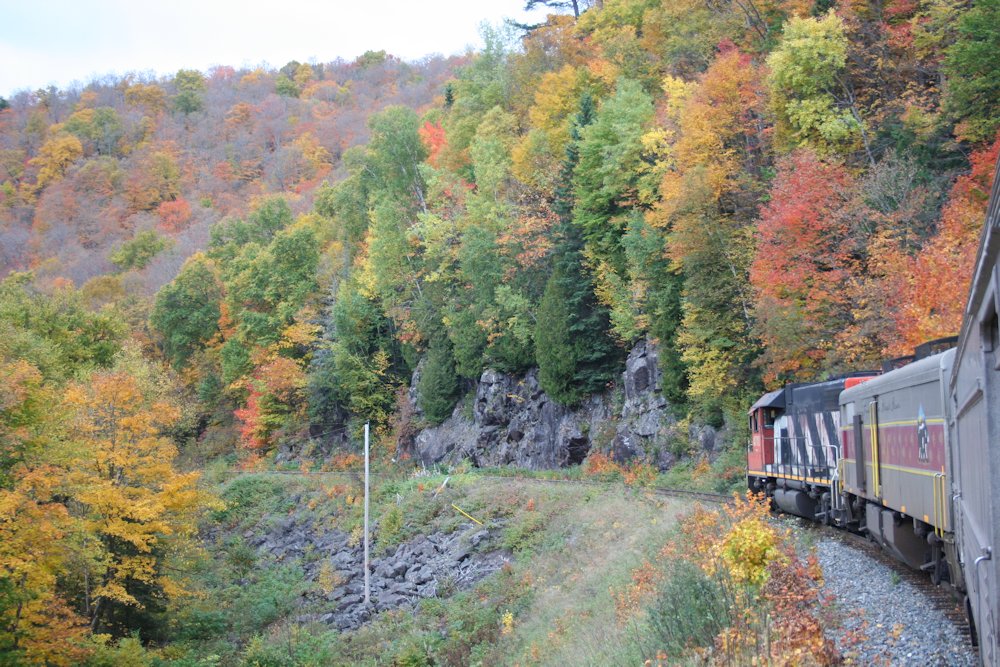
  • Note the extremely low numbers eastward out of Brient (Brient was the yard that served the harbour at Michipicoten, at the terminus of the Michipicoten branch), barely better than half of the westward ratings for the same portion. From the harbour at Michipicoten to Wawa is an almost continuous upgrade, and the steepest grades on the railroad are found near Brient on the descent to the Lake Superior shoreline, reaching 4% between the former Brient yard and Michipicoten.
  • Note also the huge disparity between the tonnage ratings north of Hawk Junction and the rest of the railway. North of Hawk Junction, and away from Lake Superior, the terrain flattens out considerably, and this is clearly reflecting in the more favourable tonnage ratings.

So where do we go from here?

The first thing is that these are tonnage (weight) ratings, not car counts. Unless your passion is number crunching, something that uses a simple car count instead of adding up differing tonnages for each car is probably a much preferable system for determining engines to train length.

The other issue is that on the model railroad, we try to weight our cars consistently so they operate well on our tighter-than prototypical curves and generally steeper than average grades (especially helices). There’s really not much of a difference between the weight of a load or empty.

While there have been articles published about methods scaling down prototype weights for the extra realism, and manipulating this table is actually kind of fun as an academic exercise, during an operating session I would prefer a quick an simple way of just looking at the train length to determine how many engines are required.

The simplest thing to do on a model railroad would be to take a representative unit, stick a bunch of cars behind it and run it up the ruling grade on the layout (quite likely the helix if your layout has one.) Find out how many cars a single unit can pull and use that as a baseline to say you can have, for example, up to ten cars per engine on a train. If your layout is flat, or your grades are very gentle, you might arbitrarily set your car counts to have something that looks good (or just not worry about it too much, and just say, “Yeah, that looks about right for this layout” – although really that’s pretty much the same thing, just without writing down an actual “rule” for it.) There’s not really a wrong way of doing it, as long as the engines can handle the size of the train.

Finally, model locomotives tend to be a lot more equivalent; a model SD40-2 isn’t twice as powerful as a model GP7; more likely they’re pretty equivalent. Depending on the brands or makes of the models, the GP7 could even be a better puller than the SD40! So to make the SD40s look more powerful, we institute an artificial restriction on the GP7s, maybe something as simple as “10 cars per 6-axle unit, 8 cars per 4-axle unit” to force the use of more smaller units to replace a pair of bigger ones, instead of having 2 GP7s do the same work as 2 SD40s.

The interesting thing about the ACR tonnage ratings is that huge disparity mentioned above between the flatter Northern subdivision north of Hawk Junction and the rest of the railway, which stays much closer to the rocky shores of Lake Superior. However, when I get to the point of actually building my ACR layout, which will be based on the Northern and Michipicoten subdivisions, I don’t imagine that grades on the (model) Northern sub. will be appreciably different than on the Michipicoten branch. In fact, depending on the layout design and inclusions of helices to double deck the layout or lengthen the run between stations, the ruling mainline grades could actually be between Hawk Junction and Hearst.

However the prototype tonnage ratings show that trains leaving Hawk Junction to the north should have a higher power/car ratio than trains heading south to Steelton (Sault Ste. Marie) or Wawa/Michipicoten. While the model version won’t really have the same characteristics, I can fake by decreeing artificially lower car counts/engine for the Michipicoten and Soo subdivisions. The last will likely just be staging, but trains leaving the modelled yard at Hawk Junction should “look right.”

As an exercise, I took the “A” rating column* for each class and divided the all the numbers by 125 tons. 125 tons is the approximate gross weight of a fully loaded 100 ton capacity car (like the ACR’s 100-ton open hoppers). But except for (loaded) ore trains, the average car in the 1980s was more like 70-ton capacity, and of course empties are much lighter. So this has the quite deliberate effect of already forcing car counts down.

* Since I probably won’t be modelling much of the Soo subdivision south of Hawk Junction, I only included north of Frater, and to simplify the Michipicoten branch, I split it at Wawa instead of Siderite, since Wawa and Michipicoten will probably be the only actually modelled locations on the branch.

The interesting thing about dividing by 125 (the weight of a loaded ore car) is that on the Michipicoten branch in the 1980s, the traffic was pretty much all loaded hoppers eastward, empties westward; so this actually gives a pretty good picture of the power required for loaded ore trains; 3 SD40s or 5 GP7s for a 36-car train of loaded hoppers. The westward car counts could actually be much higher since the cars would all be empties, but you also have to provide enough power to account for bringing the loaded train back!

After dividing by 125, I multiplied everything by .6 (somewhat less than 2/3) to scale things down a bit more, and simply rounded everything off to whole numbers. This already produces some interesting results, but some numbers are a bit high yet and may need to be artificially downgraded yet, but it’s an interesting place to start. Let’s take a look:

Table 2: “A” ratings, divided by 125tons and scaled down by .6

GP7 GP9, GP38-2 SD40, SD40-2
Northward:
Frater-Hawk 7 8 11
Hawk-Hearst 14 17 22
Southward:
Hearst-Hawk 14 17 23
Hawk-Frater 7 8 10
Westward:
Hawk-Wawa 6 8 10
Wawa-Michipicoten 9 10 14
Eastward:
Michipicoten-Wawa 5 6 7
Wawa-Hawk 7 8 11

This does some interesting things, which are easier to see with the smaller set of smaller numbers. The counts for the portion from Hawk Junction to Hearst are almost exactly double everything else, and things are pretty consistent in both directions, except between Wawa and Michipicoten where some really interesting things happen. Remember it’s basically entirely uphill from Michipicoten to Wawa.

Those Hawk-Hearst numbers remain pretty high, and now it’s really clear how much easier the north end of the railway is compared to the south. I don’t think a single model SD40 will handle 23 cars up a helix! I’ll need to limit things more on the Northern sub, so my ratios are never going to be quite double like the numbers above.

Here’s what happens when I scale everything a factor of one half, instead of .6:

Table 2: “A” ratings, divided by 125tons and scaled down by .5

GP7 GP9, GP38-2 SD40, SD40-2
Northward:
Frater-Hawk 6 7 9
Hawk-Hearst 12 14 18
Southward:
Hearst-Hawk 12 14 19
Hawk-Frater 6 7 9
Westward:
Hawk-Wawa 5 6 8
Wawa-Michipicoten 7 8 11
Eastward:
Michipicoten-Wawa 4 5 6
Wawa-Hawk 6 7 9

That produces something interesting. Just reading numbers off of this and using the same car counts in both directions pretty much gives max car counts of 12/14/18 (for GP7/GP38/SD40 respectively) between Hawk Junction and Hearst, and 6/7/9 everywhere else except for the extreme restrictions on the grade out of Michipicoten. But even that’s pretty reasonable: 3 SD40s handling a max of 18 cars (include the caboose in that) which is a decent sized train on a model railroad and would look pretty spiffy.

The Hawk-Hearst numbers will need to be scaled down more based on the realities of model locomotive performance, but the rest looks pretty reasonable, at least on paper.

Will I adopt these car limits as-is? Ultimately probably not exactly, but it’s an interesting place to start and hopefully something to generate some good discussion!

AC 8201-8500 series hoppers – Part 3: End platform grating

Here’s a good view of what the end of one of these cars looks like:

http://rrpicturearchives.net/showPicture.aspx?id=1251473

While the stock Walthers model basically just has some generic raised-tread pattern on the end, you can see that the pattern of walkway grating is quite distinctive, and I wanted to capture this.

The following wreck photo also highlights quite clearly how the grating is open, and would be see-through:

http://algomacentral.railfan.net/images/AlgoCenRy/AC_Mile_5_wrk-5_5-14-1980.jpg

If I were only doing one of these cars, I might consider completely cutting away the end platforms and rebuilding them from scratch to have the open grating, however for the sheer volume of these cars that I need, I’ve decided this would be far too much time and effort to be worth it.

I do however wish to at least replicate the tread pattern, which is a big difference from the model. To this end, after disassembling the cars and removing the handrail pieces, I filed the top surface of the end platforms smooth to remove the existing tread texture.

IMG_6616

End platform filed smooth.

I cut the new walkways out of etched brass walkway/grating material. The walkways are a rectangular “Apex” tread pattern. I’ve been using etched brass material from Details Associates. I just used a regular pair of scissors to cut the thin brass sheet.

There’s two parts to the walkway tread on these cars. There’s the grating on the open area of the platform, and an extra bit of grating leading to the end ladder. The platform grating is cut out of the etched material in a rectangle 2.5 by 10.75 scale feet in size. The cut piece should all be whole rectangles, with the “grain” following the width of the car.

The walkway to the end ladder grabs is oriented perpendicular to the platform grating. With the sizing of the rectangles in the Details Associates etching, I cut a strip from the etched sheet 3 rectangles wide; this is perfectly the size to fit between the platform grating and the car body. I then cut these into approx. 1.75 scale foot pieces.

With all the piece cut, I attached them to the prepared underframe pieces using CA adhesive. Very carefully, trying not to glue my fingers to themselves or the car, I used a toothpick to spread the CA across the bottom surface of the grating, and then applied the grating material to the car. For the smaller pieces I used a pair of curved tweezers to move them into position.

IMG_7289

Several finished platforms, with one just filed smooth in the middle.

IMG_7290

Completed walkway/platform grating with the underframe and body fitted together, showing how the walkway accesses the end ladder.

This is the current point I’m at with these cars (well, the 9 I’m [semi-]actively working on). 5 cars now have the grating complete (I just finished a few of them up tonight) and another 4 have the platforms filed and prepared (and actually have for quite some time now).

After I finish this current batch of cars, (I’m hoping to try to bring these 9 all the way through to completion now) I’ve got another 50 or so of these Walthers cars waiting for the same treatment at some point!