Today I took advantage of a nice Saturday to myself with nothing planned an unattractive weather outside to delve back into some modelling projects, and start a new one, because, why not? (Who says you can have too many projects at once?)
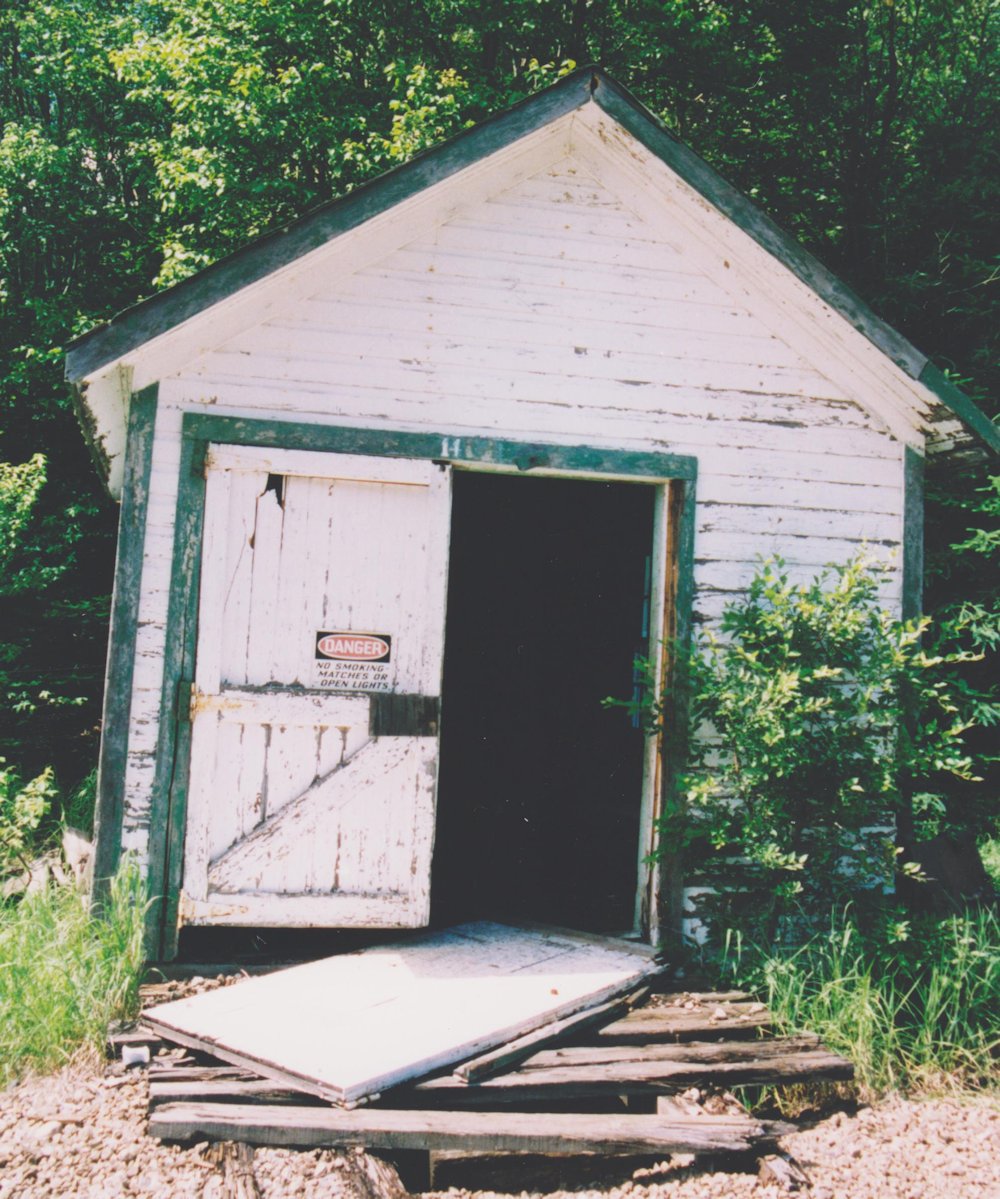
Abandoned speeder/tool shed at Frater, mid 1990s. Blair Smith photo.
This afternoon I was able to start into a project to put together a trio of standard track speeder/tool sheds for my eventual ACR layout. These are small, simple buildings, so an attractive weekend project. (Ok, so finishing these will spread over a few more weekends…) Like on most other railways, these sheds were for storing a section gang’s track maintenance tools and inspection track speeder. The wide door on the front of the shed was large enough for the speeder to enter, and the shed would be located perpendicular to the tracks with a pair of rails in front (which sometimes could even be just wooden beams) for the speeder to be rolled out to the track.

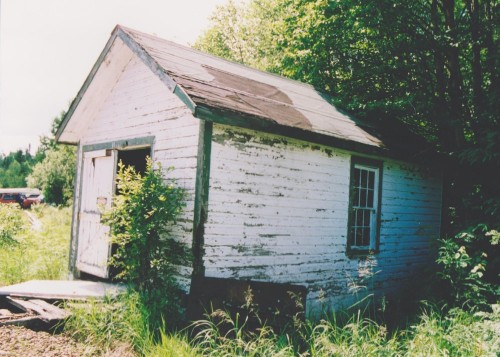
Abandoned speeder/tool shed at Batchewana? August 2014. Nick Acciavatti photo.
Like most other railways, the Algoma Central had a standard design for their speeder/tool sheds; and identical structures could be seen all along the line. Surviving examples have been noted at Batchewana and Perry, and possibly still other locations. The shed at Frater pictured above is long gone.
These three models will (hopefully) eventually find their way to modelled representations of Franz and Mosher, and possibly Perry for the third one, if I ever have room to include a siding south of Hawk Junction.
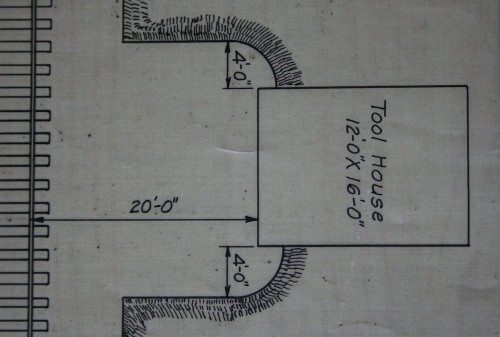
Detail from AC&HB Ry. drawing C-8-31, Standard Grass Line and Track Signs, August 19, 1946. Sault Ste. Marie Public Library Archives collection.
This excerpt from an old railway drawing in the Sault Public Library Archives gives a indication of the footprint and general relation of the tool shed to the tracks. Other dimensions were approximated from photos and I was able to work out a scale drawing and lay out the pieces on a sheet of Evergreen styrene siding. Note that the location of the window in the side of the structure is not centred. The rear and opposite side are blank walls with no windows.
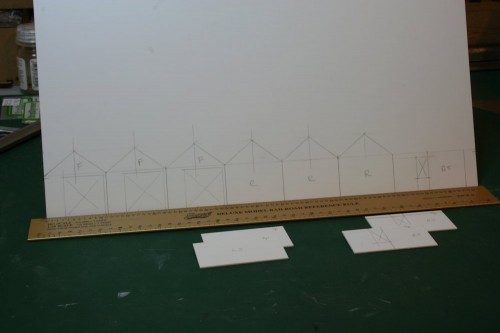
Fronts and rears for 3 speeder sheds laid out on plastic siding. Since the outlines are drawn on the *back* of the sheet, with the siding texture on the opposite side, everything is drawn as a mirror image.
At this point so far, the parts have been cut apart and the door openings cut out. The window openings still need to be opened up on all of the side walls, and then I can start assembling things and working on the main front doors.