Steam Generator Roof Details

Catching up on some projects that I worked on a while ago, but haven’t posted to this blog recently. One of those projects is my pair of scratchbuilt ACR steam heater cars.

I assembled the bodies, and then these sat for a while while I worked out the roof details.
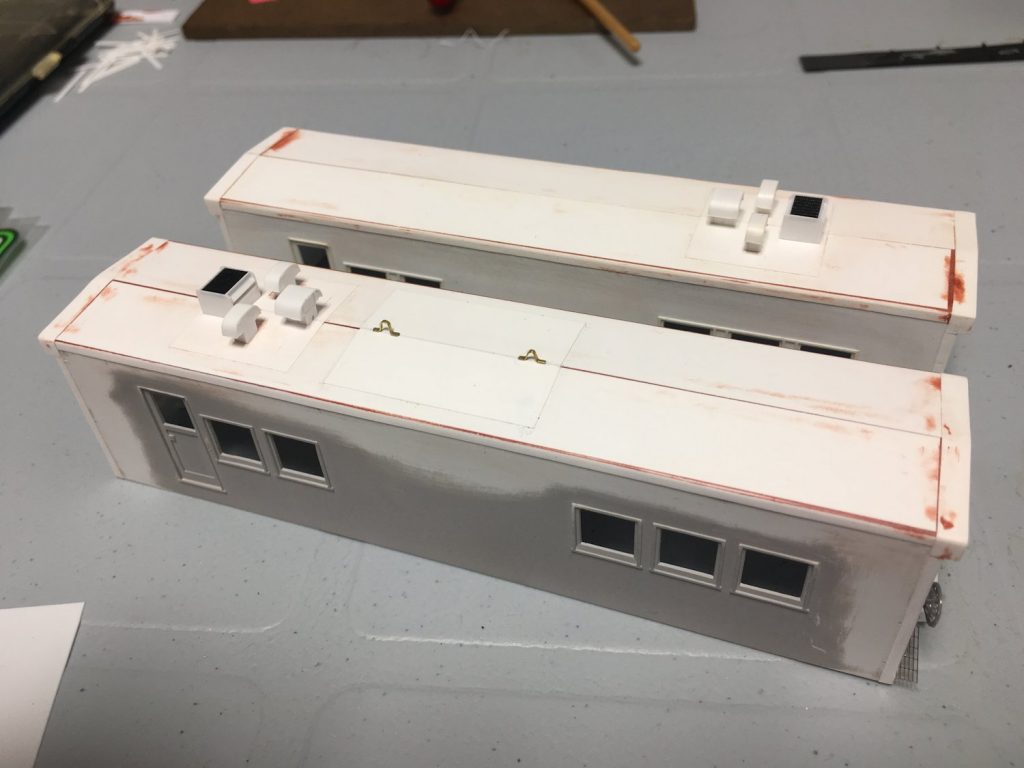
The main details are of course the various vents for the steam boiler. These are placed on top of a hatch on the roof. The hatches were made with .005″ styrene sheet glued to the surface of the roof. *Good* roof photos are hard to find, most of the detail is only worked out from side or oblique shots, but I have enough to go on to make out the size and positions of the hatches. Photos also seemed to indicate the one car had an extra hatch in the middle of the roof (not sure if and/or when this was added to the car, so it may or may not have been there in the mid-eighties, but it makes for a good visual variation). A couple of bits of flat brass wire formed into lifting loops finishes off the middle hatch.
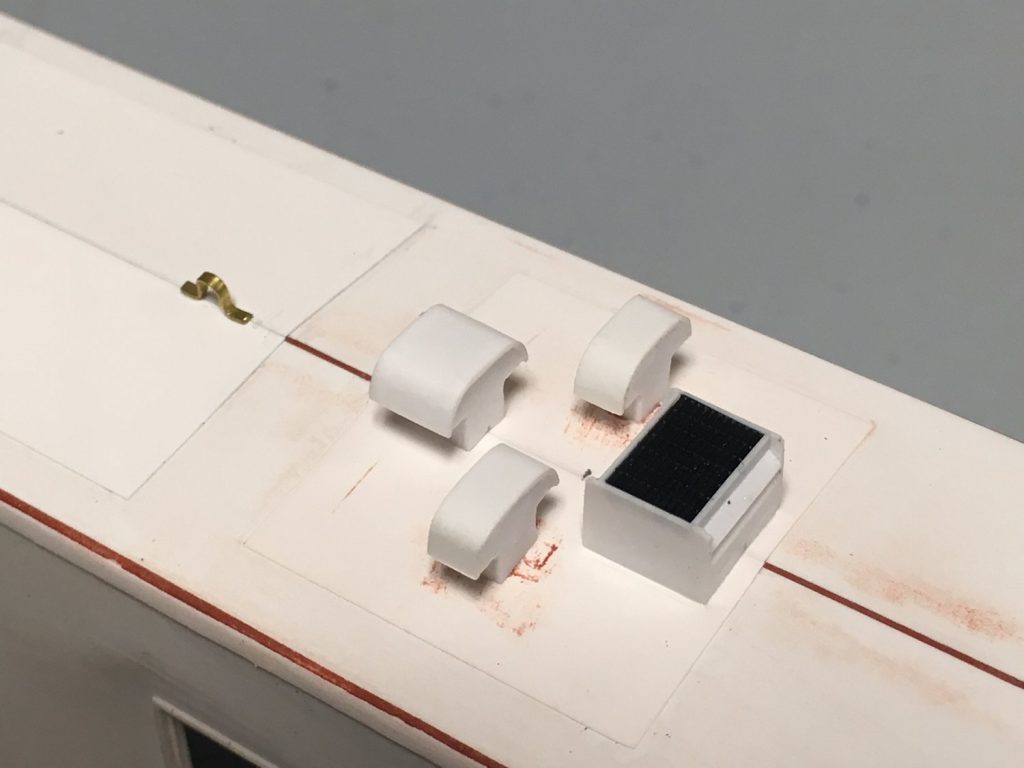
The actual steam vents were an interesting challenge to build from .010″ styrene sheet and strip. The mushroom-shaped stack ends were carefully cut and filed to shape, then assembled with simple sides, and then the top was added by curving strips cut from styrene sheet over the top. Liberal use of styrene cement and patience holding the part in place while the solvent evaporated and dried was involved.

The boxy vent was fairly simple by comparison, assembled from assorted .010″ strip and sheet. The “grillwork” on top was cut from a scrap piece of walkway material in my junk/parts box.

There’s not much more to do on this pair of cars any more before painting them, but I have a few other passenger car related projects in the works as well, and I’ll probably hold off on the painting for a bit yet until I can put a bunch of them into the shop. Need to get some appropriate shades for the grey and maroon paint…

Steam Generators: One step back, one step forward

Sometimes a project takes a step back before going forward. It can be easy and natural to only share successes, but mistakes are also a source of learning.

The Algoma Central’s quartet of home built steam generator cars were built in 1951-52 using the frames of old 40’ steel braced wood boxcars. These wood boxcars were a pretty good match for the Accurail car and I have a trio of these decorated for the AC using CDS transfers. In building these scratchbuilt heater cars, I built them to fit the same Accurail 40’ boxcar underframe, since the real cars were built on the same boxcar frames.

Except…

With the .040” styrene walls of the scratchbuilt body married to the Accurail frame the overall width of the new body was only equal to the width of the wooden sheathing of the original box and did not take the width of the car bracing which would have been attached to the outside of this. The original scratchbuild was FAR TOO NARROW and at least a foot or more narrower than the other passenger cars they will run with.

This major error has really bothered me, as while otherwise the cars built up quite nicely so far, the too thin bodies can’t be unnoticed. So being unhappy with its current state, the project was shoved off to the side for a while.

Teardown and disassembly of assembled car to salvage the sides.

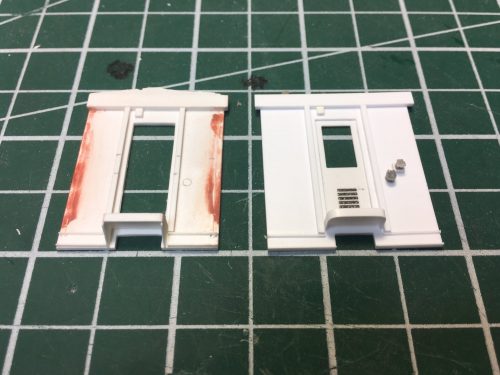
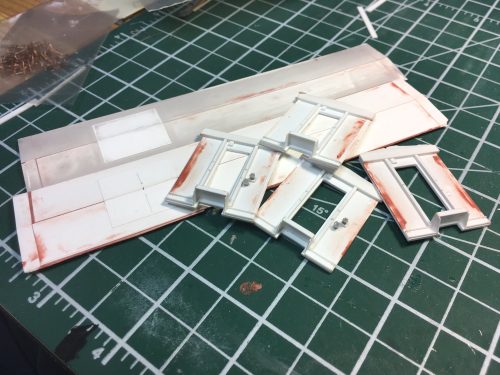
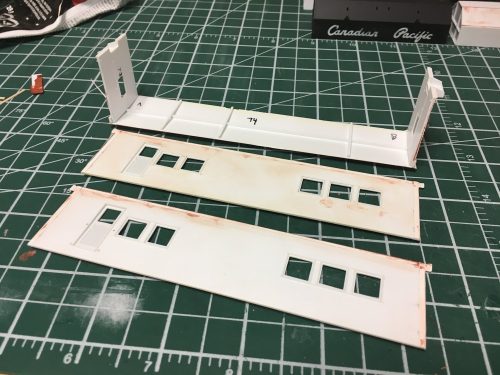
This past week I pulled the cars from the back of the workbench and resolved to correct the mistake and move forward on the project again. The sides turned out well and I didn’t want to throw the entire project out and re do that effort, so the ends and roof were cut away and the corner trimwork removed with a razor blade. A few minor pieces such as the doors and aftermarket detail parts for the electrical plugs were removed from the original ends and salvaged for reuse. New, wider versions of the ends were fabricated and reassembly of the cars is now well on its way.

Old (left) and replacement (right) car ends.

New underframes will have to be scratchbuilt next, and then hopefully I can continue with fabricating the roof vents and other details for the generator, which I had started but put aside when it became obvious I didn’t want to continue with the original bodies.

Scrapped steam generator components.

More to come hopefully, now that this project is rolling again…

Generator End Details and Body Trim

A few more steps forward on these cars in getting the bodies finished up this week.

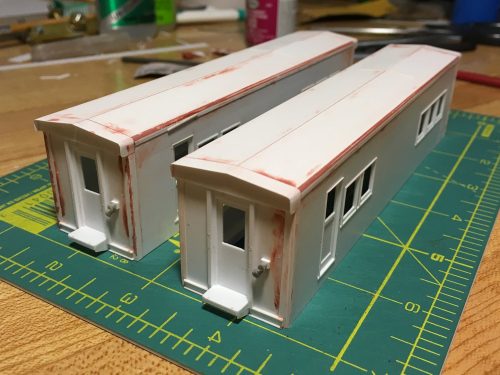
End details have been added with some electrical plugs from a Detail Associates locomotive M.U. stand detail kit, and the step platforms scratchbuilt from styrene sheet and strip. Mounting holes for all of the end of side grab irons have been located and drilled out, but these will be installed later after the bodies are painted. The final remaining details yet to be done on the ends are adding the brake wheel and hardware to the “B” end of the car, and adding ventilation louvers on the end doors using the 3D louver decals from Micro-Mark, which I do have on hand.

140

One of the interesting visual features of these cars is the sheet metal overhang over the ends; I replicated this with .005″ styrene sheet wrapped around the roof of the car. The trim work on the upper fascia of the car side and the corners was also cut from .005″ strip, and then the joints were filled and sanded down. (And rounded off on the side corners.) I also added a few more pieces of .005″ sheet (barely visible at the far ends of the cars) for the roof hatch where the steam exhaust vents are mounted.

This project may pause for a bit while I work out how to do the roof vent/stack details (try to scratchbuild, try to draw up some parts for 3D printing?) but there is also some minor underframe work to be done yet as well.

Steam Generator Doors and Windows

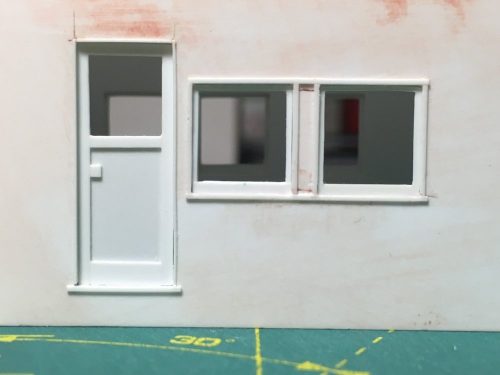
Over the last couple of weeks I’ve been making slow but relatively steady progress on my pair of steam generator cars, with both bodies assembled and window and door trim installed. I’ve also managed to make the side and end doors and start adding the window sash detail. (The doors are completed on both cars, and the window sashes are complete on one of the two.)

The doors are a simple construction of .010″ styrene sheet cut and filed to fit the opening with the raised framing laminated on using .010x.040″ and .010x.080″ strip. The window openings in the doors were cut out after the trim work was applied and filed flush with the trim. Once complete the doors were cemented in place in the opening. The end doors were similar but without any of the strip trim work.

005

The last step to finish the side windows is adding the window sashes inside the frames. I initially began to attempt framing this in with individual 2×4 and 2×2 strip, but after managing to get the bottom piece of the sash in all the windows, the process actually convinced me to pop them back out and take a similar tack to the doors and laminate the sash frame using .010″x.020″ and .010″x.040″ strip on a .010″ sheet backing and the VERY CAREFULLY cut and file out the opening. The .020″ thin sash frame is extremely fragile at that point, but once installed the effort is worth it and I found the process to be going much better than trying to build up the sash frames inside the opening from individual strips.

I have a few more windows to do on the second car yet before I move on to the next detailing stage in construction.

Algoma Central’s Home-Built Steam Generator Cars

When the Algoma Central dieselized in 1951-52, their varied roster of steam locomotives was replaced by a pair of SW8 switchers for duties in Steelton yard, and a fleet of 21 all-purpose GP7 road switchers for mainline power.

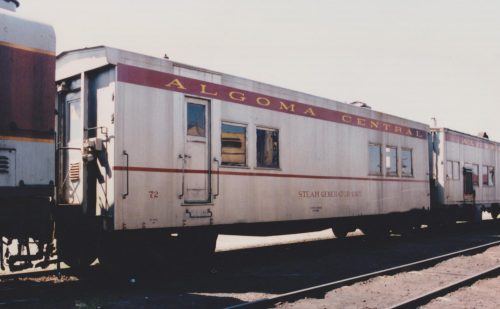
Unlike many other larger railroads that acquired some engines with optional built-in boilers to provide steam heat for passenger trains, the ACR opted for a standardized fleet of dual-purpose locomotives and none of their locomotive were ordered with steam generators. Instead, the ACR converted several cars in the Steelton car shops to act as stand-alone steam generators for passenger trains, allowing the entire locomotive fleet to be used in either freight or passenger service. Four cars, numbered AC 71-74 were custom built in the car shop on the underframes of old 40′ steel-braced wooden boxcars. One additional car, AC 76, was converted from baggage car 204, itself a conversion from a former US Army troop sleeper car from the Second World War.

acr-from-blair-068

AC 72 at Steelton Yard in the early 1990s, courtesy Blair Smith. Coupled to the left and right are other steam generator cars converted from an old Northern Pacific steam locomotive auxiliary tender and a former US Army troop sleeper car.

I haven’t been doing much modelling work this summer on account of on top of the normal summer busyness I moved into a new home in mid-August. So there’s been a lot of preparation and settling in over the last while. Over the Labour Day long weekend however I was able to get a couple of projects out, and one of them is this scratchbuild of a pair of the home-built generator cars. AC 71 and 73 were retired and scrapped in the mid-late 1970s but 72 and 74 lasted in service through the 1980s and into the mid 1990s. Since the ACR locomotives did not have generators, every ACR passenger train would run with a generator car so I definitely have a need for some of these unique cars.

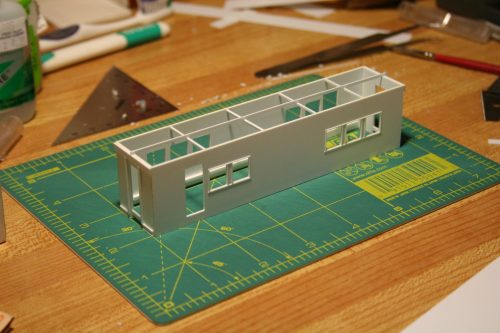
I actually started the sides and ends for this pair of cars quite some time ago, but have never wrote about them before now. The sides for one of the cars are almost complete, and the sides for the second car are still just blank rectangles requiring windows to be cut out yet. I did however do the basic fabrication for all four ends for the two cars. On the holiday Monday I was able to do the basic assembly of the first car using the completed sides.

img_6334

Sides and ends assembled, showing 2×6 ridge line for roof.

The dimensions for the sides and the window locations were worked out from photos and an ACR painting/lettering diagram in the Sault Ste. Marie Public Library Archives. It’s designed to fit over an Accurail underframe for their 40′ wood boxcar kit. (I’ve used this kit to model a trio of AC 3100-series boxcars, and these generator cars were built using underframes from retired cars from this series.)

004

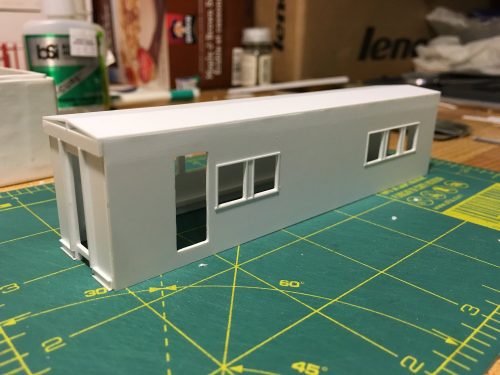
Basic car assembled with sides, ends and roof.

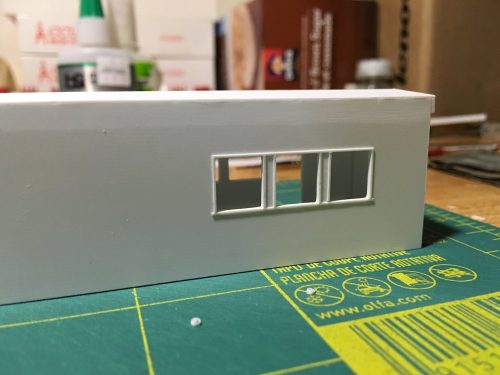
The sides and ends are cut from .040″ styrene, with basic end details added using various sizes of styrene strip. There’s a lot more to do there yet though, so stay tuned. The side windows have some framing trimmed around the openings using thin strip to replicate the prototype frame. More work needs to be done yet to actually model the window sashes within the frame, and to frame and model the doors.

Note that the car sides are not mirror imaged – the door is to the left-hand end on both sides.

023

Detail of window framing.

That’s about as far as I’ve gotten so far, although I’m hoping to chip away at making more progress on this project over the next week or so. Probably starting with getting the sides for the second car completed so that both cars will be at the same point in order to progress forward with the finer detailing on both cars at once.