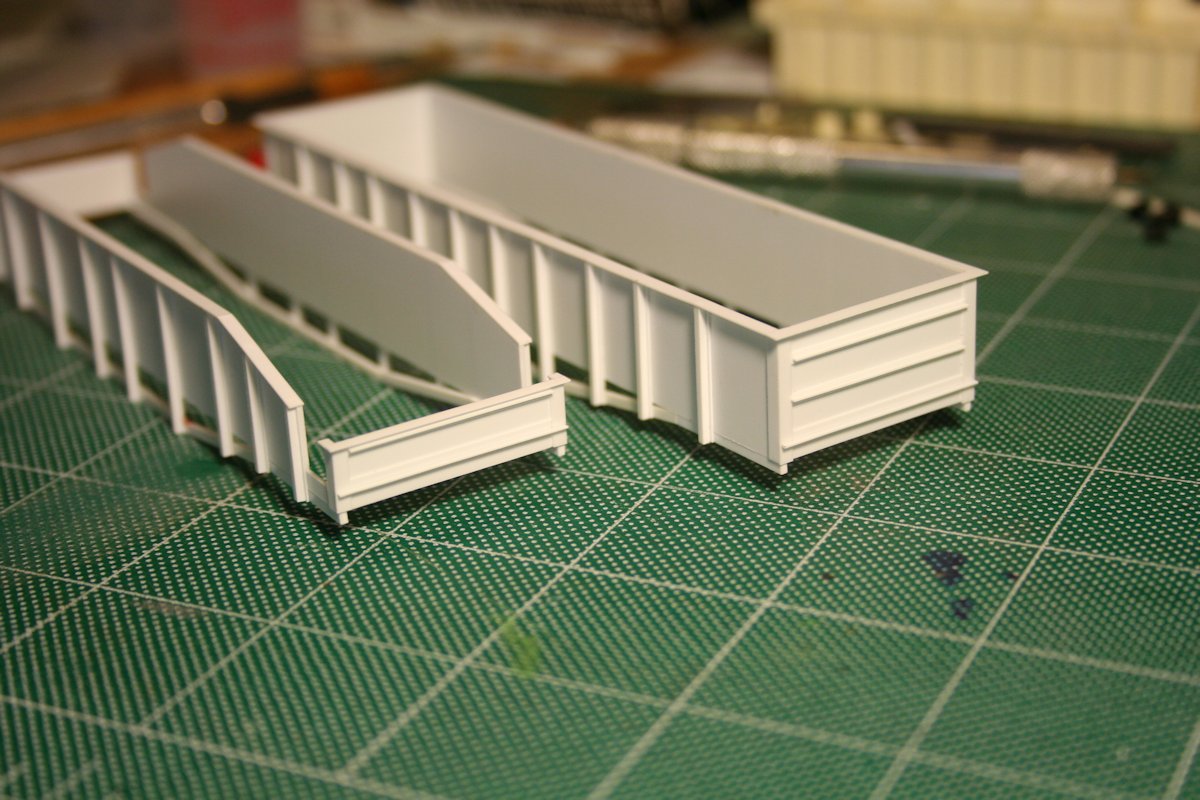
I had some requests for some more details on the dimensions and parts used in the scratch build of these two gondolas, so I’ve scanned my rough sketches for the post spacings and overall dimensions, and will attempt to provide some further details of specific measurements and strip sizes below.
I posted a scan of my scale drawing that I used as my official guide in my previous post, here are the rough sketches with a few more spacing dimensions jotted down.
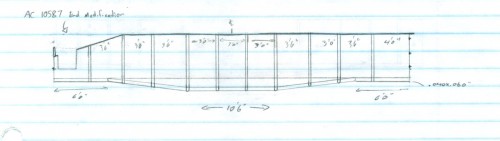
AC 4601-4803 rib spacing sketch, not to scale. (Click on image to enlarge)
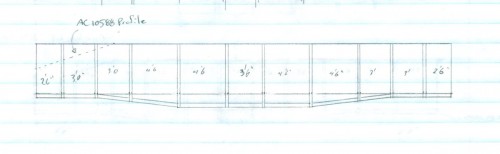
AC 4804-4850 rib spacing sketch, not to scale.
Also, for reference, here are actual dimensions from a 1960s Official Railway Equipment Register for the two series:
|
4601-4603 |
4804-4850 |
| I.L. |
39’5″ |
40’10” |
| I.W. |
8’11” |
9’0″ |
| I.H. |
4’0″ |
4’0″ |
| O.L. |
40’0″ |
41’8″ |
| Ex.W. |
9’9″ |
9’10” |
| Ex.H. |
7’11” |
– |
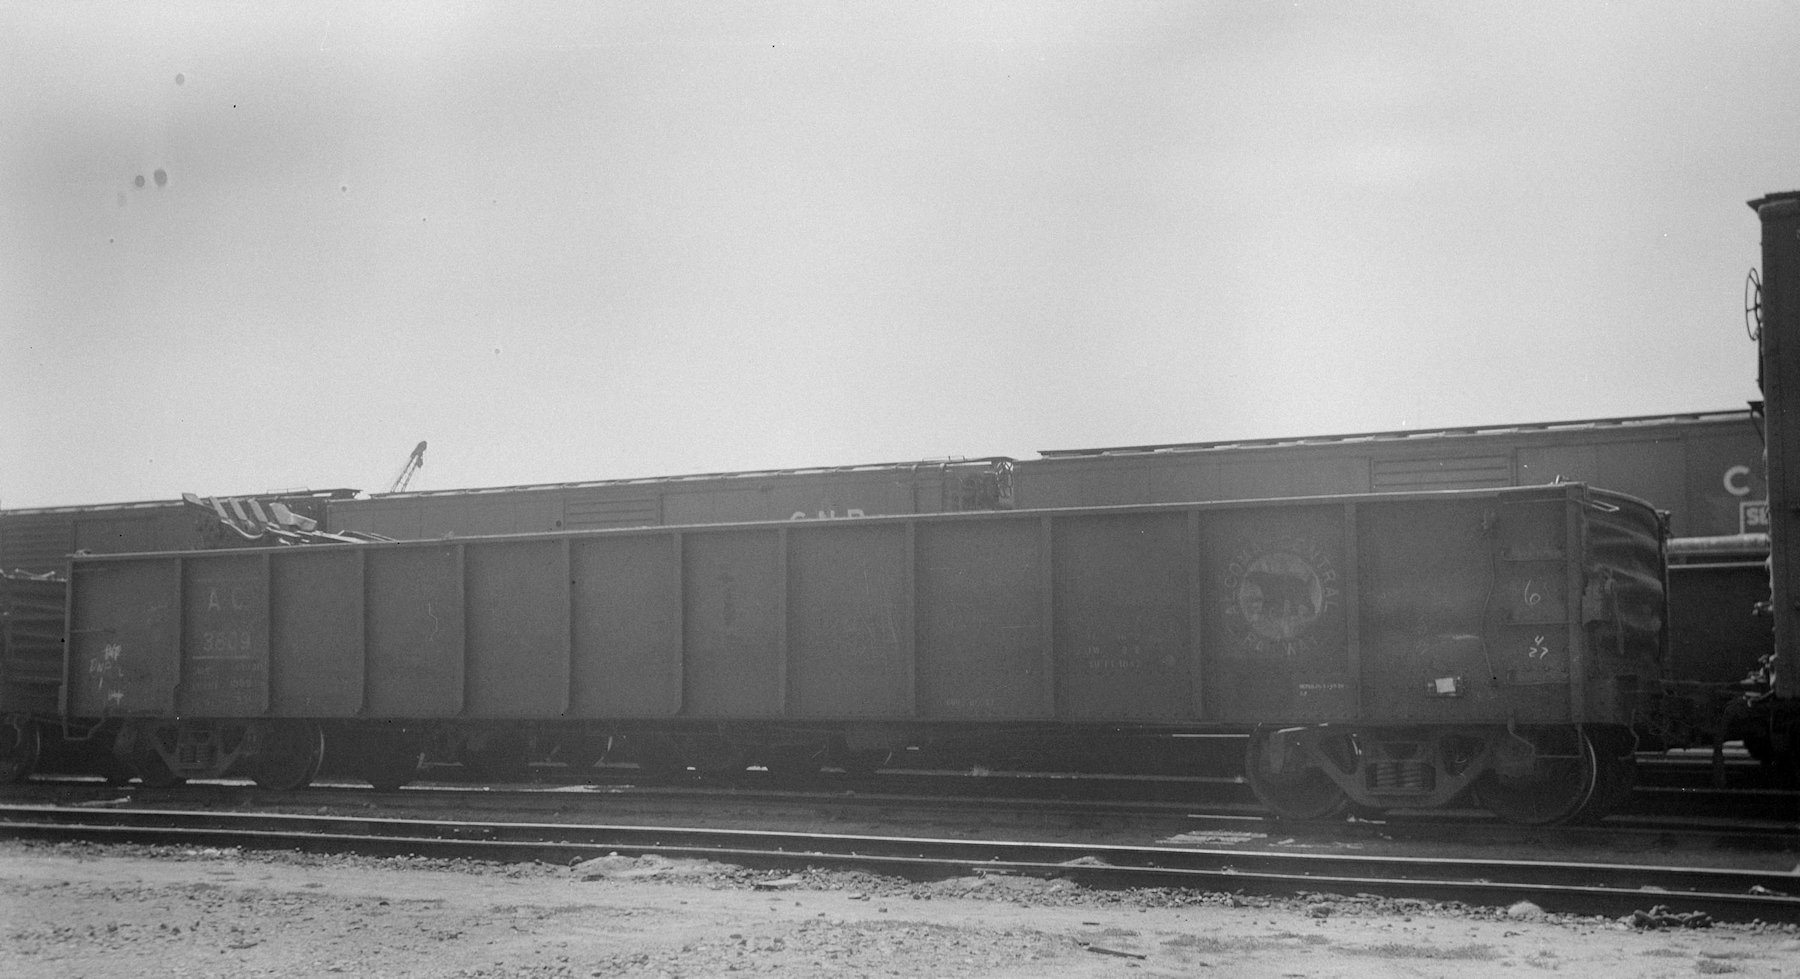
Sides
Height of the side pieces (cut from .020′ sheet) is five scale feet, even. Overall length of the sides is 40′ for the 4601-4803 cars or 41′ for the 4804-4850 cars. (This probably shortens the inside length a little, but the scale foot difference and the different rib spacing makes a pretty good difference between the cars.)
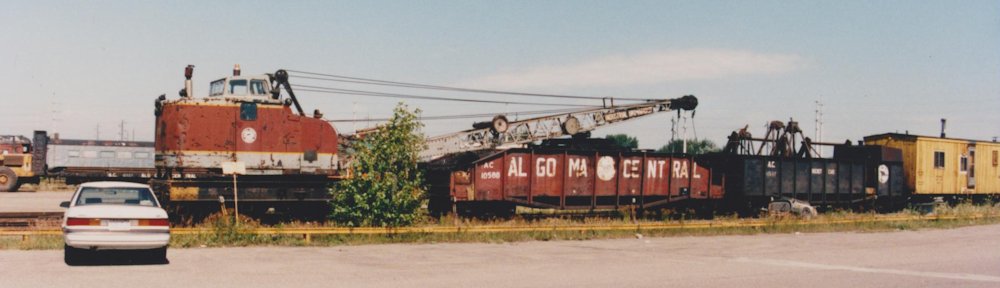
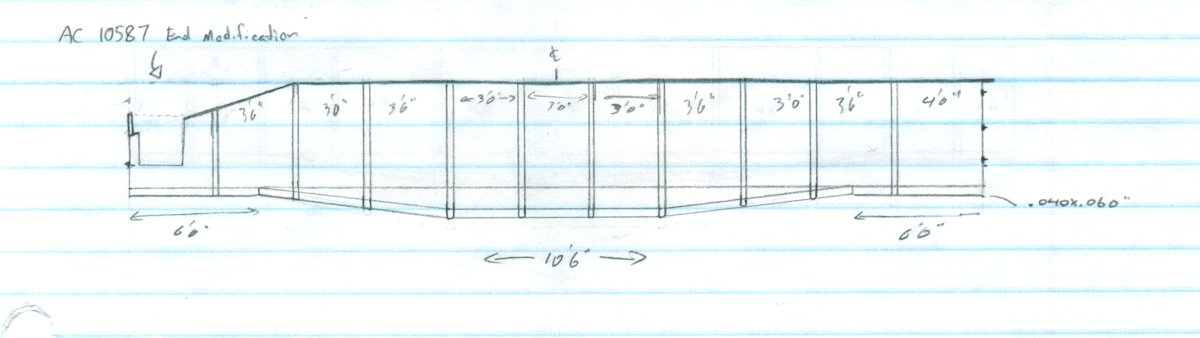
For boom cars 10587 (ex 4601-4803) or 10588 (ex 4804-4850) the angled cut out reduces the end height by 2’6″ and runs in 7’9″ from the end.
Top chord along the top edge is .010x.080″ strip.
Drop Sills
For the drop side reinforcement, I cut the pieces from .040’x.060′ strip (.060′ in the vertical direction). I started the drop 6′ in from the end on both cars. The horizontal drop portion is 10’6″ on the 4601-4803 cars or 13’6″ on the 4804-4850 cars, centred. The bottom edge of the fishbelly is 1’6″ below the edge of the side sheet.
Ribs
The prototype cars actually appear to have ribs that are a Z angle, which isn’t too hard to custom fabricate (I’ve done it before), except for the rounded off bottom bit. I ended up just making them a little more solid on this pair of cars, using plain .040x.040′ square strip on a .010x.060′ flange piece. The square stock is not centred on the flange, but aligned to one edge. Note when installing the ribs that the flange edge faces away from the centre of the car. (i.e. the “open” end of the Z would face the centreline of the car.
The height of the rib pieces then is of course cut to length – 5’6″ near the car ends, 6’6″ in the centre and cut to size when placed over the angled part of the drop.
See above diagrams for spacing.
Corners and Ends
Ends are .020″ styrene sheet again like the sides, and 9 scale feet wide.
The corners are trimmed up with .010x.080″ strip. Rivet decals will be applied later to the corner strips and at places along the bottom edge of the side.
The end bracing is .010x.060″ strip applied flat to the end sheet, and a .010x.030″ strip applied on edge on top of that to form the distinctive T section stiffening ribs.
Floor and Underframe
The styrene floor is also .020 sheet, cut to fit within the assembled body sides and ends. I used .080 spacer strips to recess it from the bottom edge, and I’m planning to apply a wood floor with 1x? strip after the body is painted.
The bolsters are built up from styrene to an overall depth of .165″ for the truck mounting following similar commercial parts. This seems to be about the right height, although may still require an adjustment washer. (I’m really hoping it doesn’t end up too far off.)
I used a piece of lead sheet for the weight (we had some old leftover flashing at the club – I’m not sure how readily available the lead sheet is still these days but there must be somewhere to find it) and then built up the underframe on top of that. The centre sills are .040 sheet and should roughly match the profile of the sides. The rest is all cut to fit to give an impression of the framework.
Lots more to be done yet, but I think that covers the current build progress so far. Hope this is of interest or help to those curious. This is an interesting build so far, and it’s been fun to have some questions and feedback.


