Hopper Interior Paint and Weathering

While I had the airbrush and paint booth fired up this evening to do some priming and initial paint work on a different project I’ve been working on this weekend (more on that sometime later when I’ve made some more progress) I also ran about a dozen of these hoppers through the paint shop to paint the interiors.

IMG_5146

I picked up at least part of the technique (with regards to some of the colours and order of use) from an old RMC magazine article, although probably any time anyone ever does something, they always put their own slight twist on it.

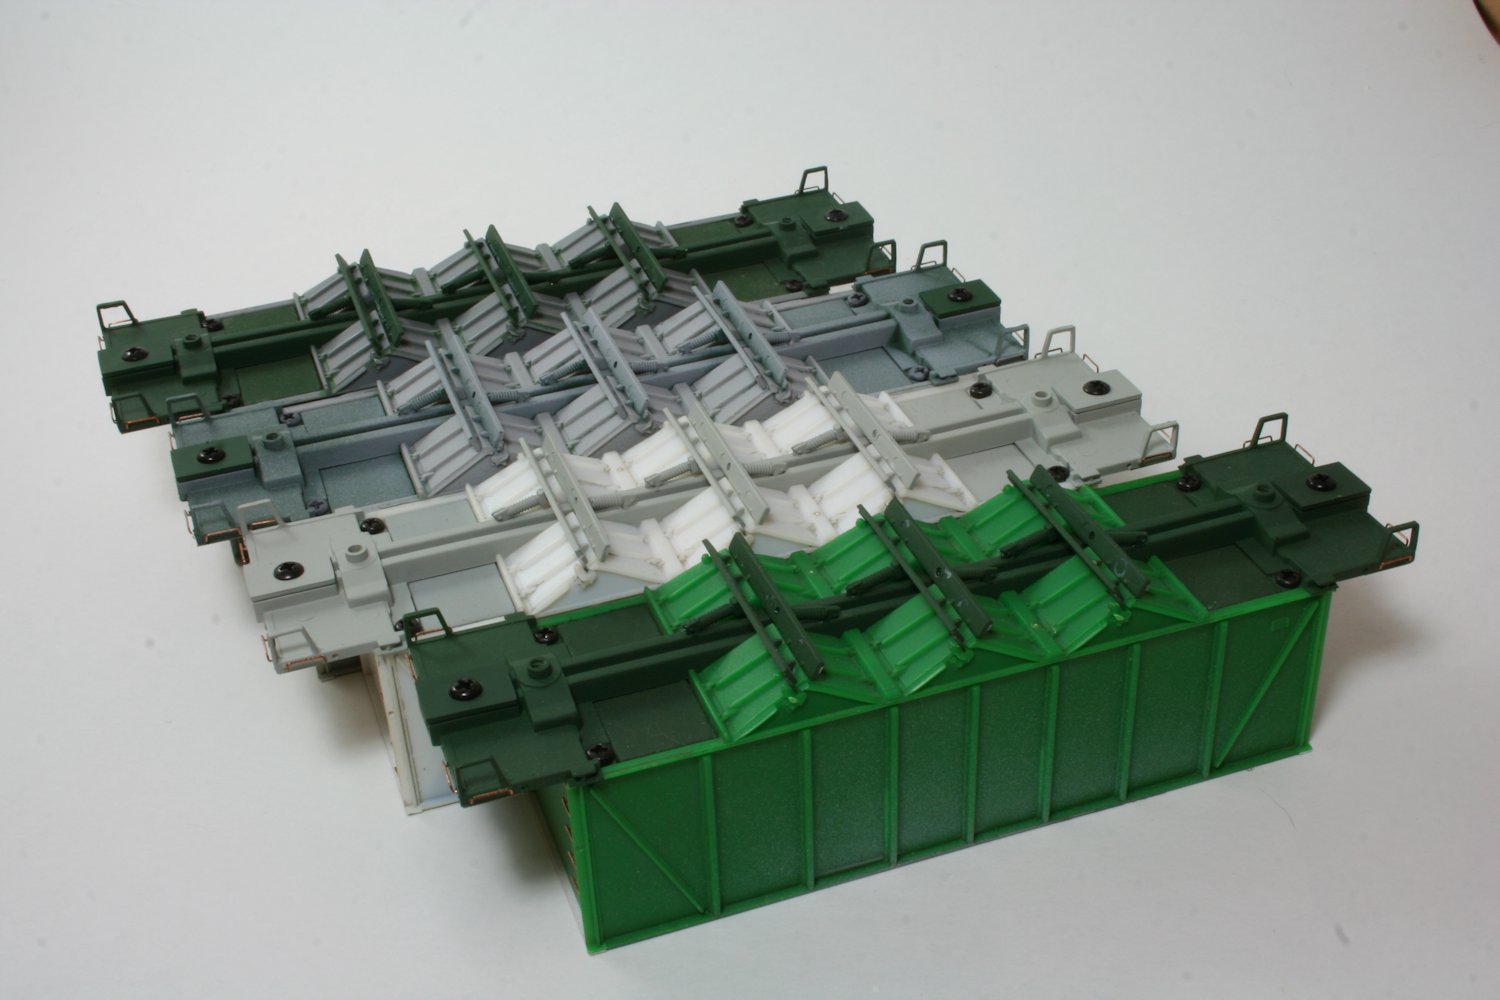
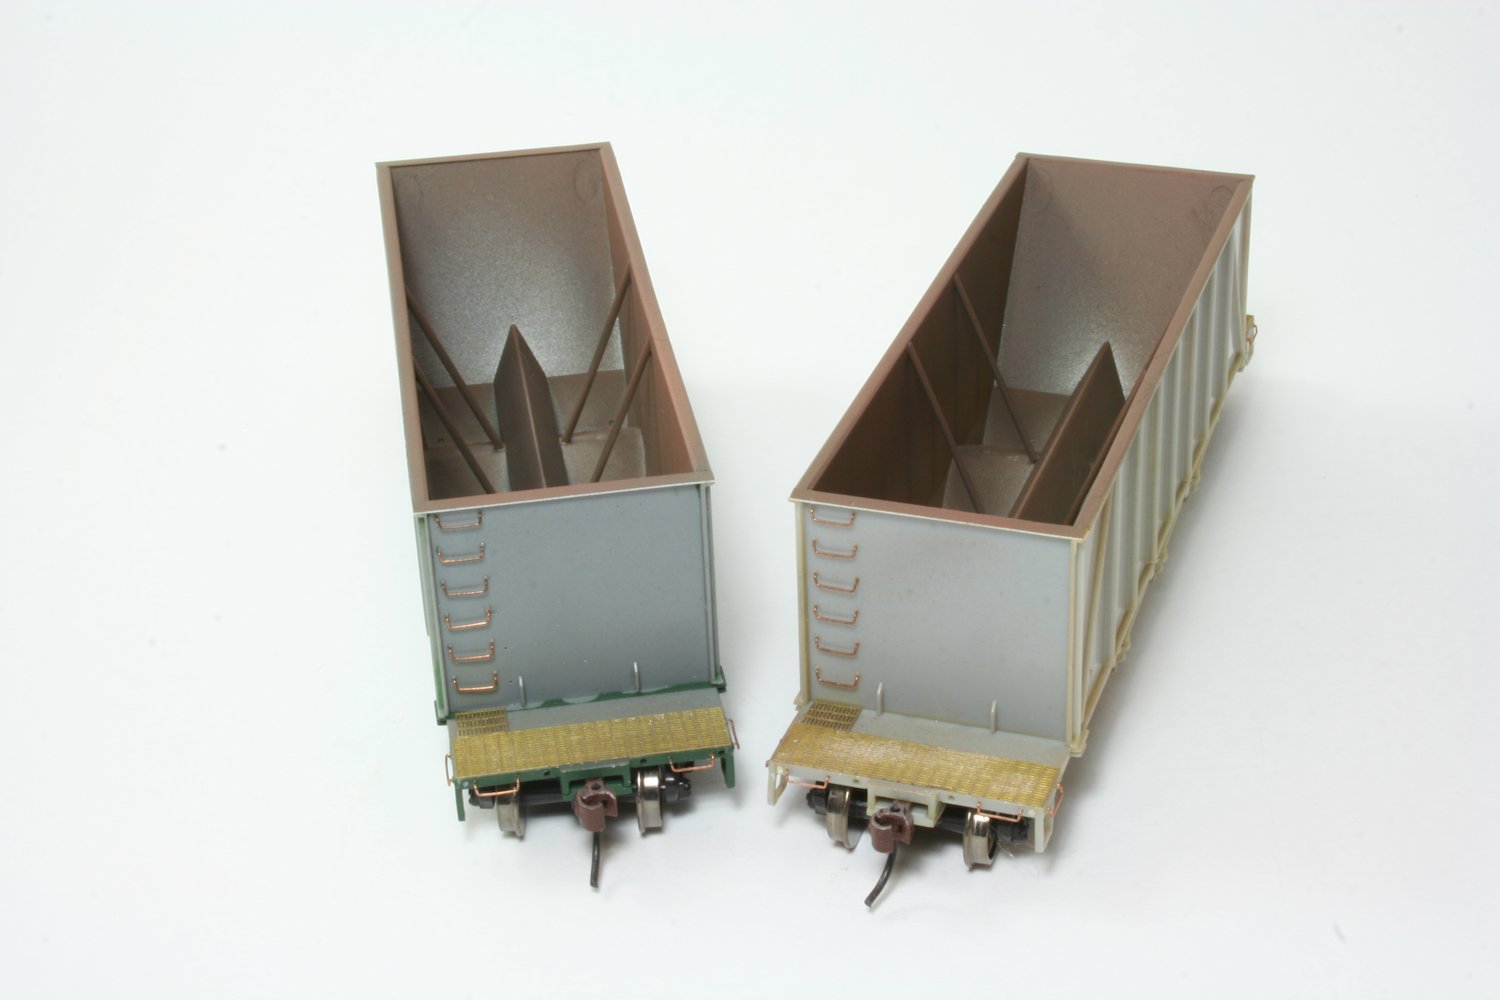
My first step is to paint the interior with a light primer colour. For some cars in raw grey this was not always necessary, but as I have several cars molded in several different colours including red, yellow, green and gray (most were stripped from various roadnames) and a primed interior is required to let the actual colours cover properly. Once primed, I gave the interior a base coat of Model Master “Steel” to give it the metallic silvery of bare polished steel. Then – working very lightly, and progressively up the sides of the interior – blend in Gunmetal, Rail Brown and Rust. Go real easy on the gunmetal and rail brown – the gunmetal is a dark almost black colour, and the rail brown just helps blend with the rust and shouldn’t be too prominent – and the whole interior can get a really light final mist of rust to blend all together.

The one really tricky bit about these interiors is the angled pipe bracing. You really have to be careful to mist the colours in from both sides around the braces to avoid “paint shadow” where the brace blocks the spray. (I did end up with a couple cars with a slightly noticeable vertical line at some of the braces.

IMG_5147

I may go over some of these interiors later again, after the cars are fully painted and lettered, with some powders and pan pastels to add a bit of additional colour for specific loads that these cars carried around Michipicoten and Wawa – limestone, coke, sinter and raw ores, but otherwise this is the basic colouring for the car interiors. The top of the car will later be masked off completely to paint the exterior body of the car.

AC 8201-8500 Series Hoppers Underbody Detail

This post is mainly just included for completeness for the hopper series, as the details are basically just assembled according to the kit instructions, although as Walthers doesn’t really sell cars with modeler-applied parts anymore, I should perhaps note a couple of things.

IMG_5144

Here’s four of the around two dozen cars currently in progress, with many more still in boxes waiting their turn. You can see the door connecting/locking bars and spring details all installed. You’ll note if assembling a kit car, or re-assembling a stripped down car (in which case you’re not likely to have a diagram/instruction sheet) that there are two distinct versions of the bar details that definitely have to go on in a certain direction, as one has an extra bit of the locking mechanism detail and needs to align with the cast lock detail on the hopper bottom. (However the arrangement of the mounting pins makes this impossible to screw up.)

If you’re adventurous you could also replace the flat thick kit pieces with styrene channel to better represent the prototype parts in finer detail, replace the tail end bits of the door bracing with additional bits of styrene strip, fabricate the extra loop for the door lock on the appropriate bars. I did not do this.

One major note that apparently needs to be mentioned is the door springs, which attach to the door bars on one end, and the centre sill of the underframe on the other to cushion the impact of the doors dropping open when the car is unloaded, as the rapid-discharge hopper design basically opens up the entire bottom of the car. You can see them installed in the model photo above, and half-visible in shadow to the right side of this detail photo (courtesy of Blair Smith) below:

ac8390detail

If you get some of the latest Platinum Line releases from Walthers, any of their cars without additional detail parts for air-actuated doors (i.e. a big air tank mounted on the car end) have omitted the spring details. And unfortunately, since the detail parts are not add-on pieces on an included parts sprue, the springs are just not included in the box.

Apparently Walthers thinks that only the cars with air-actuated equipment has these door springs, which is entirely false. Sadly there’s not likely too much that can be said there, and since they don’t stock additional parts (I tried and failed to get replacements from them, and they seemed not to consider the missing parts a mistake) I will likely be saving a couple of parts sprues to make a mold and copy-cast in resin the needed parts for about 2 dozen such cars missing the springs.