This weekend I had the chance to do some basic painting on this pair of hoppers and start some of the initial weathering of the cars. I gave the two cars an initial spray of weathered black for the basic body colour a while back, and now I had a chance to do the next step.

First, I painted the interiors. To get the initial base colour for the interior, I actually used four different colours, lightly blending the colours up the sides with the airbrush. First I sprayed the lowest parts of the interior a metallic silver colour (Model Master “Steel”), then working up the sides with Gun Metal, Rail Brown and Rust, lightly blending each colour together so the the colour gradually transitions from a bare metal appearance on the centre sill and lower parts of the bays (where the load flowing out of the car during dumping would have the effect of “polishing” some of the rust off) to a more oxidized appearance on the sides and further up the hopper bays where less material is moving around during loading and unloading. This will likely be supplemented yet with a little bit of powders or pan pastels, but I’m liking the effect so far.
The next major step is weathering the exterior bodies of the cars. Most of these old cars on the ACR had a pretty distinctive weathering pattern caused by an older practice of loading sinter into the cars while still hot, resulting in much of the paint on the side sheets burning off over the years causing the sides of the cars to essentially become an expanse of rusted metal, following the shape of the interior bays. Check out this early 1970s prototype photo from Ted Ellis to see what I mean.
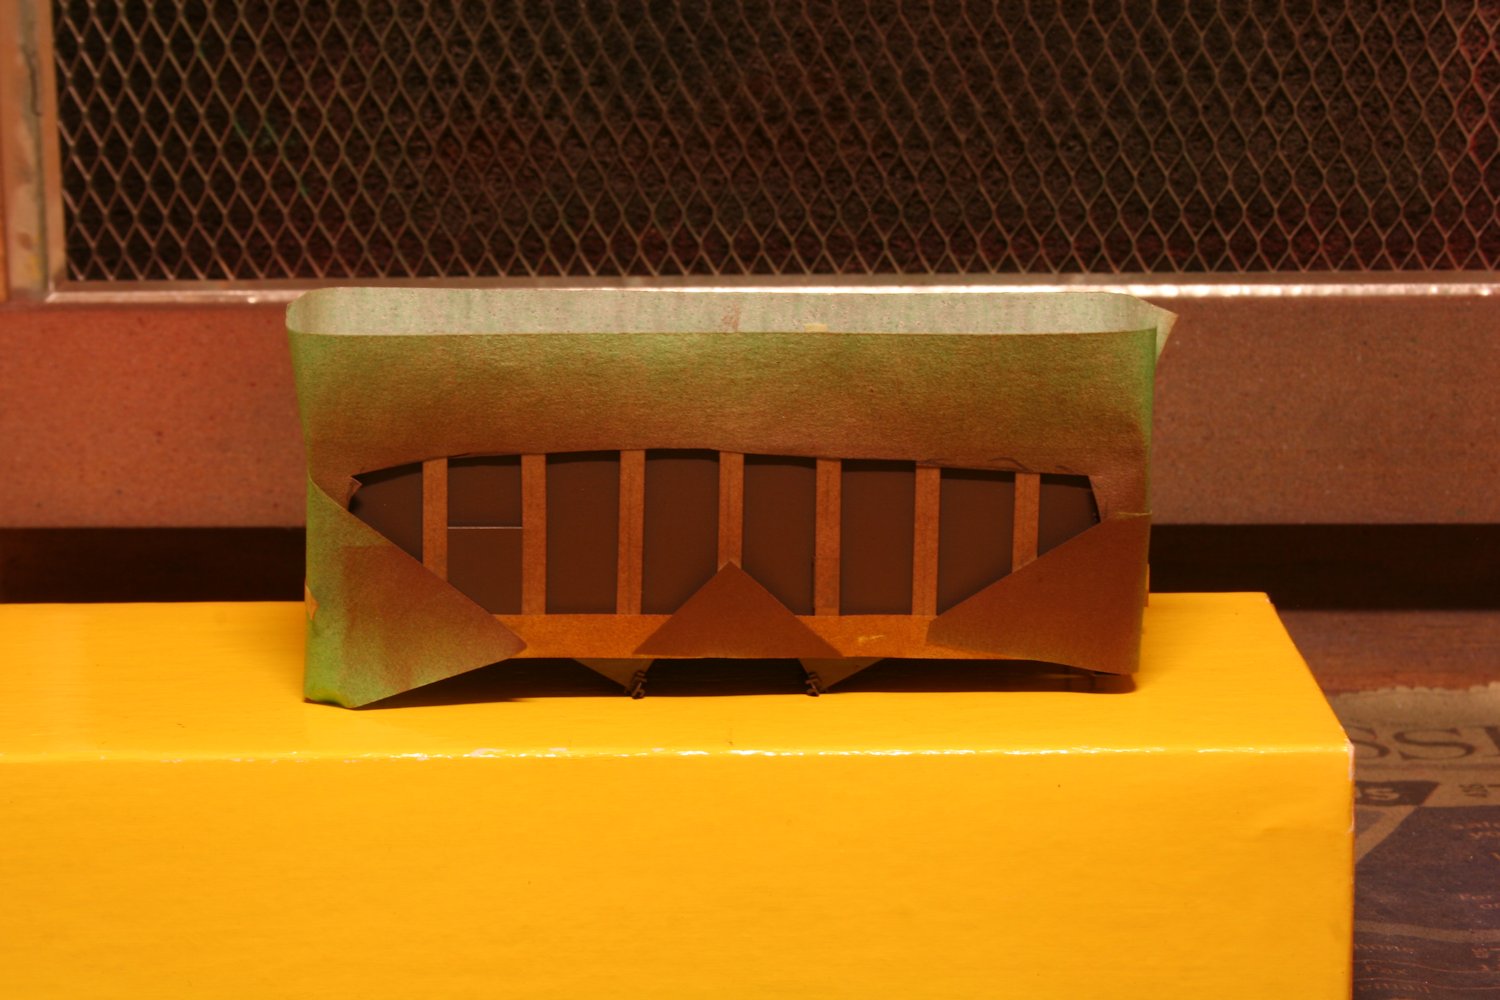
To begin replicating this pattern, I used a somewhat experimental technique. I masked off the sides and spayed them a mix of roof brown and dark rust. I first covered the ribs with strips of masking tape, as the burning effect of course only effected the sheet metal of the side sheets with which the hot material had direct contact. Then the bottom and side sills were also masked, and then the rest of the sides roughly masked in the shape of the load inside. The key here while masking is to deliberately NOT be too precise with it. Most importantly, prevent the masking tape from actually laying down on the sides of the car. The ribs were covered with a strip of tape wide enough to completely cover the rib, but these were not folded down over the shape of the ribs. The side mask was just laid down on the tops of the ribs and deliberately prevented from touching the surface of the side. My goal here was a nice soft edge that is NOT clearly defined when the rust colour is airbrushed. The masking thus completely, the sides were sprayed with a dark rust colour and the masking then removed.

You can see the preliminary result above; so far, so good, I think. I have a ways to go yet with blending in darker colours with pan pastels to really make it look like rust. Eventually the raised panel at the left hand side car number and date will a shot of black before adding lettering.