AC 300 Body Assembled

A little more work on this project tonight and the first body is assembled:

IMG_8441 IMG_8444

Starting to look like something now, although there’s still a ways to go in roof and body detailing, plus the underframe needs to be tackled. (I’ve cut the frame, but that still needs to be filed down a bit and spliced back together, then the addition of all the underbody detailing.)

I’ve already started preparing the sides for the second car now as well, I’ll be building up this pair together.

AC Baggage Cars 300-301 – Part 2: Ends and Roof

With two sides finished, I moved on to preparing the ends and cutting the roof to length.

The ends from the Train Station Products Pullman-Standard core kit just needed a minor adjustment near the bottom to handle the curved skirts at the end of the cars. The stock ends have a bit of thick bracing all the way down to the bottom, which interfered with the curved skirt on the USP side. I cut this back with my razor saw, and also shortened up these tails and filed a different curve profile into them to match my sides. A picture being worth a thousand words, the below image comparing the modified end (marked with an “A”) to the stock end probably explains it better and clearer than I can:

IMG_8427

Necessary to make the sides fit the ends properly, but pretty simple.

With the ends taken care of, it was time to tackle the roof. These baggage cars are quite a bit shorter than a full size 85′ coach, so the roof needed to be cut down to length. I ended up making a total of four cuts; with the extra piece that’s removed taken out, there were three places where the roof is spliced back together.

In a lot of the reference photos I have it’s a little difficult to make out the seams in the roof, but it appears from one or two photos that the third panel from the one end is a fair bit narrower than the others. This then is where the cuts were made to remove the extra bit of roof. I also cut the two end-most panels to narrow them down a little. A lot of careful filing to clean up the cuts and remove extra material to bring the length down to exactly the right amount for the splices, and we end up with something like this:

IMG_8410

You can see I’ve also installed the baggage doors from the kit. Like the sides, these are .020″ styrene sheet with the window openings milled out. They’re cut oversize to the opening so they can be glued to the back of the clear base. I made one modification here to the doors, trimming away the extra material below the door in order to clear the floor.

Here’s the underside of the roof, showing styrene strip used to hold the spliced roof together:

IMG_8422

You can also see in the above image that I cut away short stretches of the inner ridge on the roof in order to clear the doors on the sides.

With the ends and roof prepared, next I can assemble the car’s body!

AC Baggage Cars 300-301 from Union Station Products Kit – Part 1

With no family commitments on the Monday of the Thanksgiving weekend, I decided to make a deliberate effort to take advantage of a day off actually spent at home to do some work on various model projects. One project I’ve been working on today is a model of one of the Algoma Central’s two ex-Denver & Rio Grande Western baggage-express cars.

These two cars are a little unusual in that the lower portion is clad in stainless steel fluting, but the upper part of the car is smooth. Built as baggage/RPO (railway post office) cars by Pullman-Standard, these cars were originally ordered by the Chessapeak & Ohio Railroad, but ended up being delivered instead to the D&RGW in 1950. The Algoma Central acquired two of the three D&RGW cars in 1973, numbering them 209-210. In 1981 when the 200 series GP38-2s were delivered, all of the AC baggage cars were renumbered into the 300 series, and these became AC 300-301.

Here’s the 301 at the Steelton yard shop tracks in 2004:

SAMSUNG DIGIMAX 360

The basis for this model is a car side kit from Union Station Products. It’s one of a group of such kits I acquired back in July. (Actually I got two copies of this particular kit, so I will be able to model both car numbers 300 and 301.) The kit consists of a .020″ white styrene side and a .040″ clear plastic (acrylic?) core that are meant to be laminated together. The core has cut out sections for the windows, these to be applied later, after painting. The side kits are then meant to be used with passenger car core and detail kits from Train Station Products (which USP also resells) to provide the roof ends and underframe for the car.

The Algoma Central removed the skirting from these cars when they acquired them, so the first stop was to perform some minor surgery on the car sides to cut away the skirting between the trucks:

IMG_8399

This was easily accomplished with a straightedge and many light passes with a sharp X-acto knife to cut away the unwanted material. Following that, it was essentially a matter of cleaning up the various pieces before assembly.

The skirting area on the clear core has a bunch of horizontally scored lines in it so that the skirts can be curved inward using pliers. (The smooth side is the outside, the cut side curves inwards.) I used a a pair of flat (not needle-nose) pliers to gently curve the remaining skirting at the car ends. Just work gently and slowly and evenly along the skirt you’re bending.

The kit instructions suggest you start with the skirting when you glue the side and core together. I started with the skirt at one corner of the car and careful to keep the whole side square and lined up, glued it to the clear core with CA glue, applied with a toothpick. After holding that in place and allowing it to set for a few moments, I proceeded out from that corner along the side of the car, applying glue to a section up to a door opening, and laminating that portion of the side. I did not go ahead and glue the skirt at the other end right away – you want to start at one end and work your way down; if you’re off by even a fraction of a millimeter you can end up with a major ripple in the side.

Once the side and core were laminated together, I spent some time going over the outer edges and also the edges of the door frames with a small flat file to clean up all the edges and remove burrs from the manufacturing process. (The sides and cores are CNC milled.)

For their fluted side cars, Union Station provides a separate strip of fluting that is laminated onto the surface of the car side. This was easy to cut to length with my Chopper and apply to the side. I attached these using Testor’s liquid cement. I applied a small amount to the back of the fluting strip to tack it in place, and once properly aligned, applied cement sparingly around the edges of the strip with a very fine point brush. This wicks into the joint and makes a very clean and permanent joint.

Here’s how the one side looks so far:

IMG_8403

Just need to finish the other side (actually x3 because I’m doing two of this car) and then work on the roof and underframe, which require a certain amount of cutting and splicing because the baggage cars are shorter than a typical 85′ coach which the core kits are designed for.

ACR Survivors

On my trip to Sault Ste Marie to ride the Tour of the Line, I got to see and photograph a few examples of surviving original AC equipment.

At the yard at Steelton was a string of 5 AC gondolas loaded with track panel sections for emergency track repair and replacement work.

IMG_7351IMG_7350IMG_7349 IMG_7356

A similar set of 5 gondolas was also on hand at Hawk Junction. Note that the closest car in this string is an older 48′ gondola!

IMG_7559.jpgIMG_7981IMG_7979

These AC gons are extremely rare now. The only remaining examples are in maintenance service like these, having long been removed from any sort of revenue service. These could even be among the last 10 survivors (of the 52′ gons), although there could be a few more still in similar service on former WC lines.

Also at Steelton yard is one of the former AC steel cabooses (acquired secondhand by the AC from Canadian Pacific around 1990-91) and one of the AC’s two original steel snowplows (although the plow has several years before been repainted into WC maroon and gold colours). These were screened by the gondolas and other junk and equipment from where the passenger train boards, but fortunately I got shots from the other side using my 200mm zoom lens on my July trip:

IMG_5973IMG_5982

I also saw a few AC marked pulpwood flatcars on both trips, although it’s hard to call these original survivors, since the grey AC 238100 series pulpwood cars were rebuilt from former CP cars in 1998, well after the Wisconsin Central takeover.

Also, though it was located much farther back in the shops area and wasn’t accessible for photographs, heavyweight business car “Agawa” is still hanging around the former AC property. I have no information on the disposition of former AC business car “Michipicoten”.

Finally, I’m not sure whether you can consider this a “survivor”, but this old ex-Ontario Northland work boxcar was sitting in the weeds alongside a maintenance spur near the Oba lake “floating” trestles:

IMG_7630

Not bad for 18 1/2 years after the end of the Algoma Central as an independent railway. (The WC sale was official on Feb 1, 1995.)

Tour of the Line – Part 2

(This post is a continuation of a previous post describing my recent visit to ride the Tour of the Line over the Algoma Central Railway.)

At dawn on Tuesday morning, we got up, had our complimentary continental breakfast at the hotel and walked back to the “station” to catch our train back to Sault Ste. Marie.

IMG_7714

As we arrived were our train was ready for boarding, there was an Ontario Northland GP38-2 parked on the ladder which appeared to be blocking things for the CN C44-9CW which had arrived some time earlier off of train 571. (This was one of the two engines seen switching at Hawk Junction the day before on train 573. No trace of the second engine was seen this day, so it must have returned to Sault Ste. Marie on a 574.)

IMG_7704

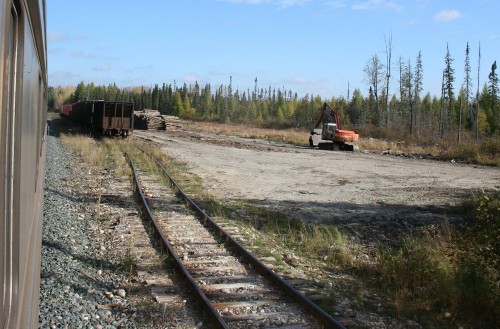
After we boarded the train and waited to get rolling, the Ontario Northland began switching the yard tracks and the CN unit was moved out of the way onto side track next to the main, seen in the foreground of the above image. Leaving Hearst we could see that all of the yard tracks had been stub-ended on the west end, except for the first track which served as the siding/runaround.

IMG_7752

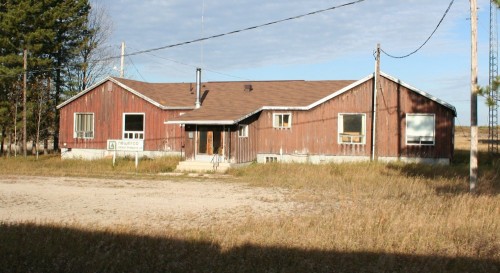
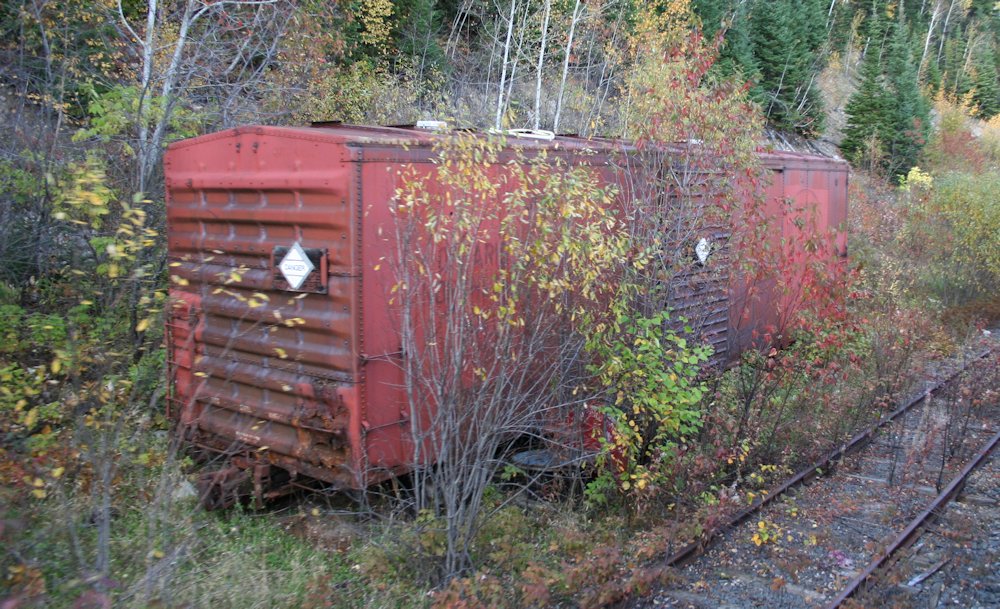
At Mead there was this office building and a maintenance garage; this was once the site of a large sawmill, but that operation closed down in the mid 1980s. All traces of the mill itself are gone except for a large cleared area, but these two buildings and a portion of the south end of the spur into the mill area are still intact (and the switch to the spur is still in place). Clearly this location must have still been used for some time afterwards to load logs and pulpwood, even though the sawmill was gone. Satellite images of the area shows extensive signs of logging operations in the area.

At Oba and Franz we again crossed the CN and CP main lines. At Oba there were quite a few cars in the old ACR yard tracks, which had been entirely empty the day before. A number of these I recognized as havening been seen at Hawk Junction the previous day.

IMG_7788

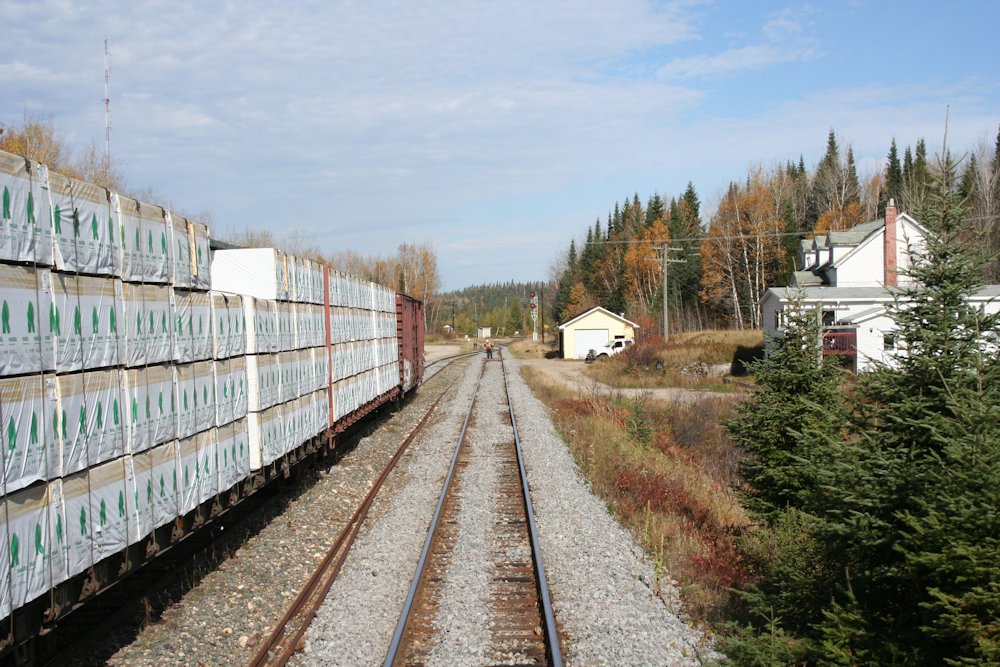
At Langdon, the first siding south of Oba (but clearly used now only as a log spur and not a passing siding) several new empty pulpwood flatcars had been added to the number of cars that had been there the previous day. For an interesting observation, note in the above photo how the switches to the old house track have been removed, but actually the siding track between them removed, so now the siding routes through the old house track. This sort of thing could also be seen at a couple of other locations.

IMG_7910

And at Franz, there were a number of cars in the siding which blocked a good view of some of the structures on the west side of the tracks, so I wasn’t really able to get the good overview shot of the location (but fortunately I was able to shoot those buildings from the vestibule the day before when they were not blocked by cars, and I have establishing shots saved from others). Clearly train 571 had had a busy trip from Hawk Junction to Hearst. On our part, we stopped no less than half a dozen times at various locations (along the entire trip) to pick or drop off campers, and by the time we returned to Sault Ste. Marie our little one-coach train was actually relatively full.

IMG_7836

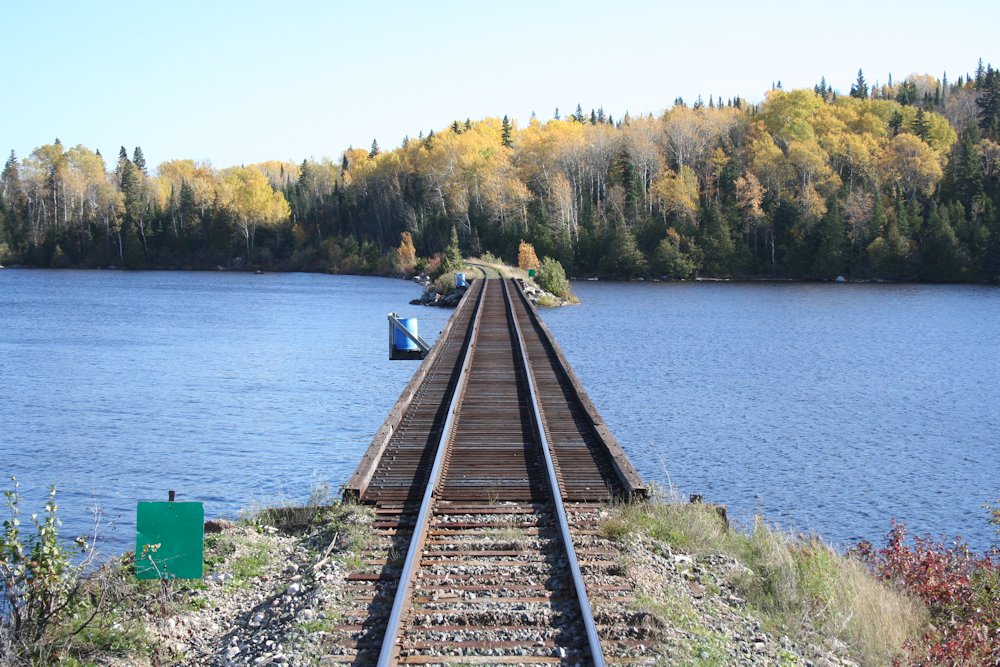
And of course I would be remiss in not sharing at least one shot of the famous trestles across the bays of Oba Lake just south of the old Mosher siding and about 15-20 miles north of Franz. The bridge in the photo above is one of the shorter bridges which are both original timber trestles. These bridges are referred to as the “floating bridges.” When they were built, construction crews driving the pilings never did get them resting on solid bedrock, and the bridges essentially float in the mud and silt. The conductor was mentioning this to some of the other passengers while we were still approaching the bridges and remarked that from the ground you can actually see the bridge deflect several inches when a train passes over it! Both bridges have a severe 15 MPH speed retriction. The longest of the three bridges is almost 1200′ long and has at some point been replaced by a modernized version with steel pilings (you could see the old wooden pilings for the original bridge alongside – the water levels were high so these were just below the surface of the water – and also the causeway approaches were wider and showed signs of the realignment) and was not so severely restricted.

IMG_8067

After passing through a much emptier Hawk Junction once more, we met the day’s northbound freight 573 at Perry siding. Today the train was short – just 8 cars.

IMG_8147

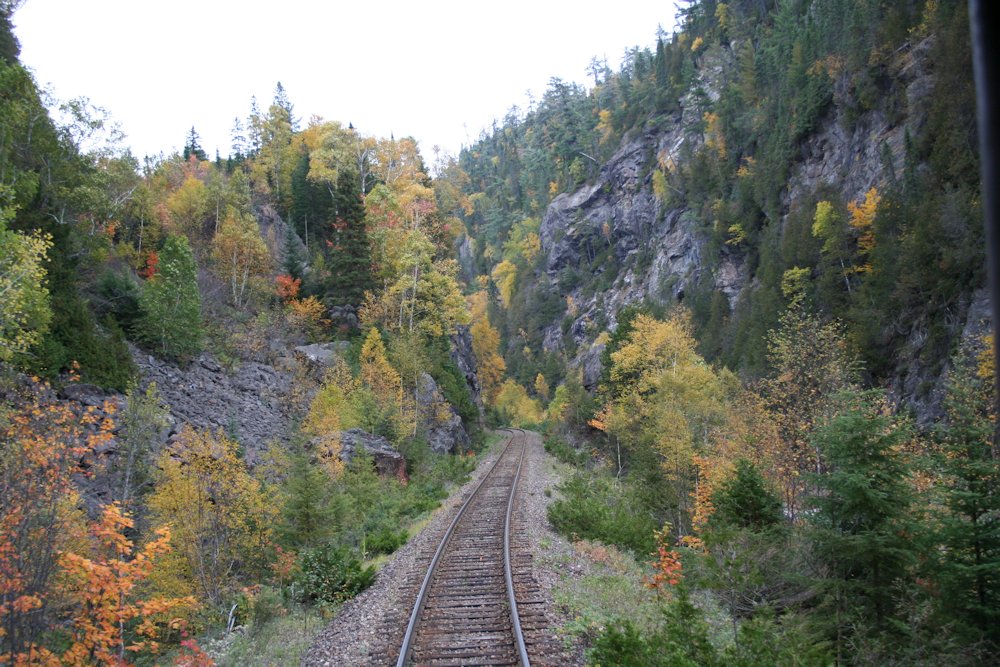
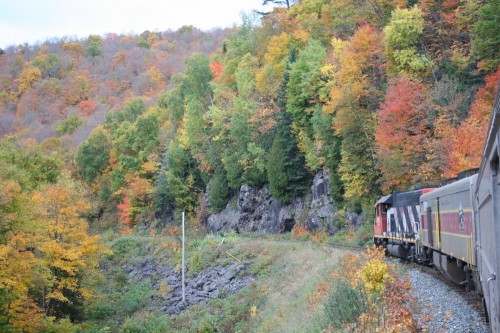
And of course Agawa Canyon is scenic from any angle. Roughly halfway between Eton and Canyon, the valley abruptly narrows from a wide valley to a narrow gorge before widening again through the rest of the canyon. The above photo is taken just after passing through the narrowest point of the Canyon.

Climbing out of the canyon, our train made good time, screaming through the curves between Canyon and Frater. No really, the amount of flange squeal was pretty amazing. Particularly when you’re in the open shooting out the side window of the coach vestibule!

IMG_8248

I’ll end this post with one final shot of the train passing through typical (for the south end) rocky terrain just north of Montreal Falls. It’s a long journey but it was enjoyable, and a very relaxed way to travel by rail, with a very different flavour to travelling on VIA or Amtrak!